
Clickup -Workflows
This guide provides a comprehensive overview of how to leverage ClickUp workflows to automate tasks and streamline processes within your workspace. It demonstrates how to create and customize automation rules to enhance efficiency.
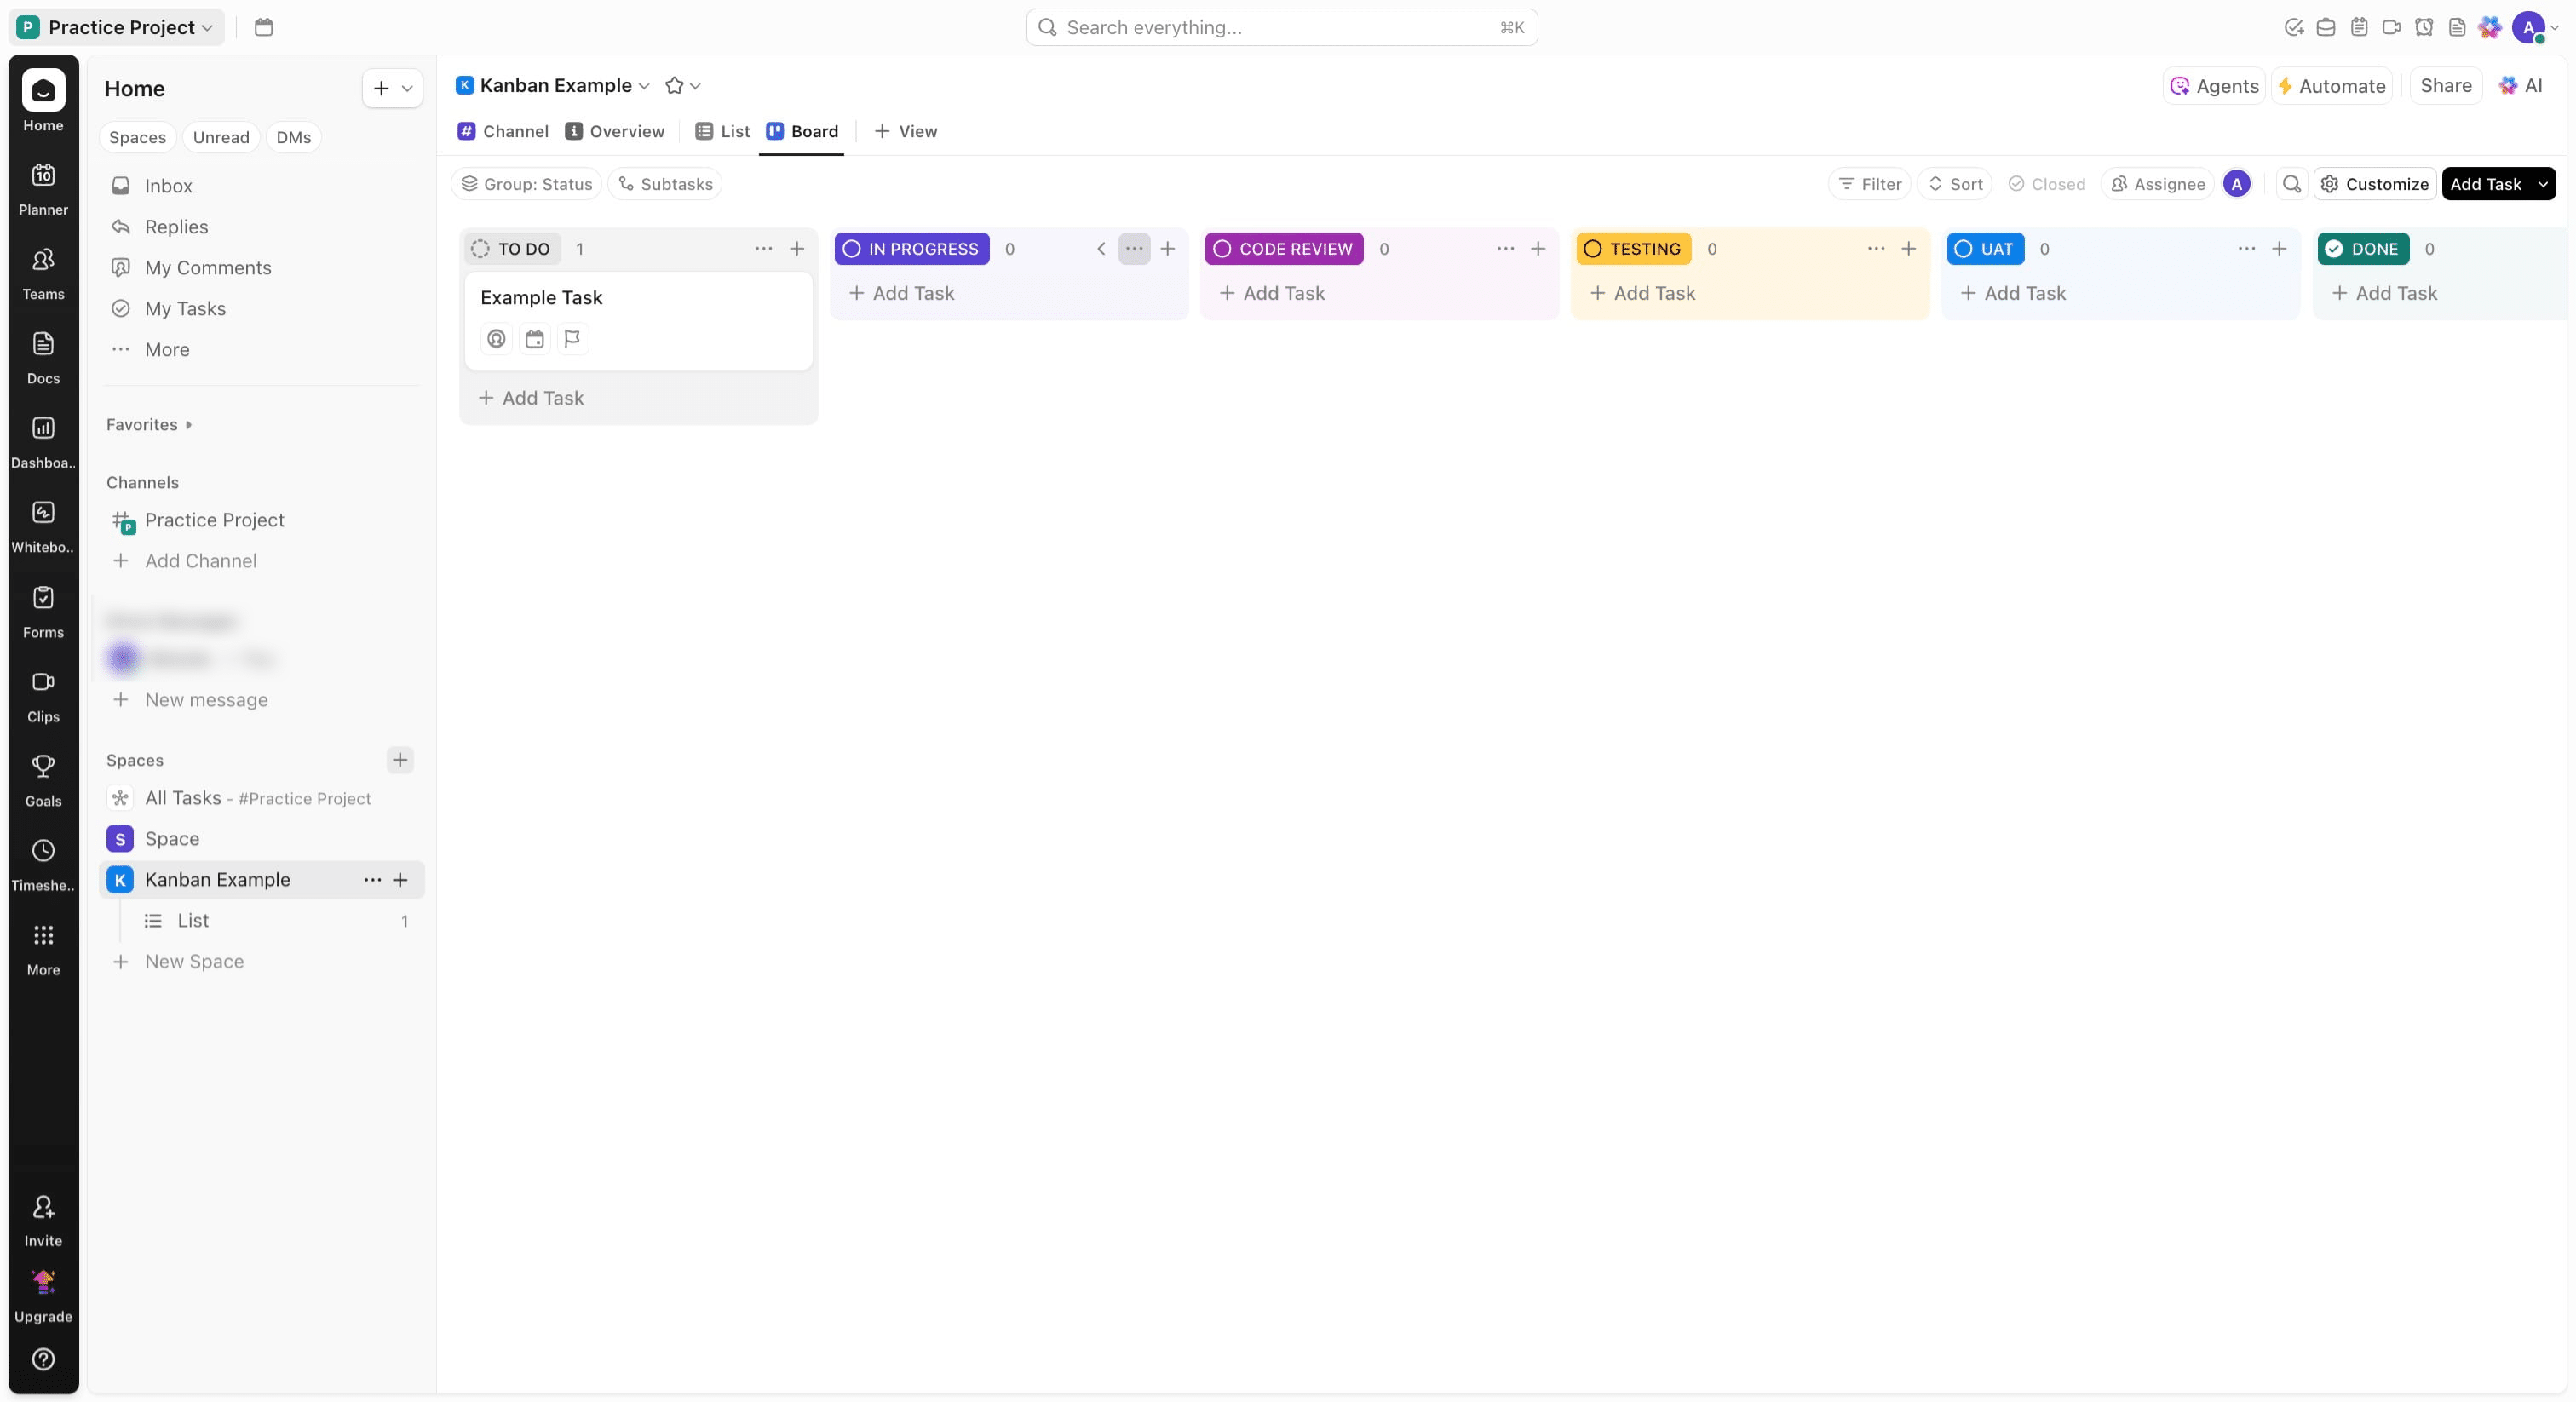
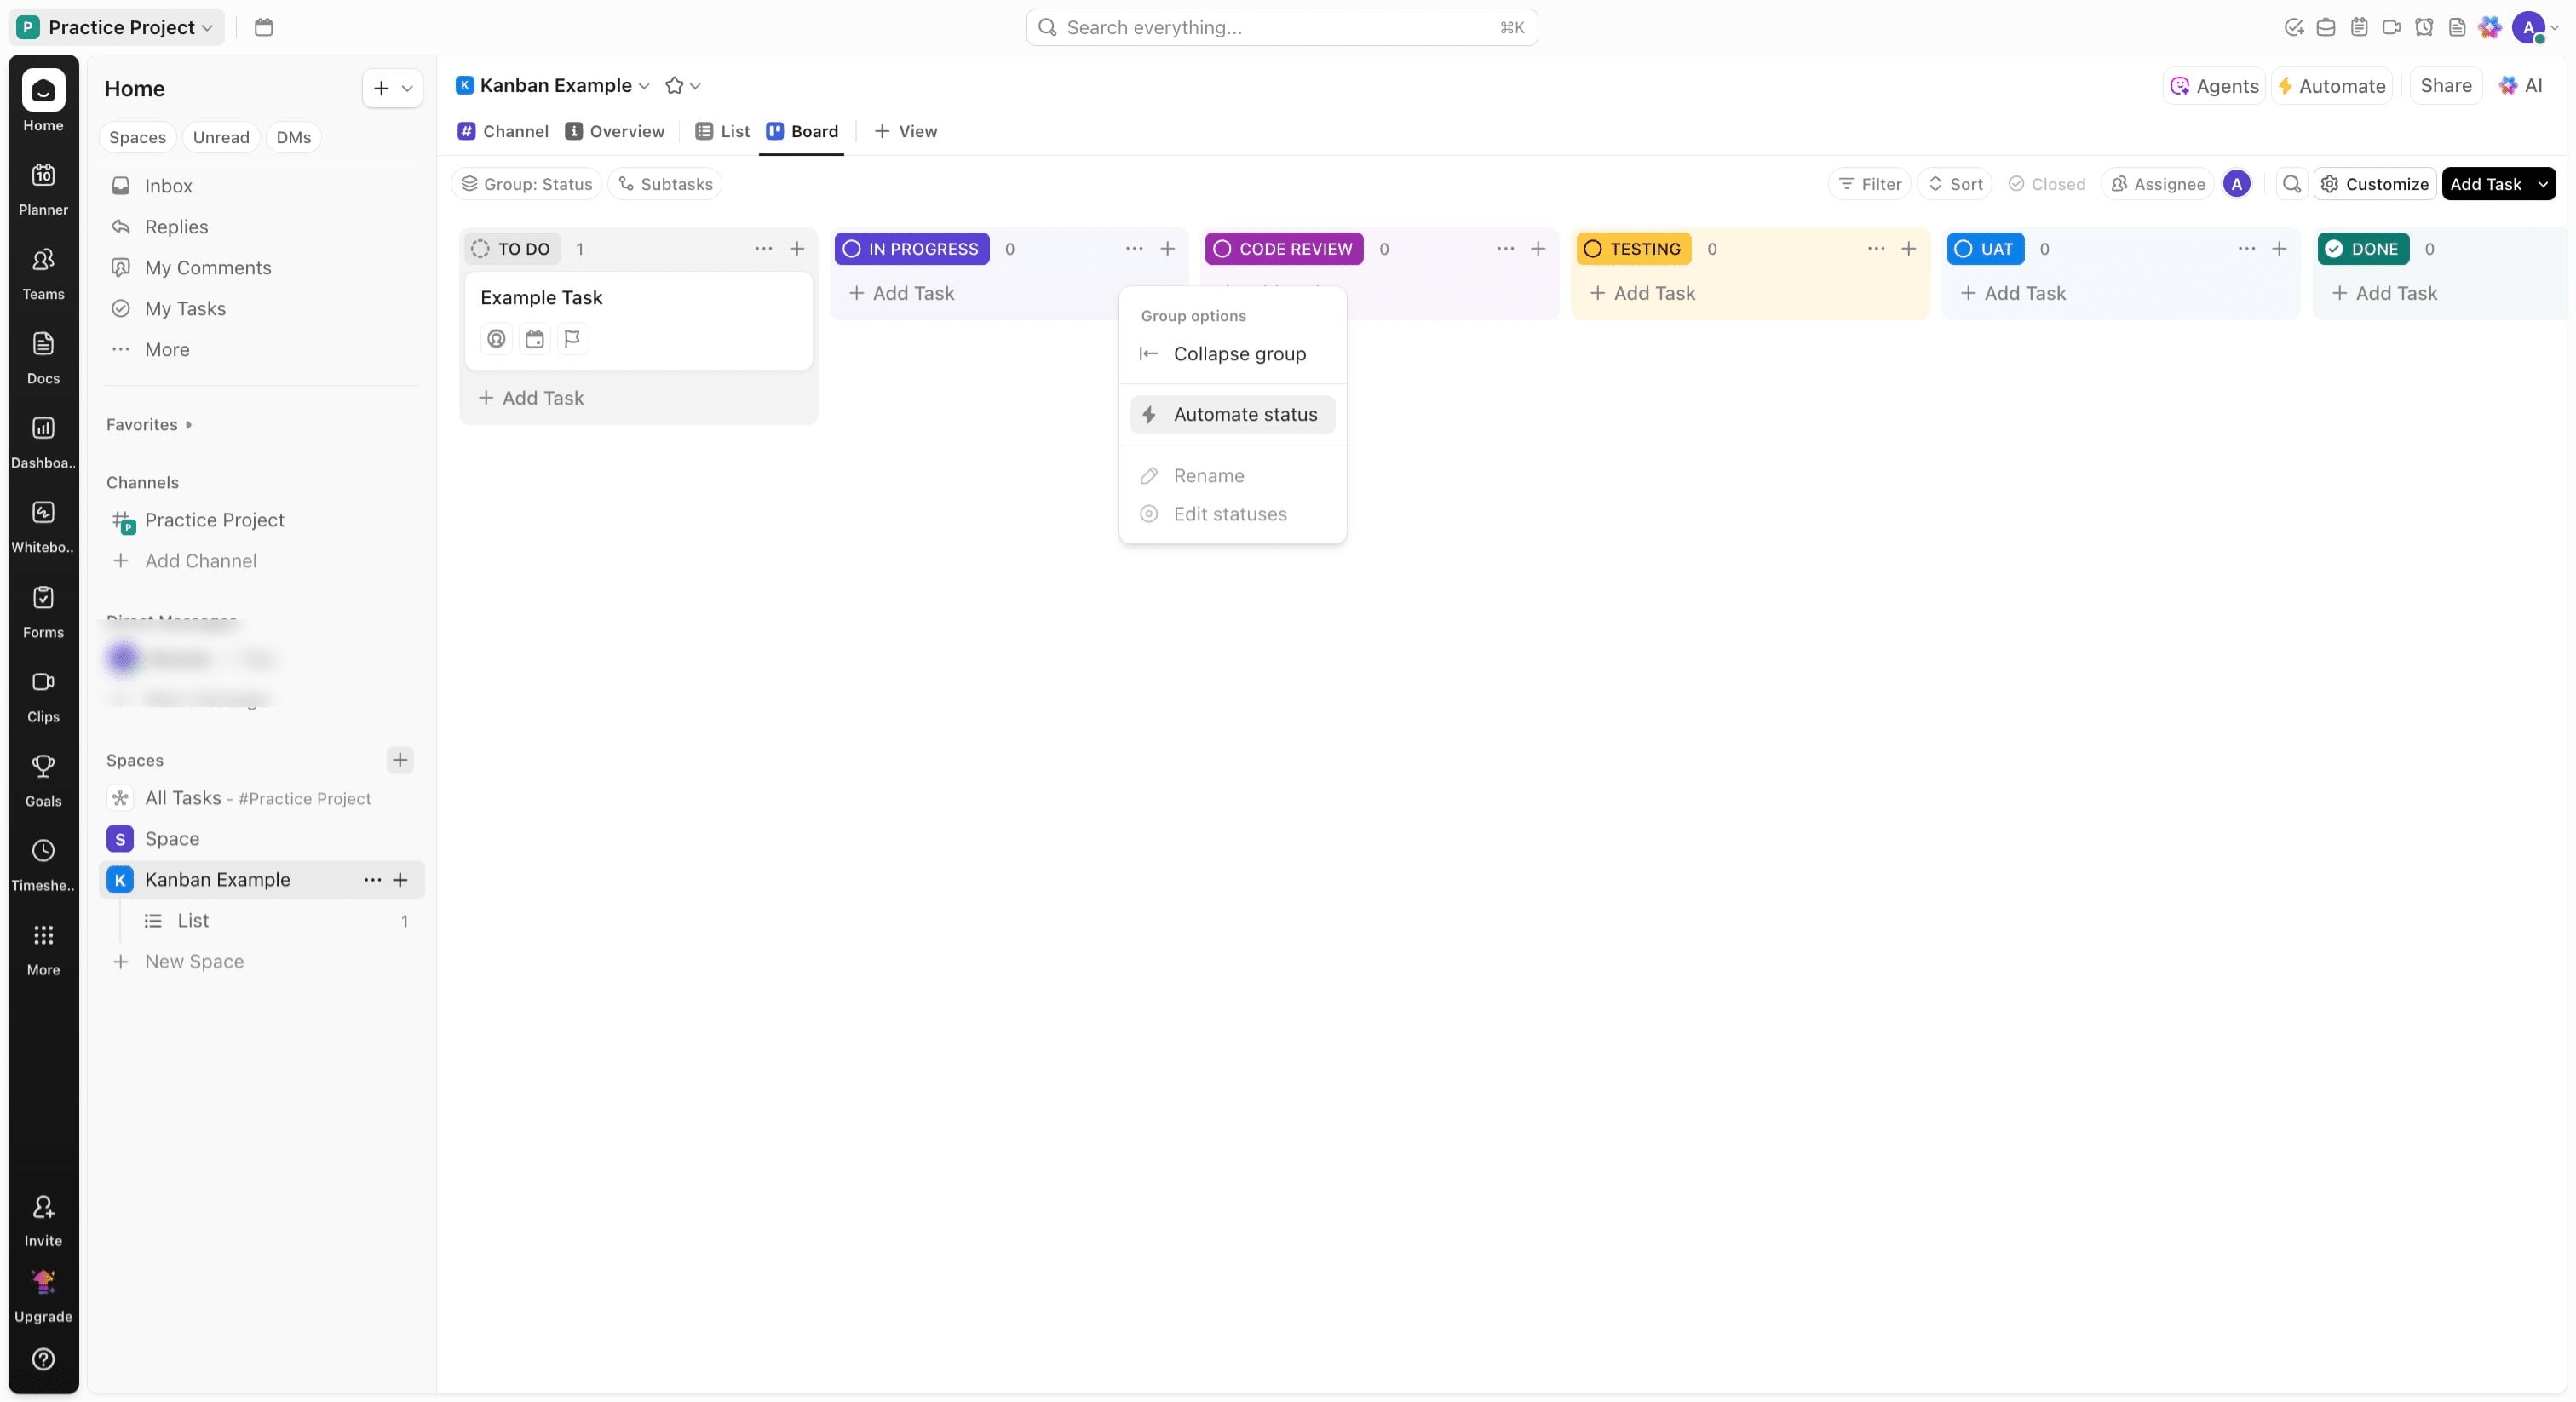
In this guide, we will work you through how to configure Jira workflows to enforce data validation during transitions. To begin, Navigate to your Clicup instance and go to your List of Spaces and select the previous space created. In your space, Click on the board view and on the In progress lane, click on the menu option
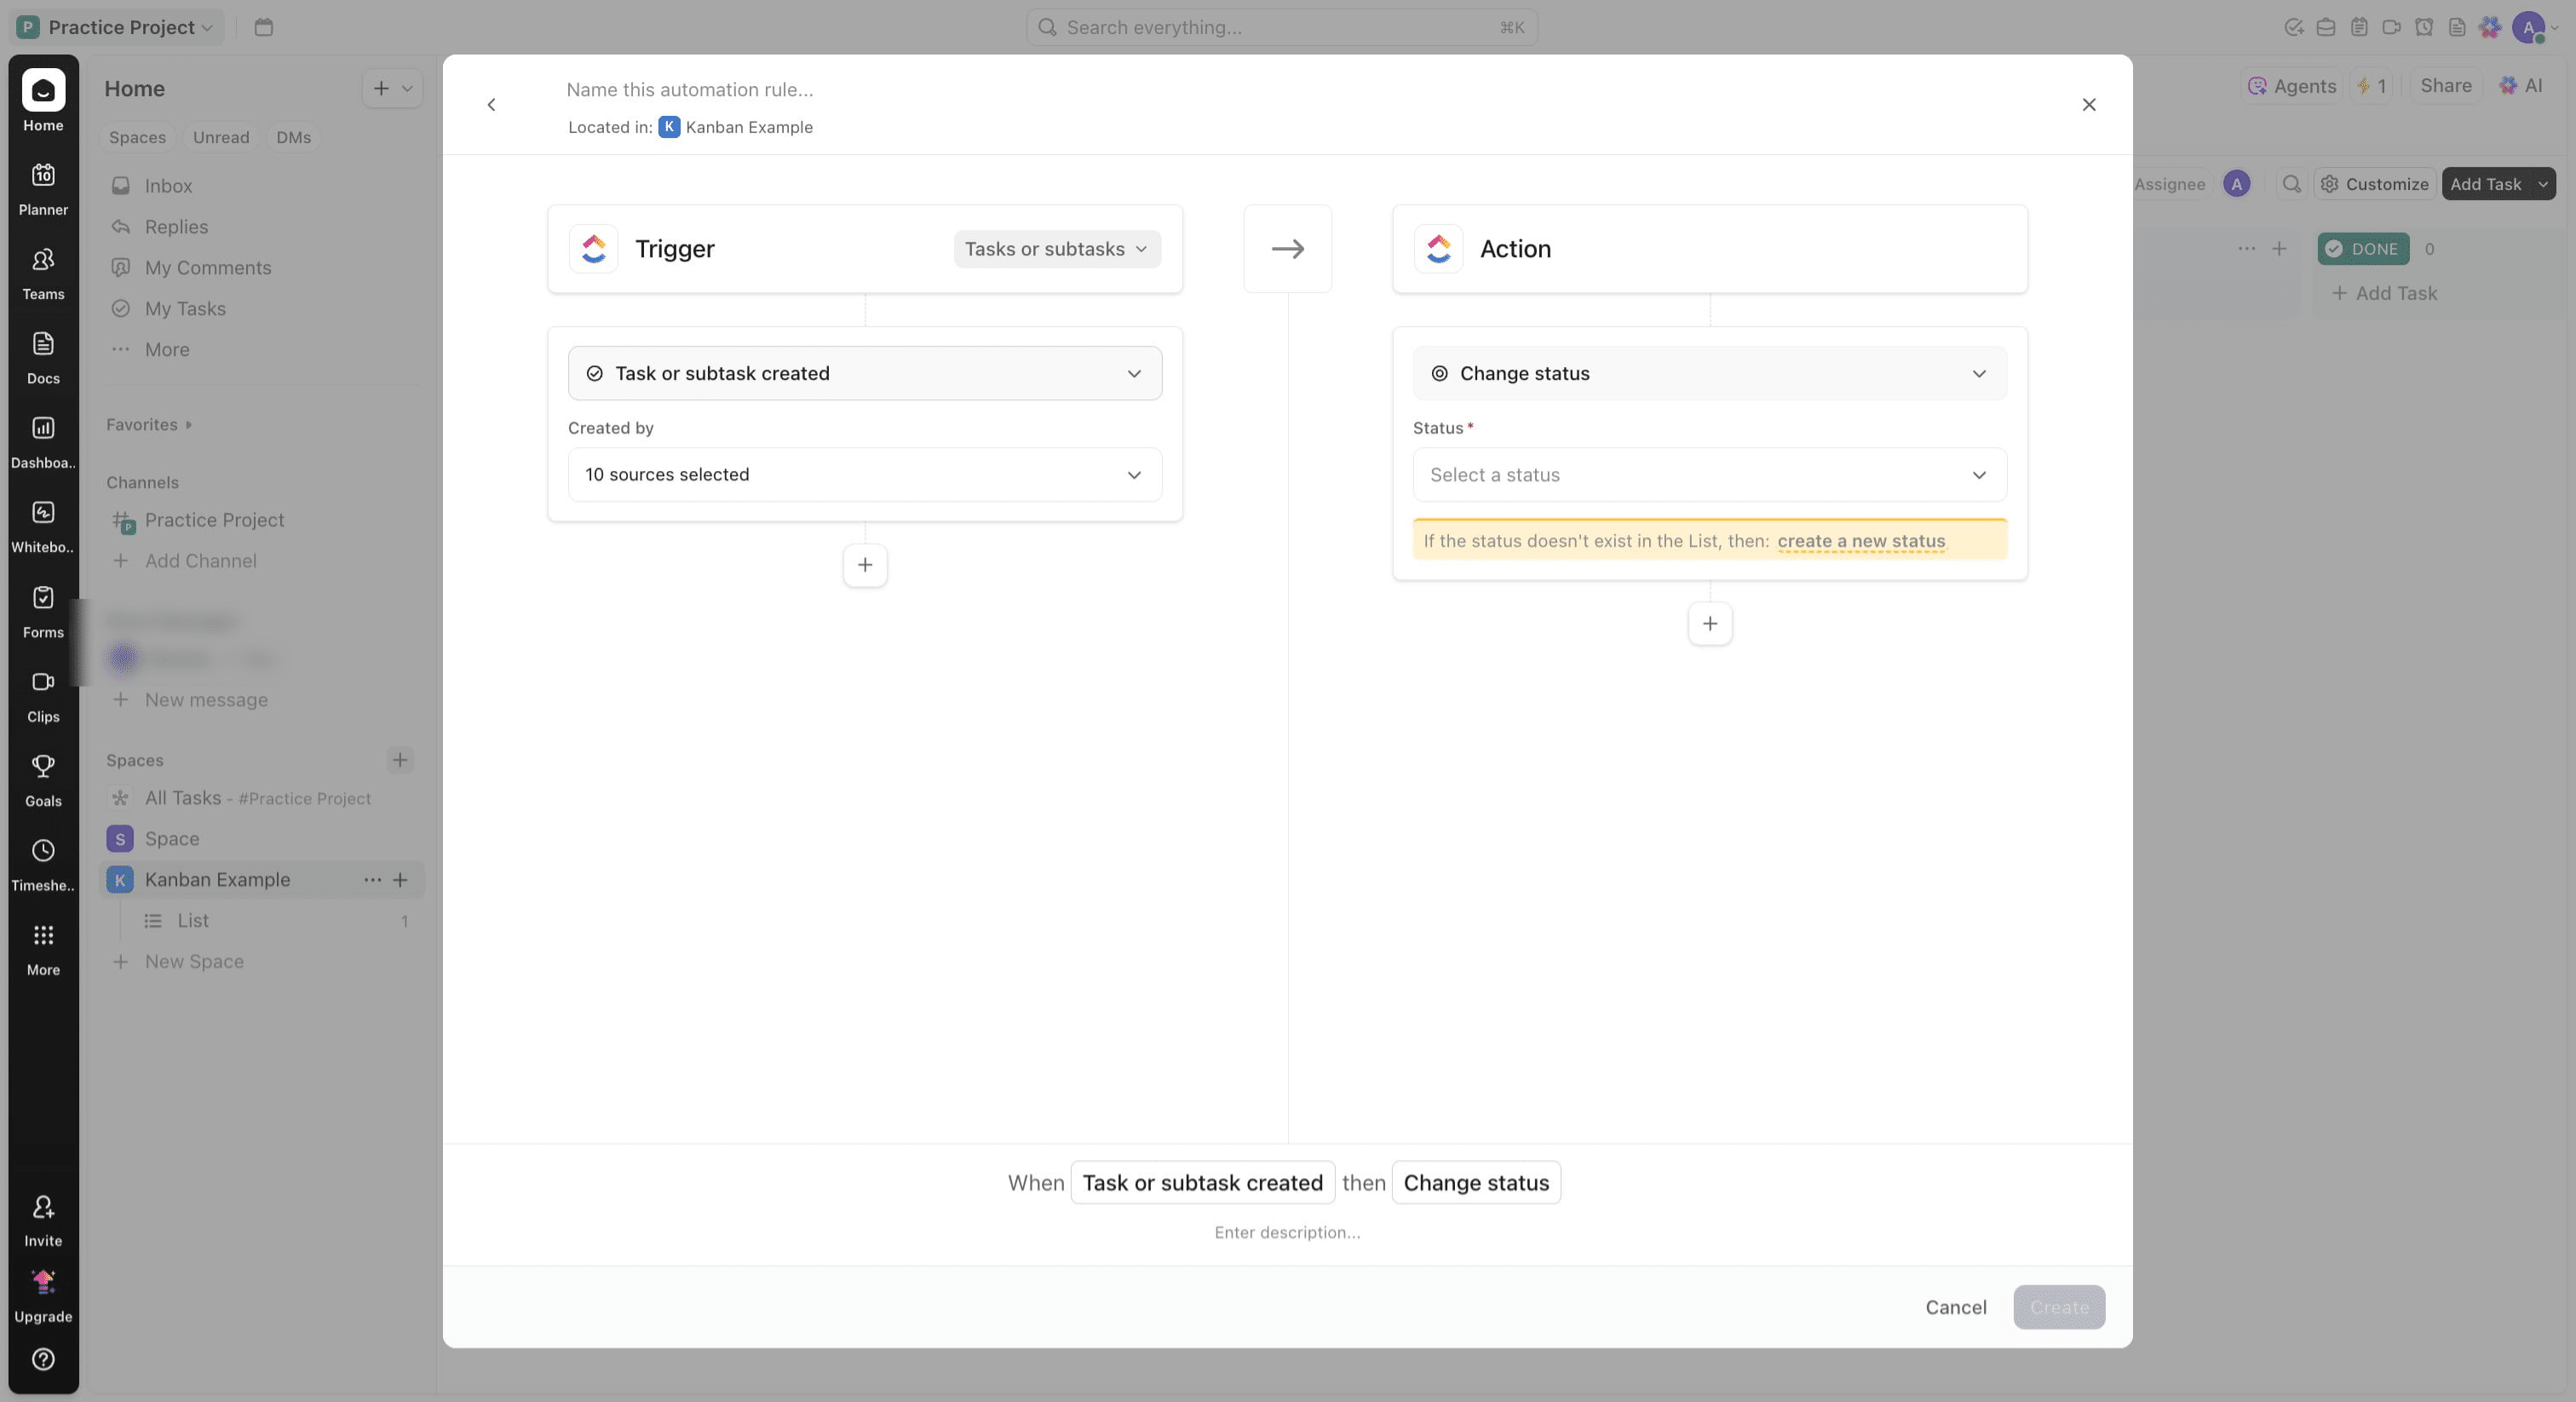
Click on "Automate status"
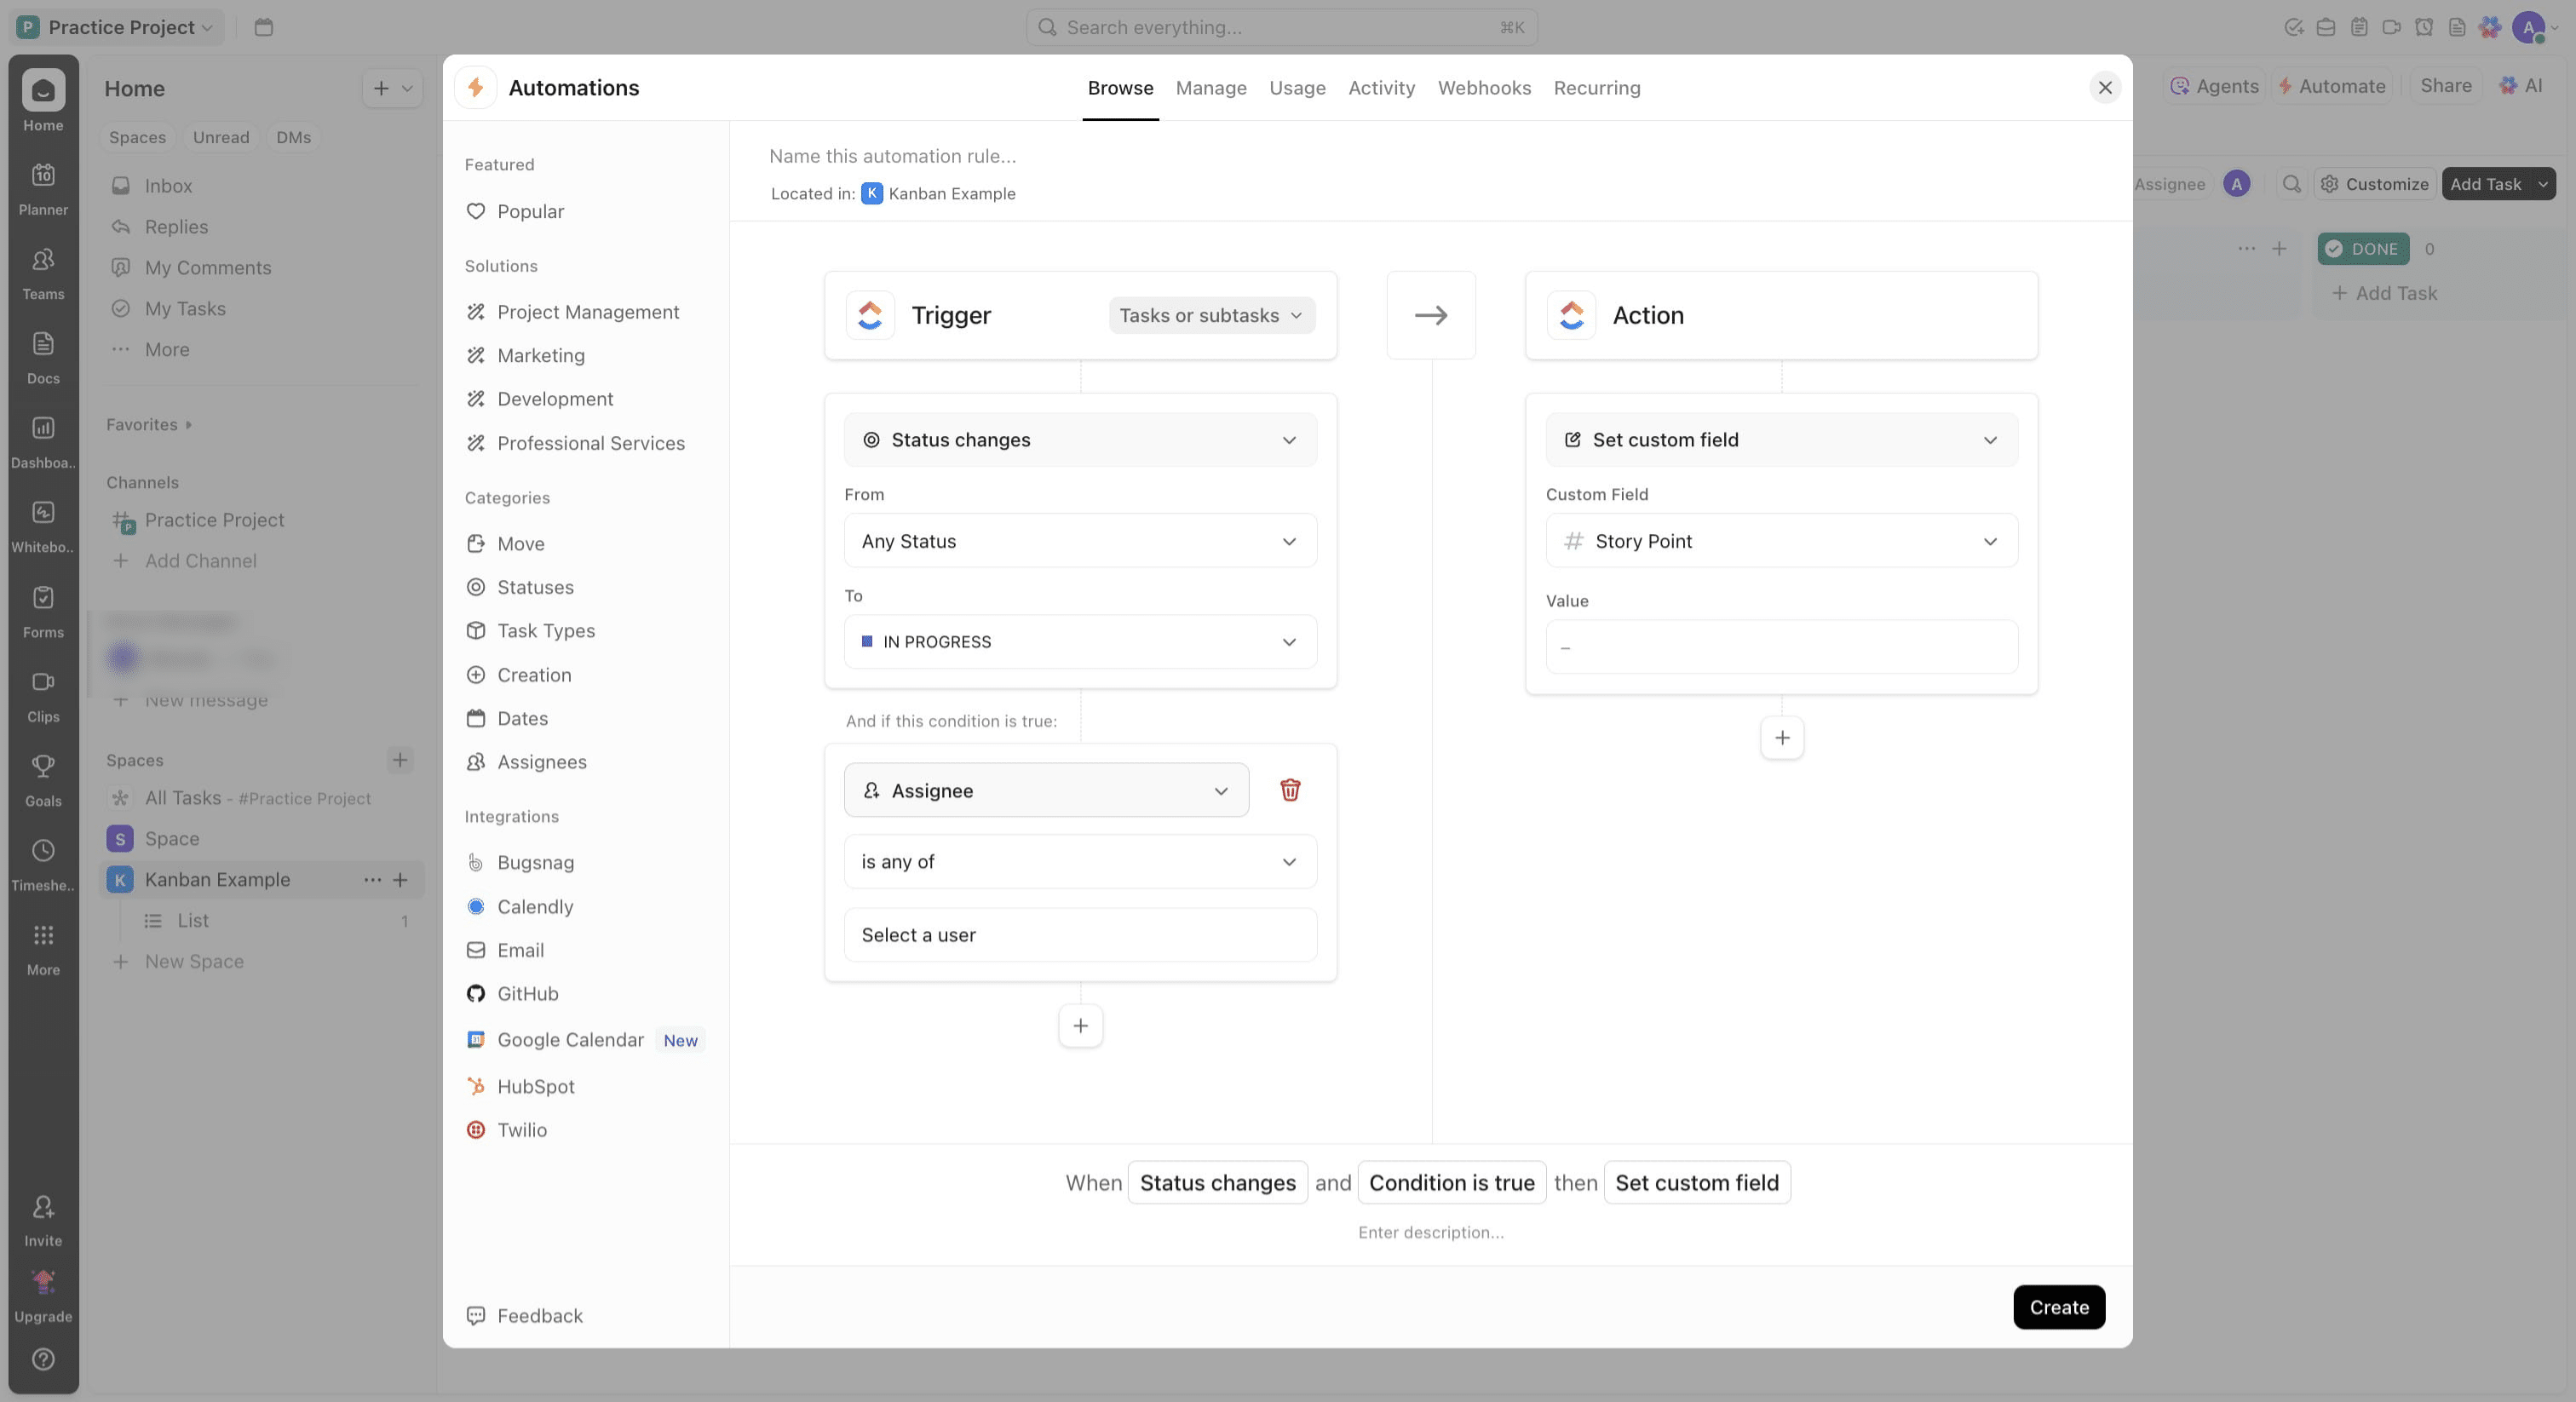
Begin creating an automation rule by ensuring your first trigger matches status transition, then click on the plus icon to add a condition
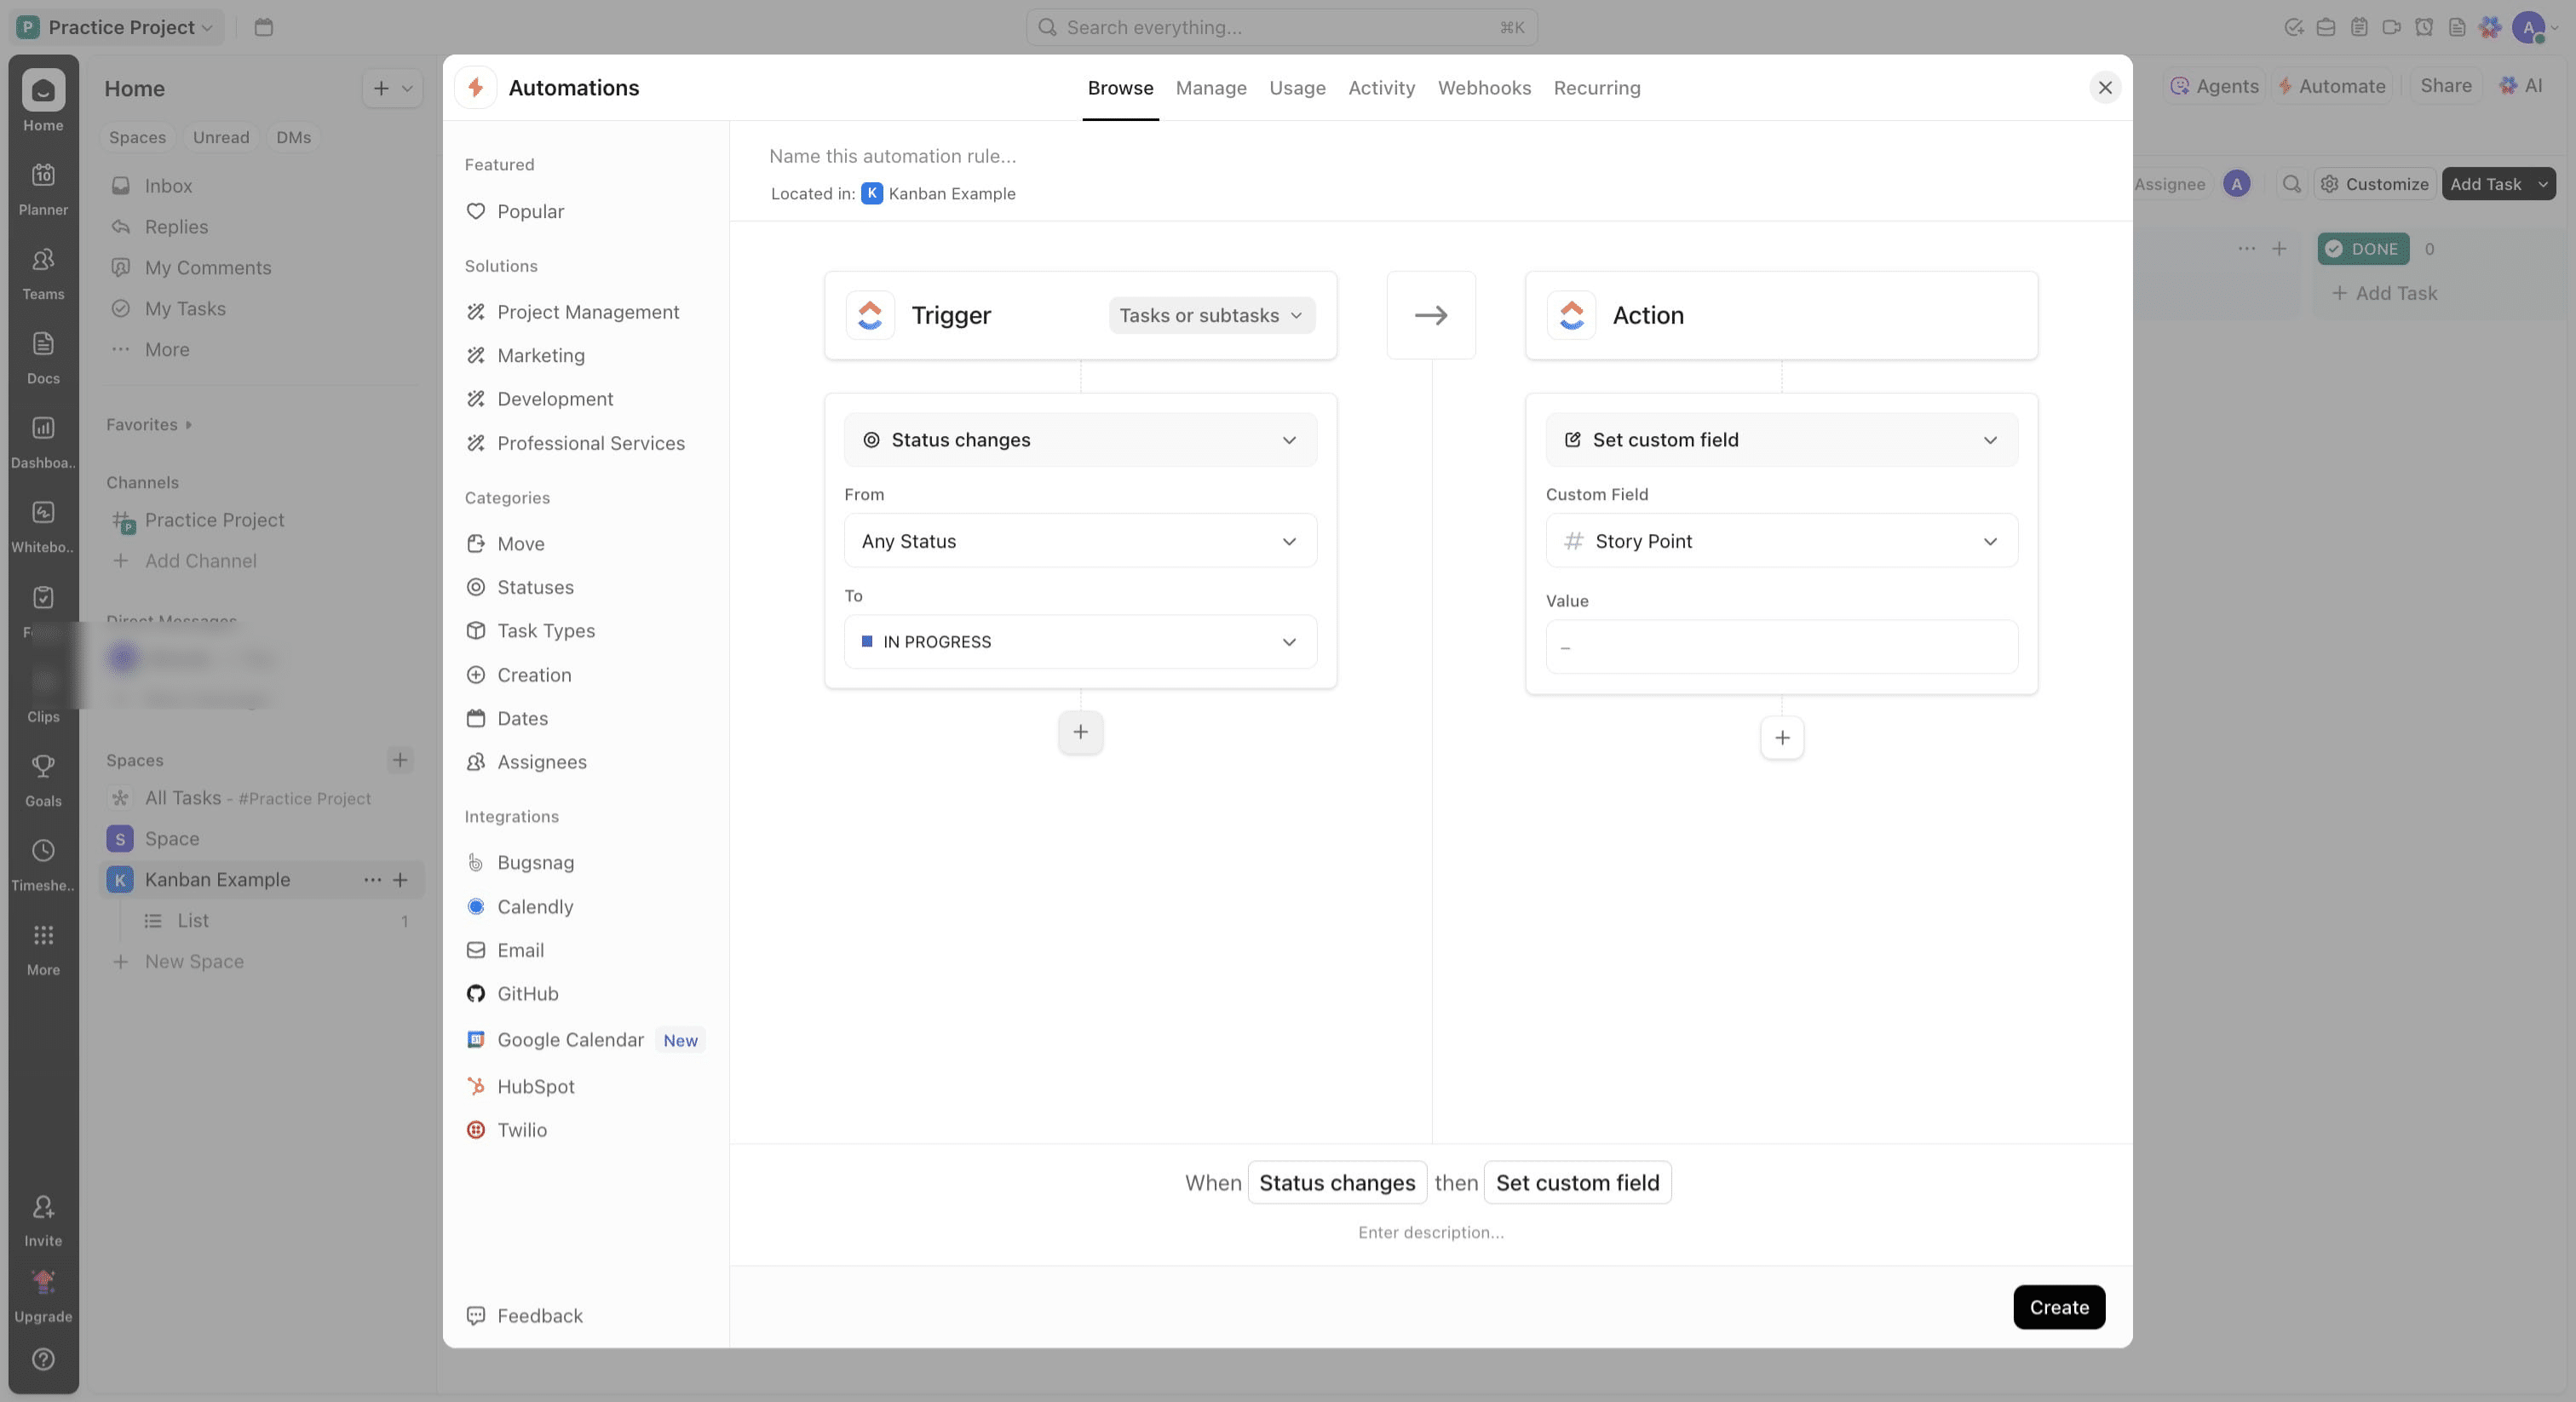
Change condition to match if the story point field is empty
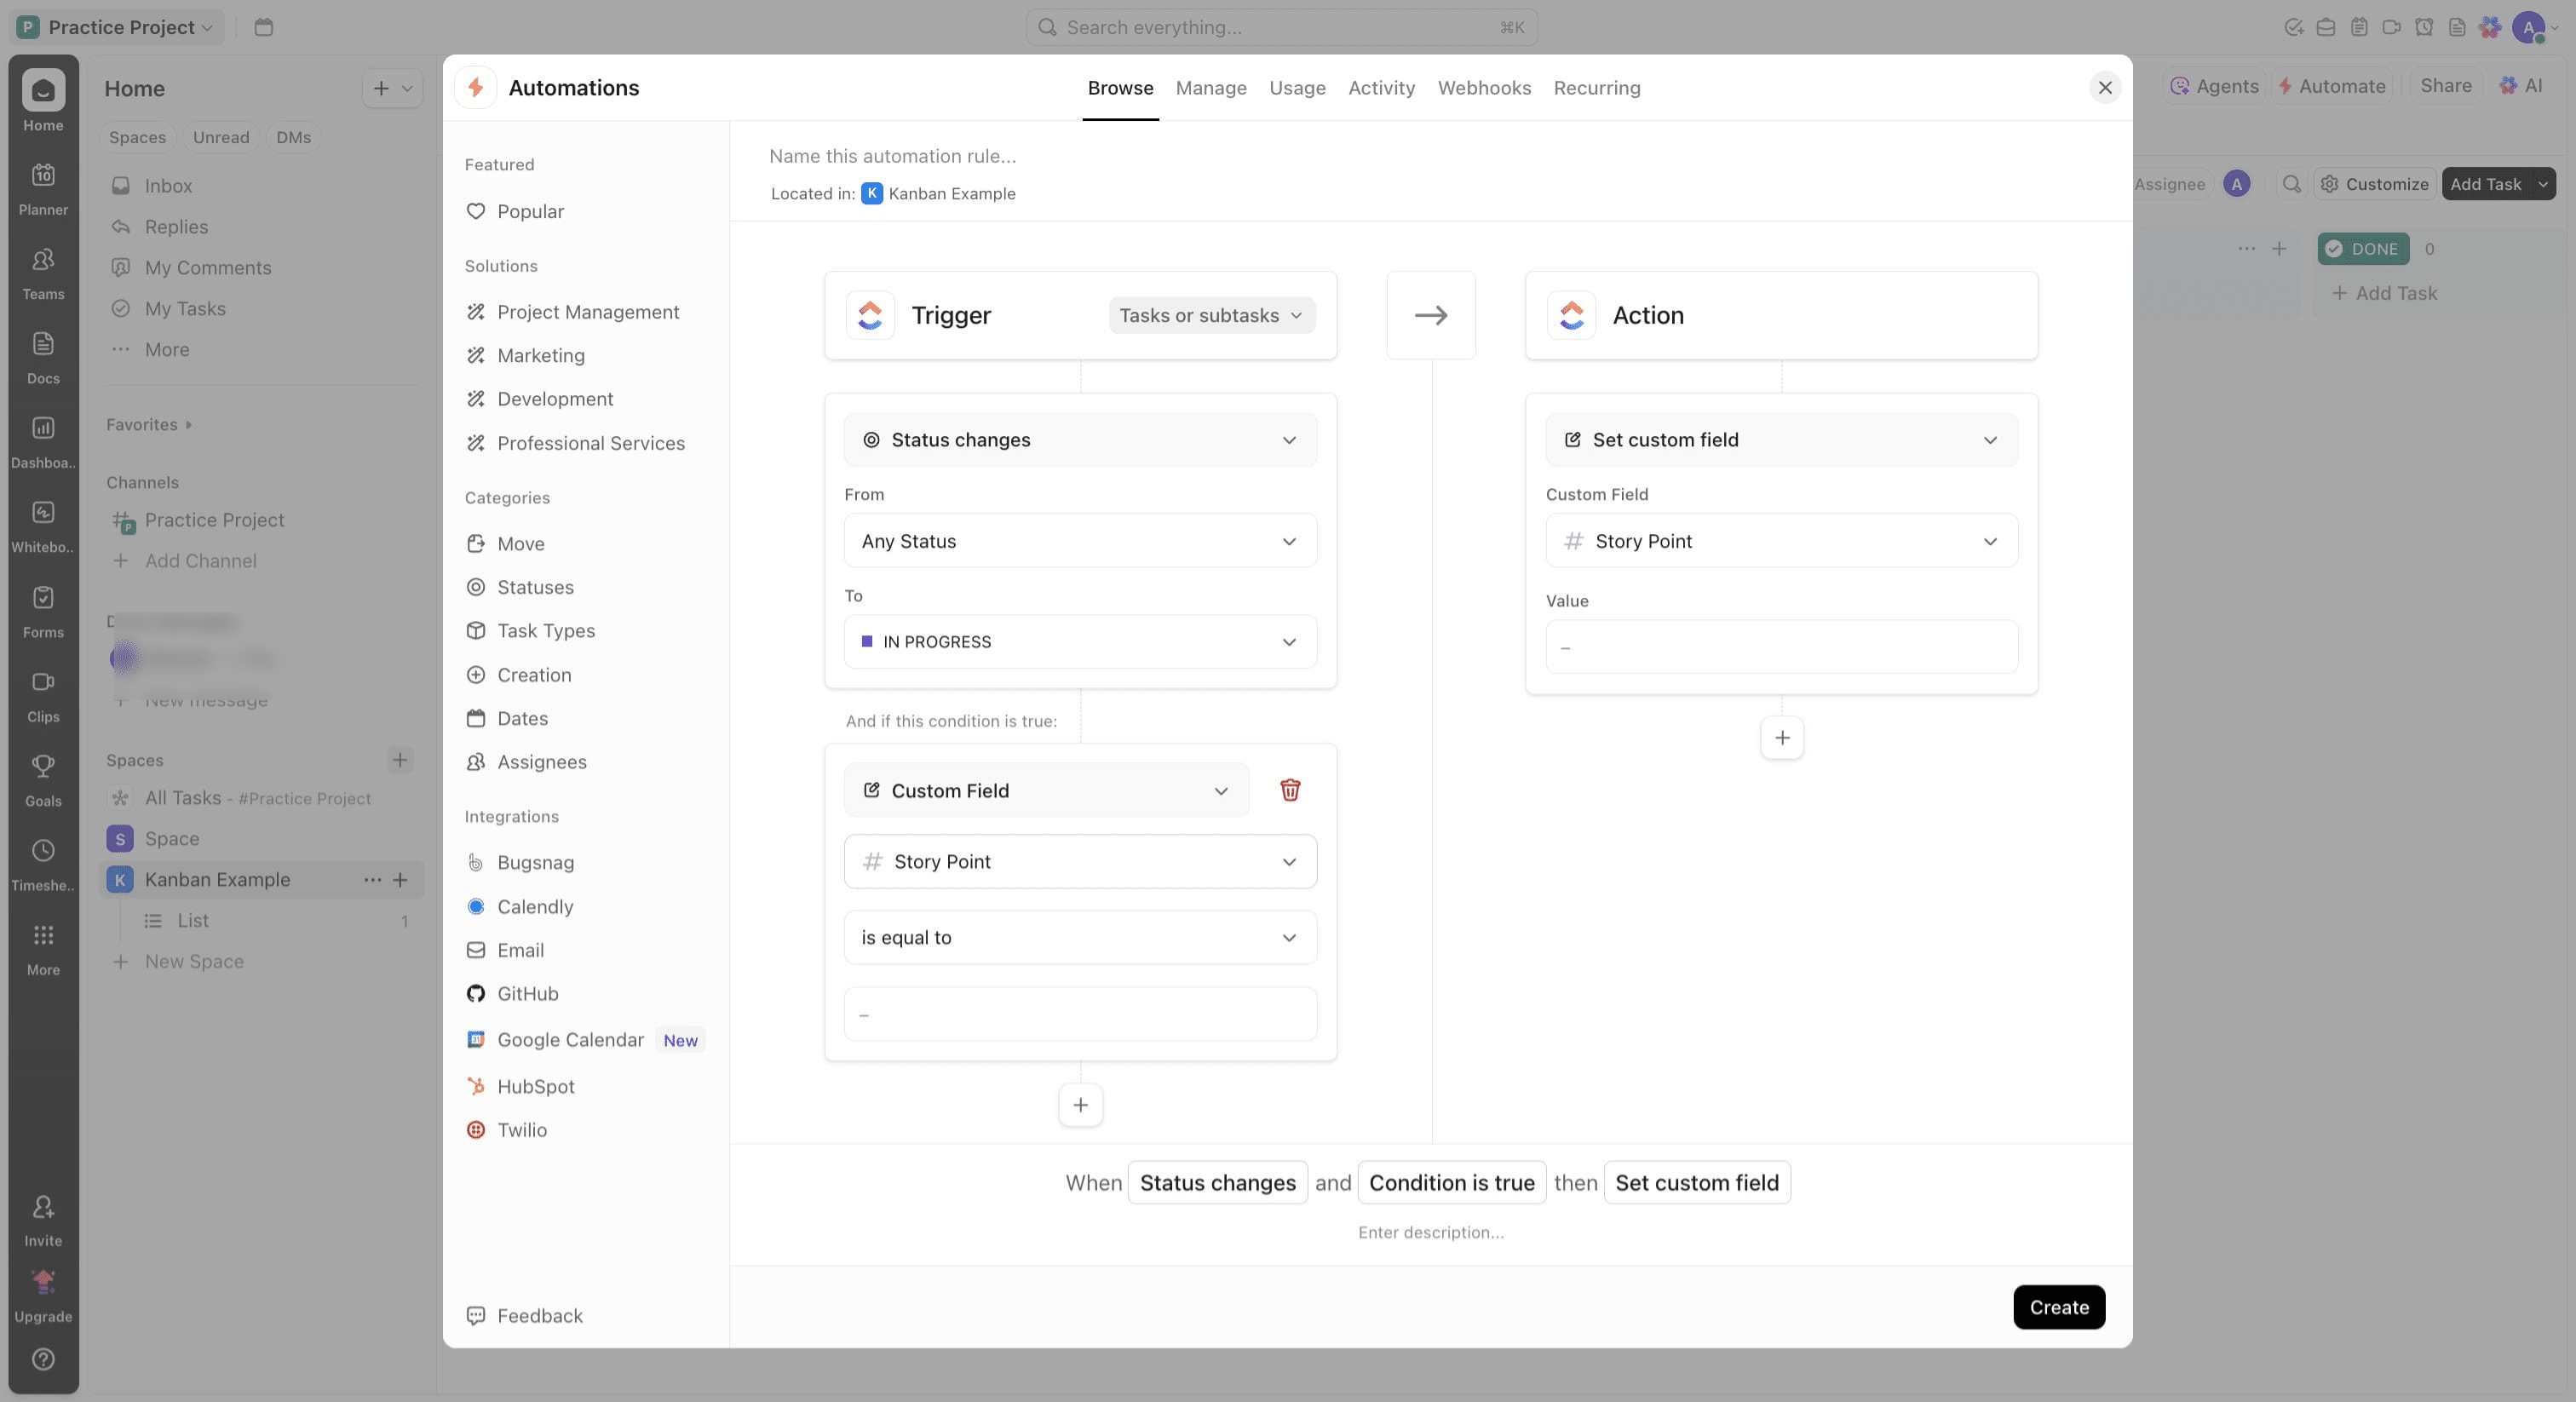
Click on "Custom Field"
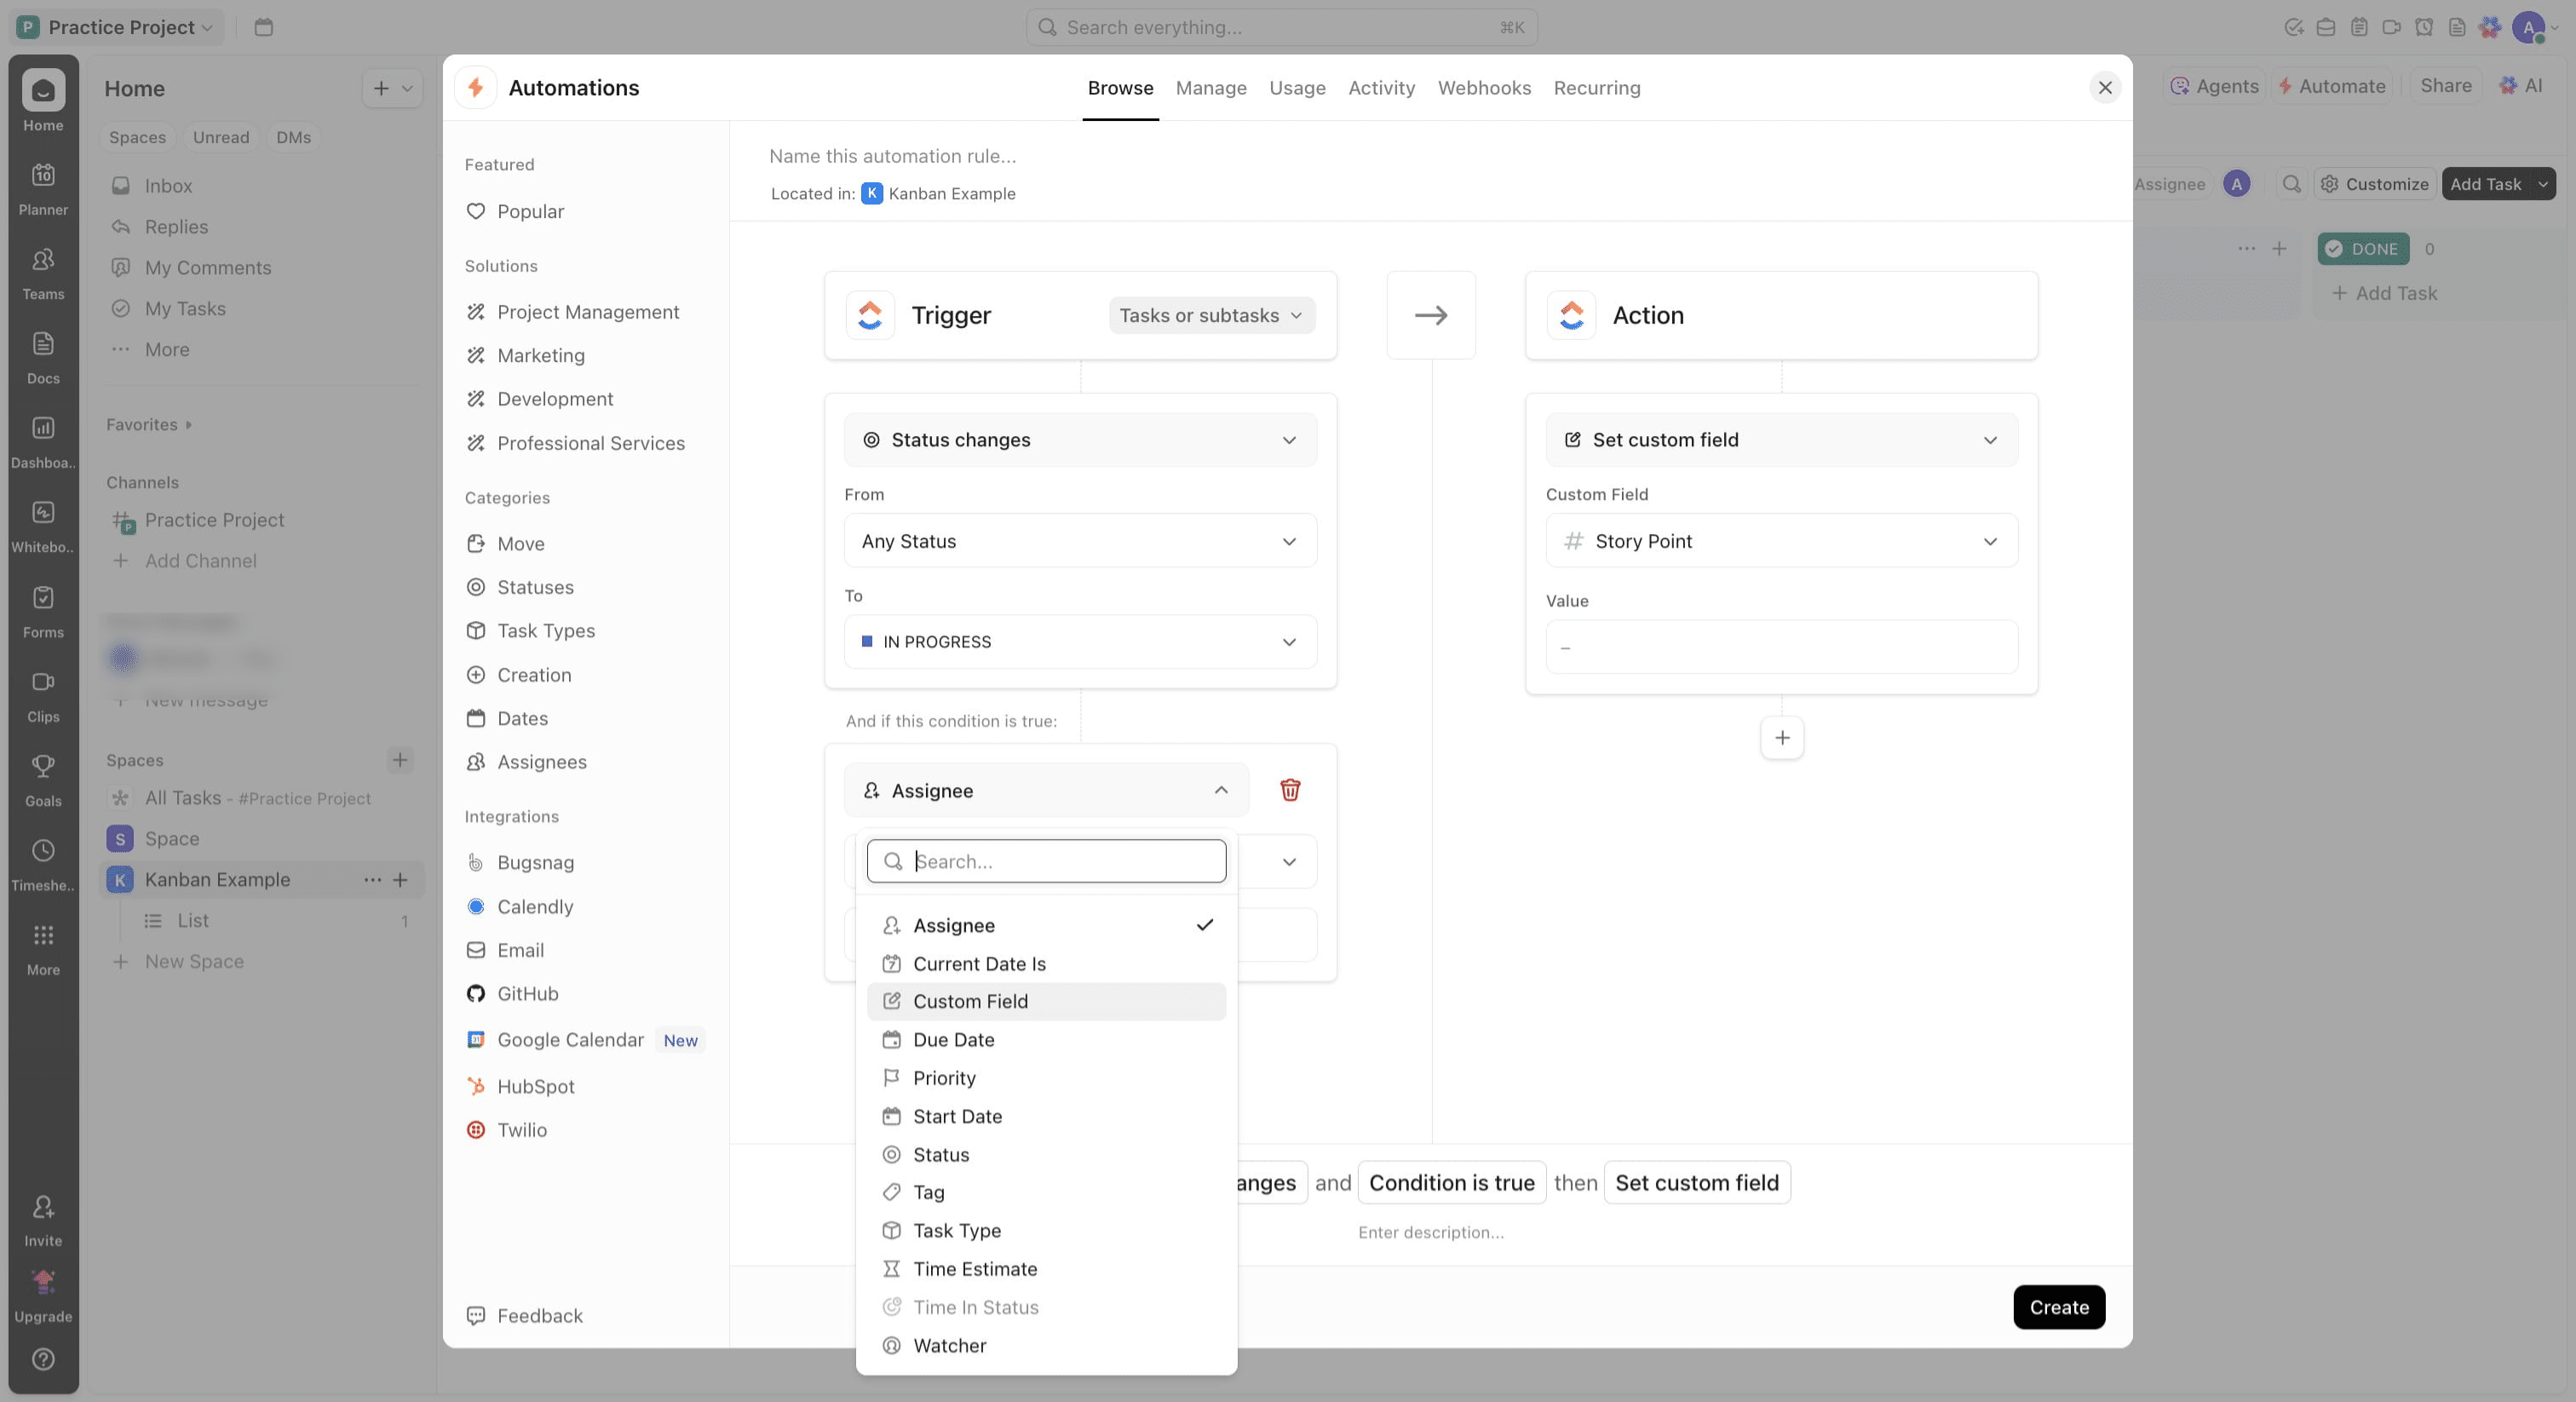
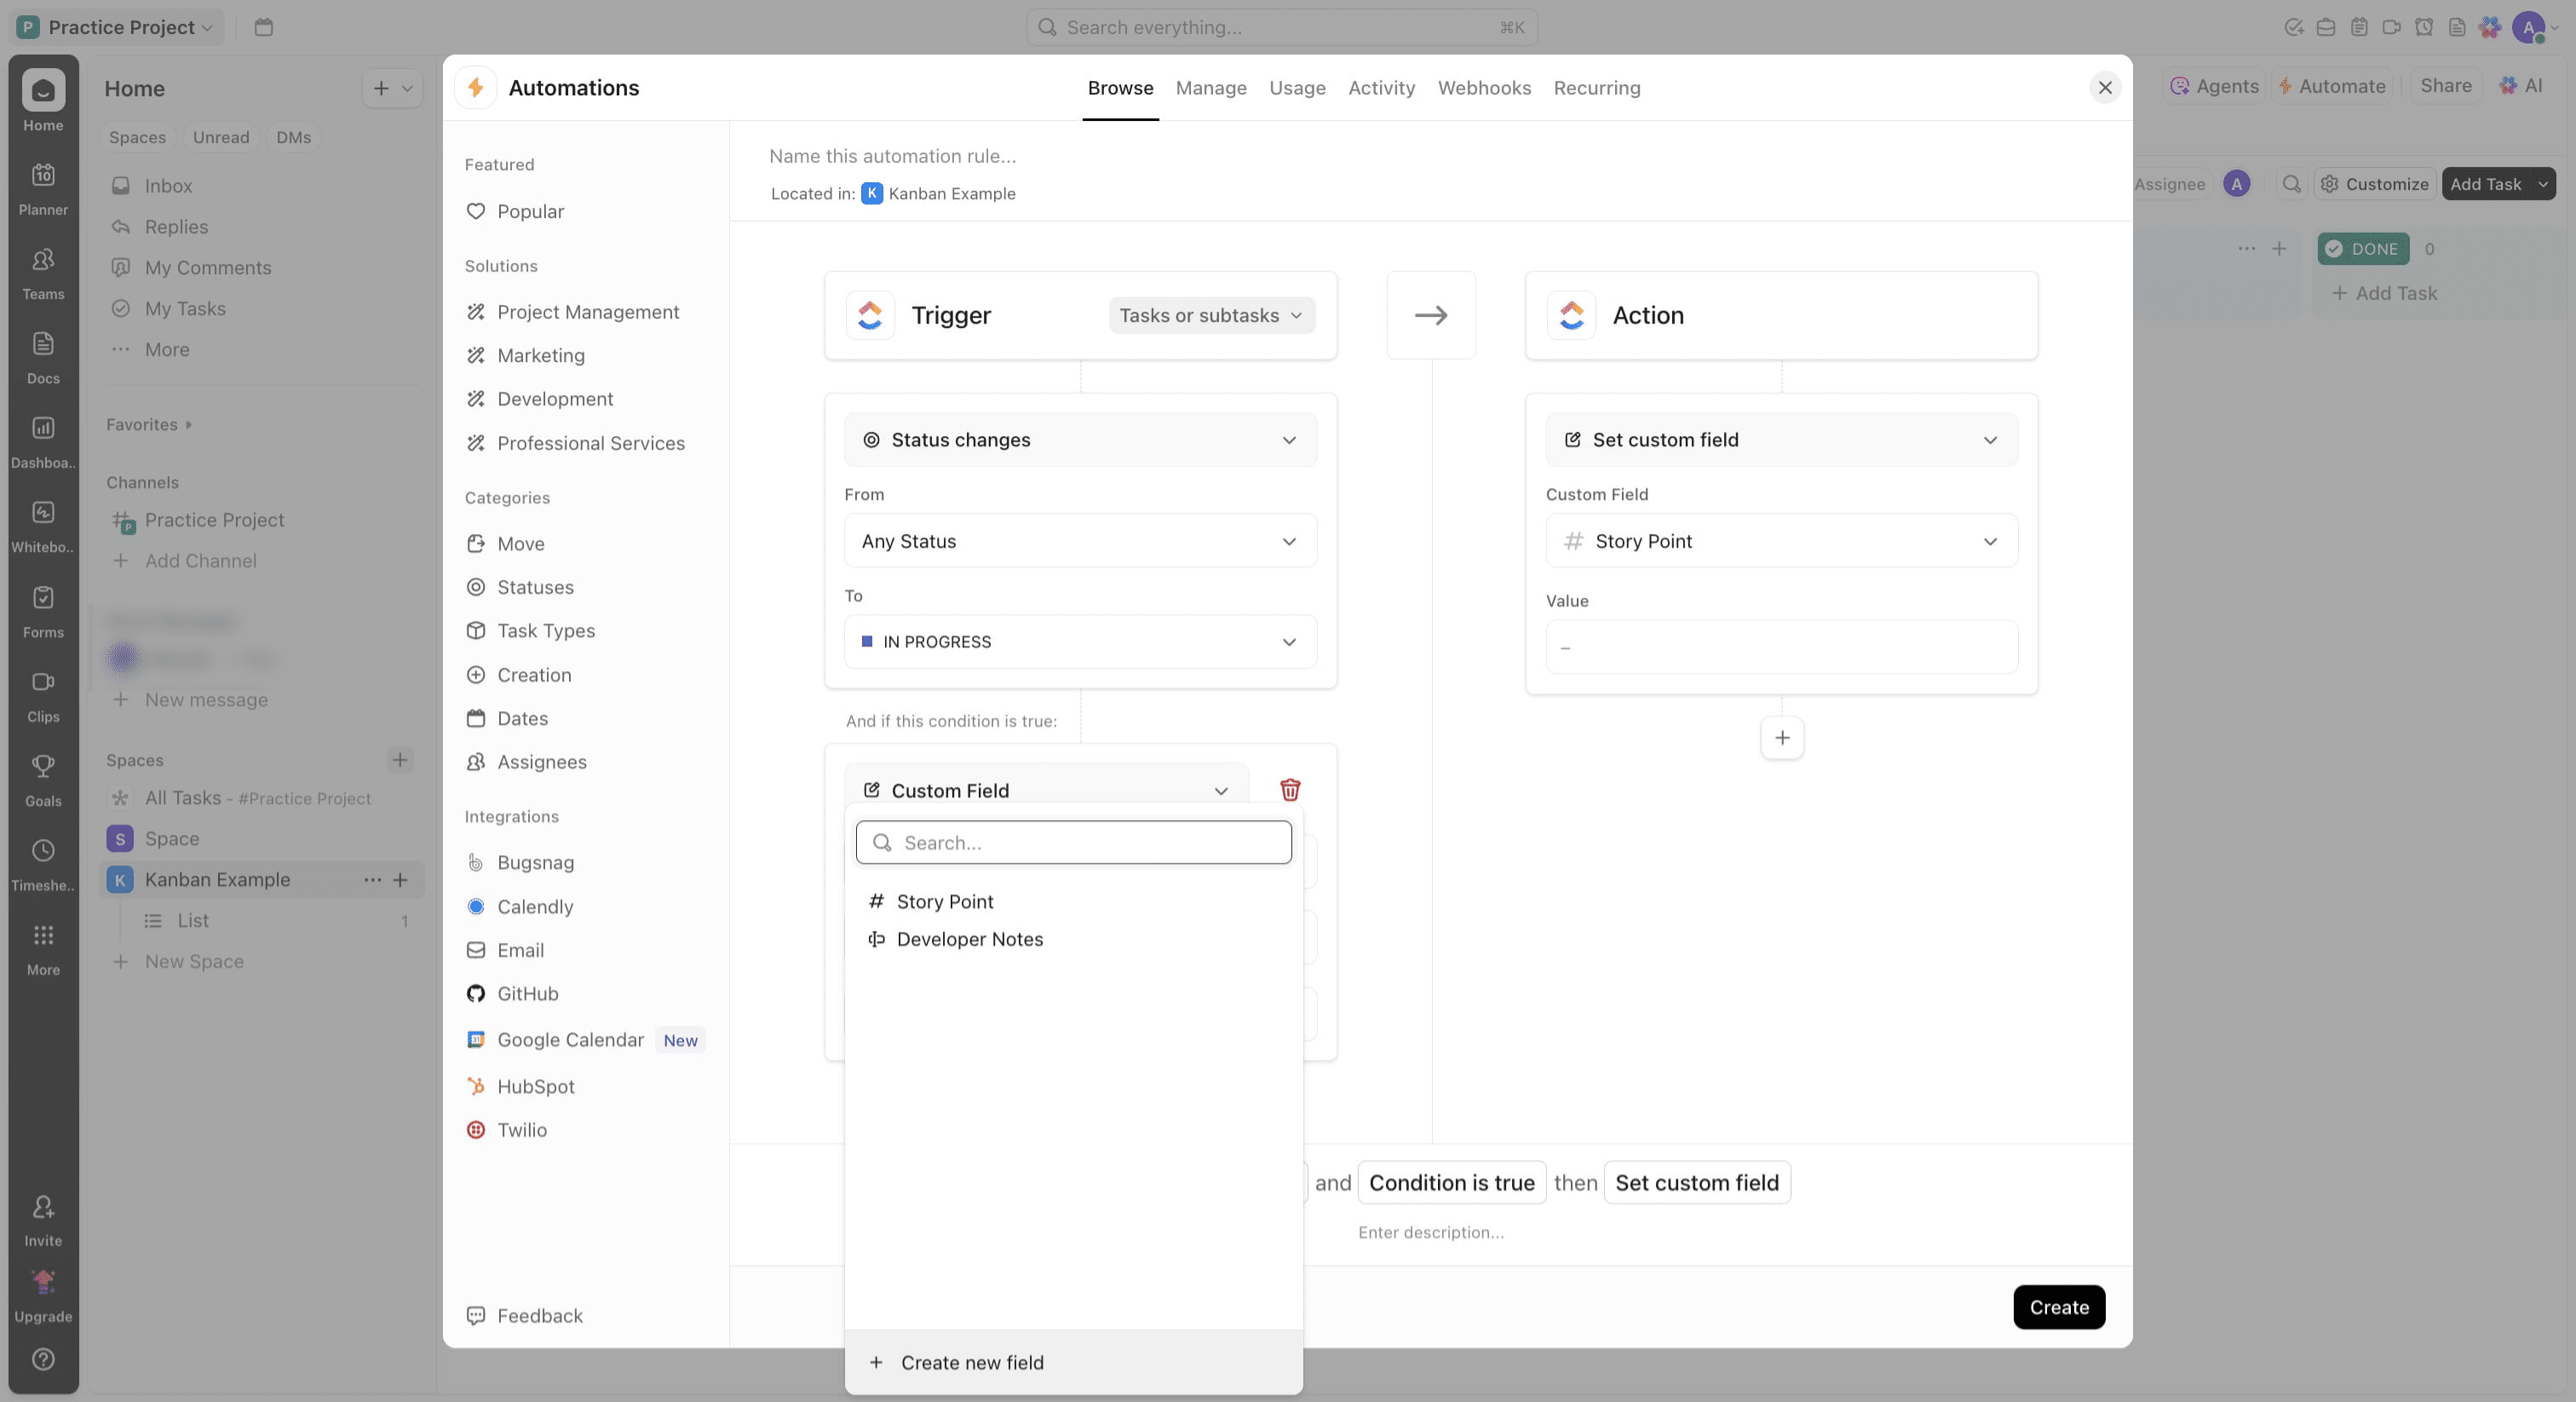
Click on the field box
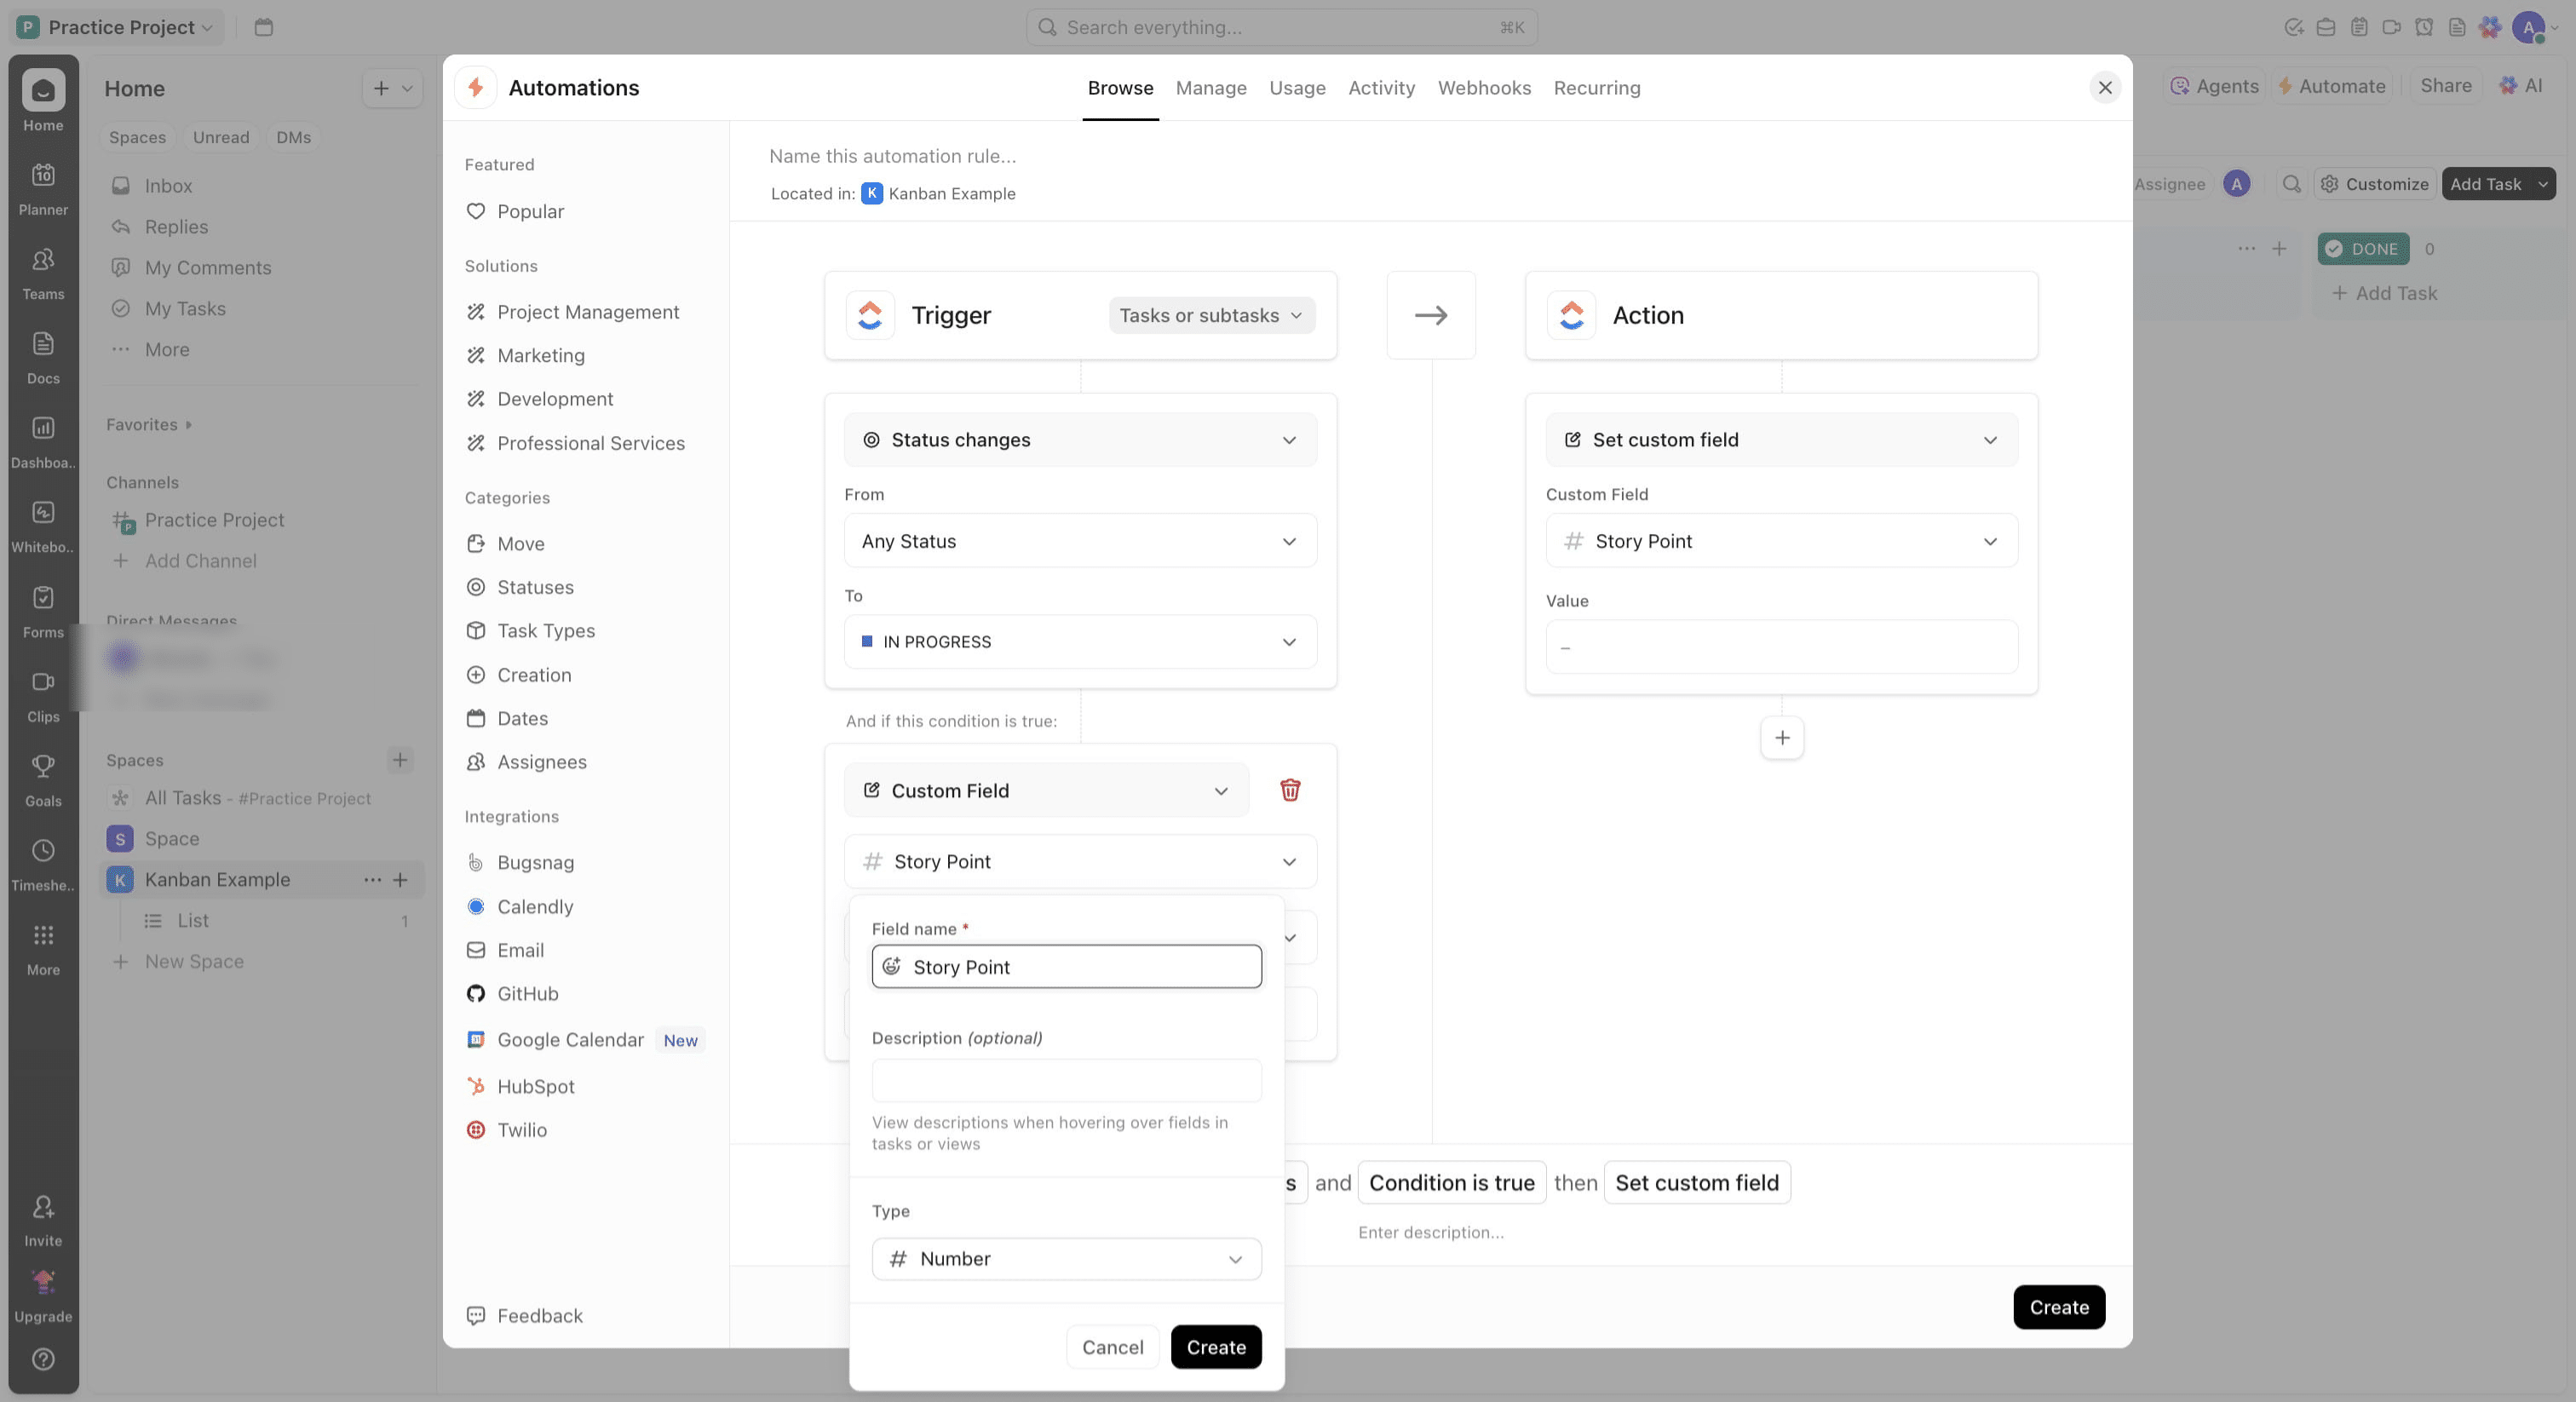
If the field does not exist, Click on "Create new field"
Enter the Story Point field name, select the type of Number and click on "Create"
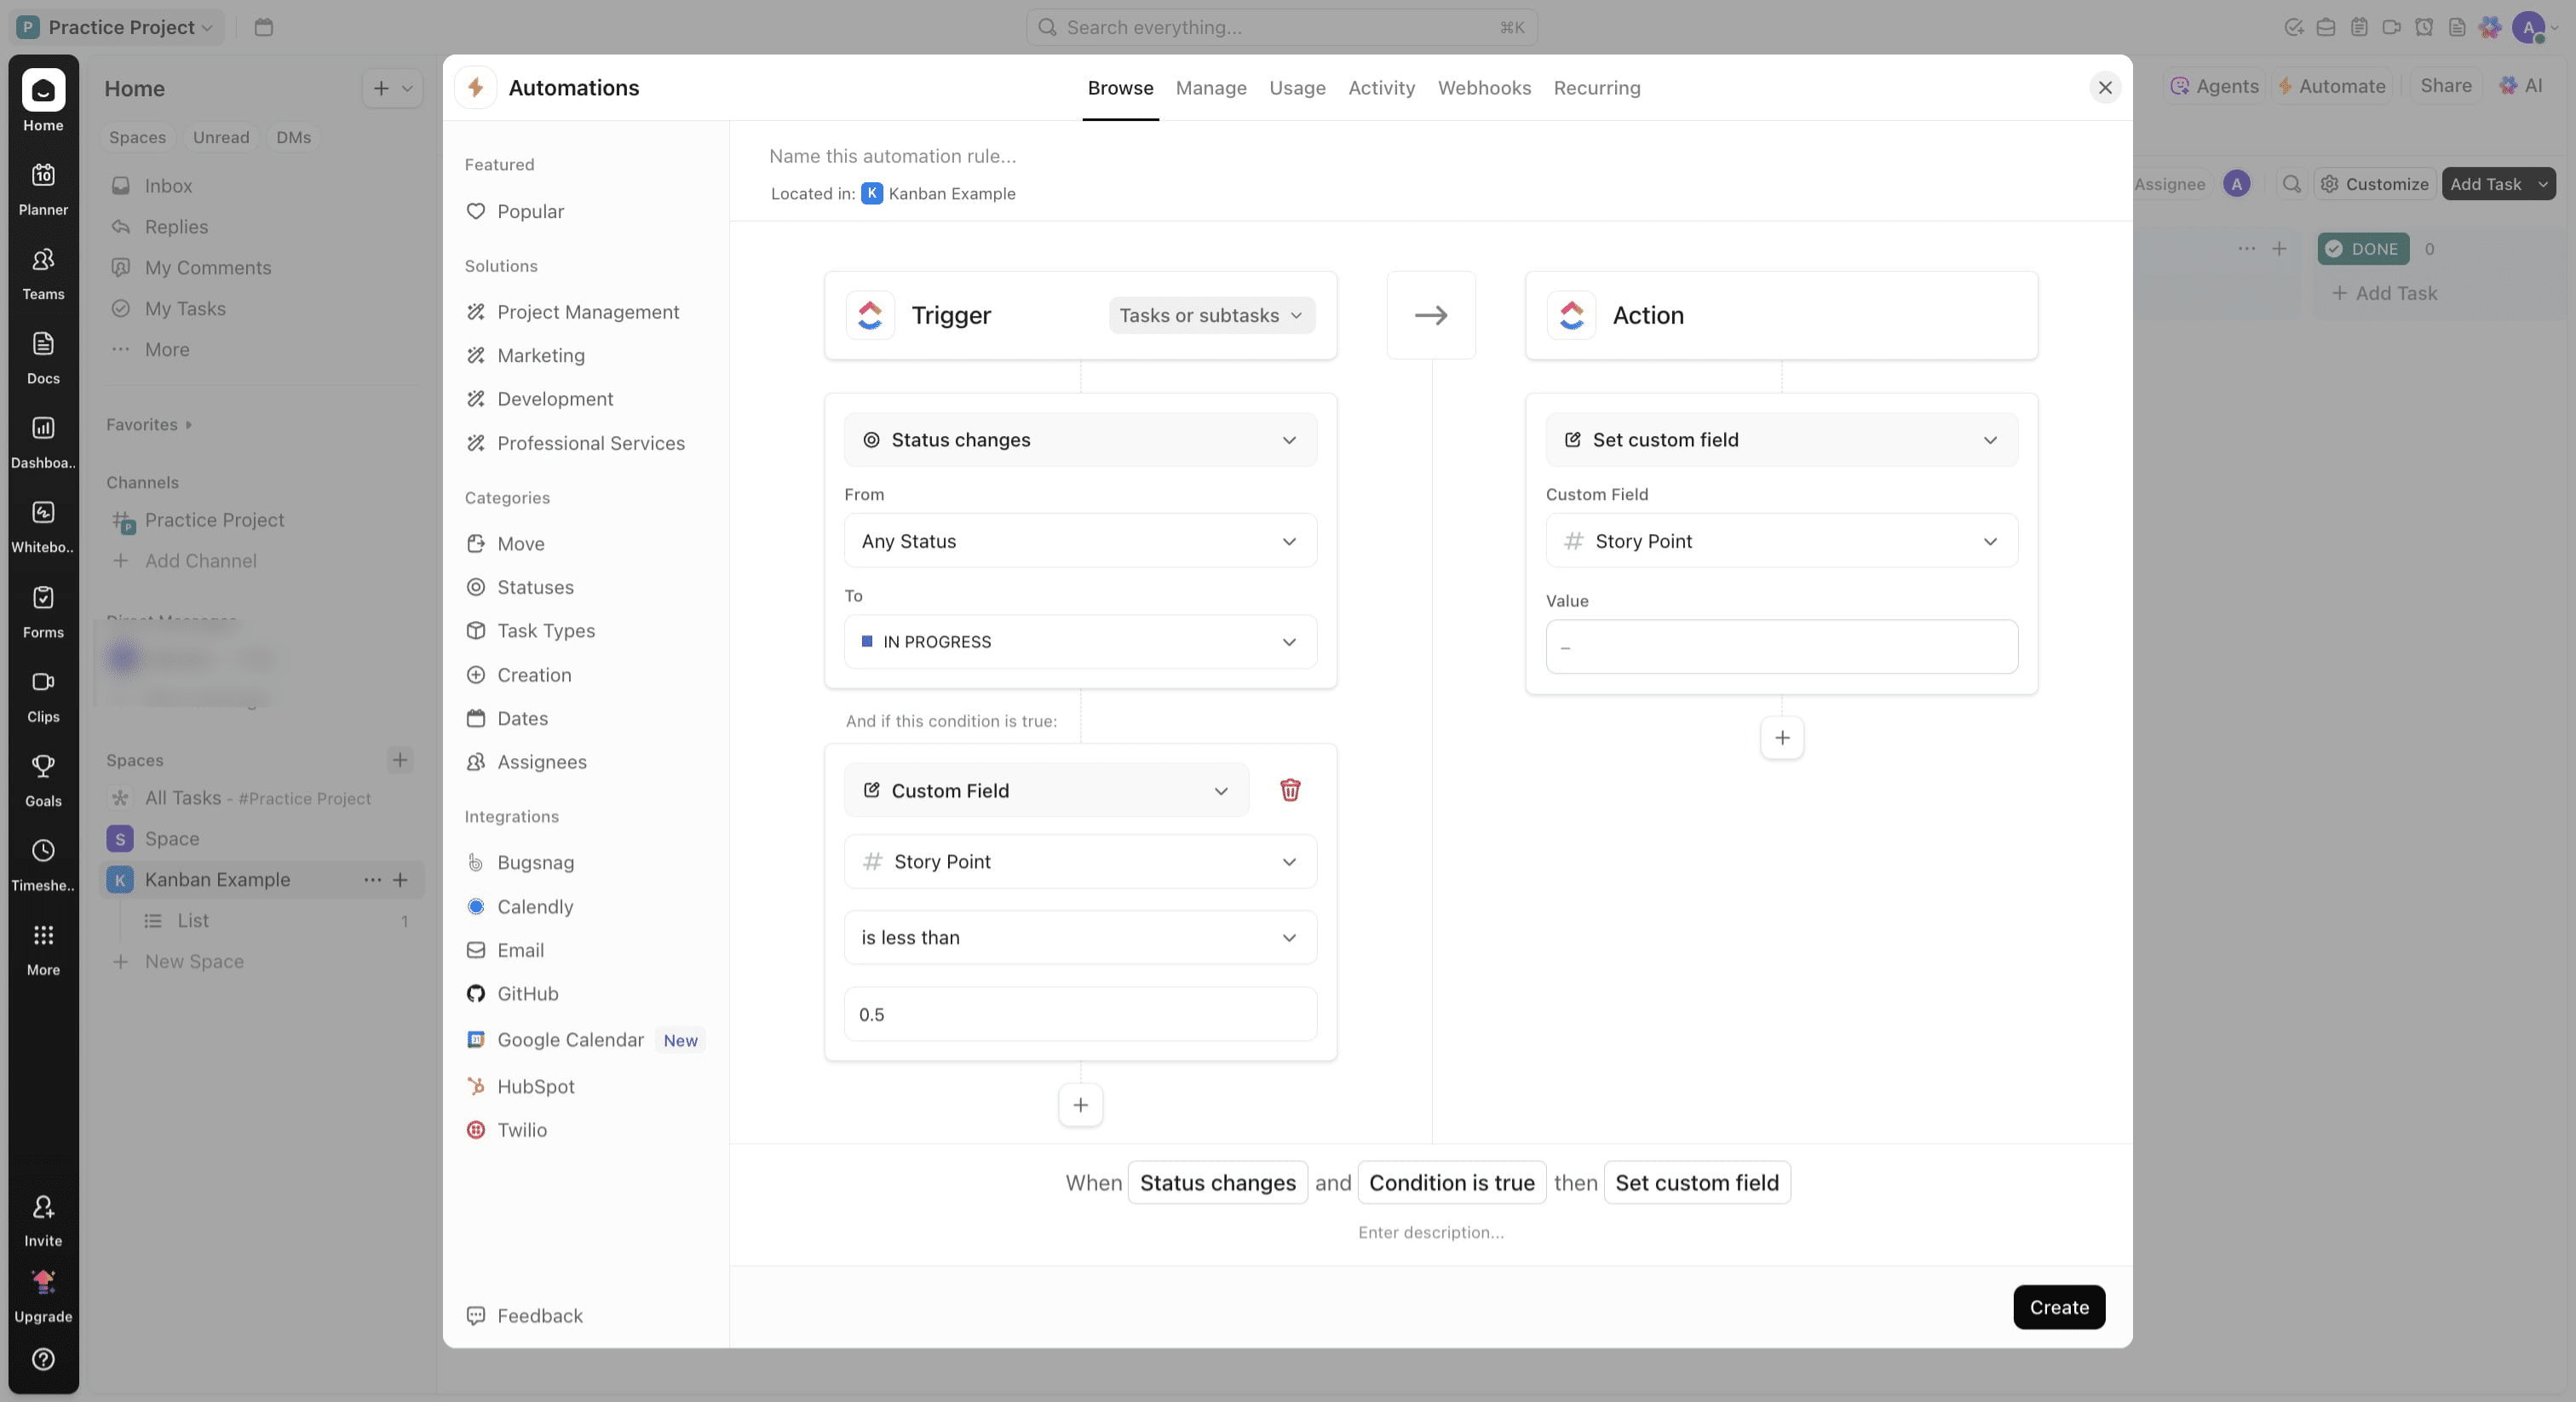
Click on "is equal to" and change to "is less than"
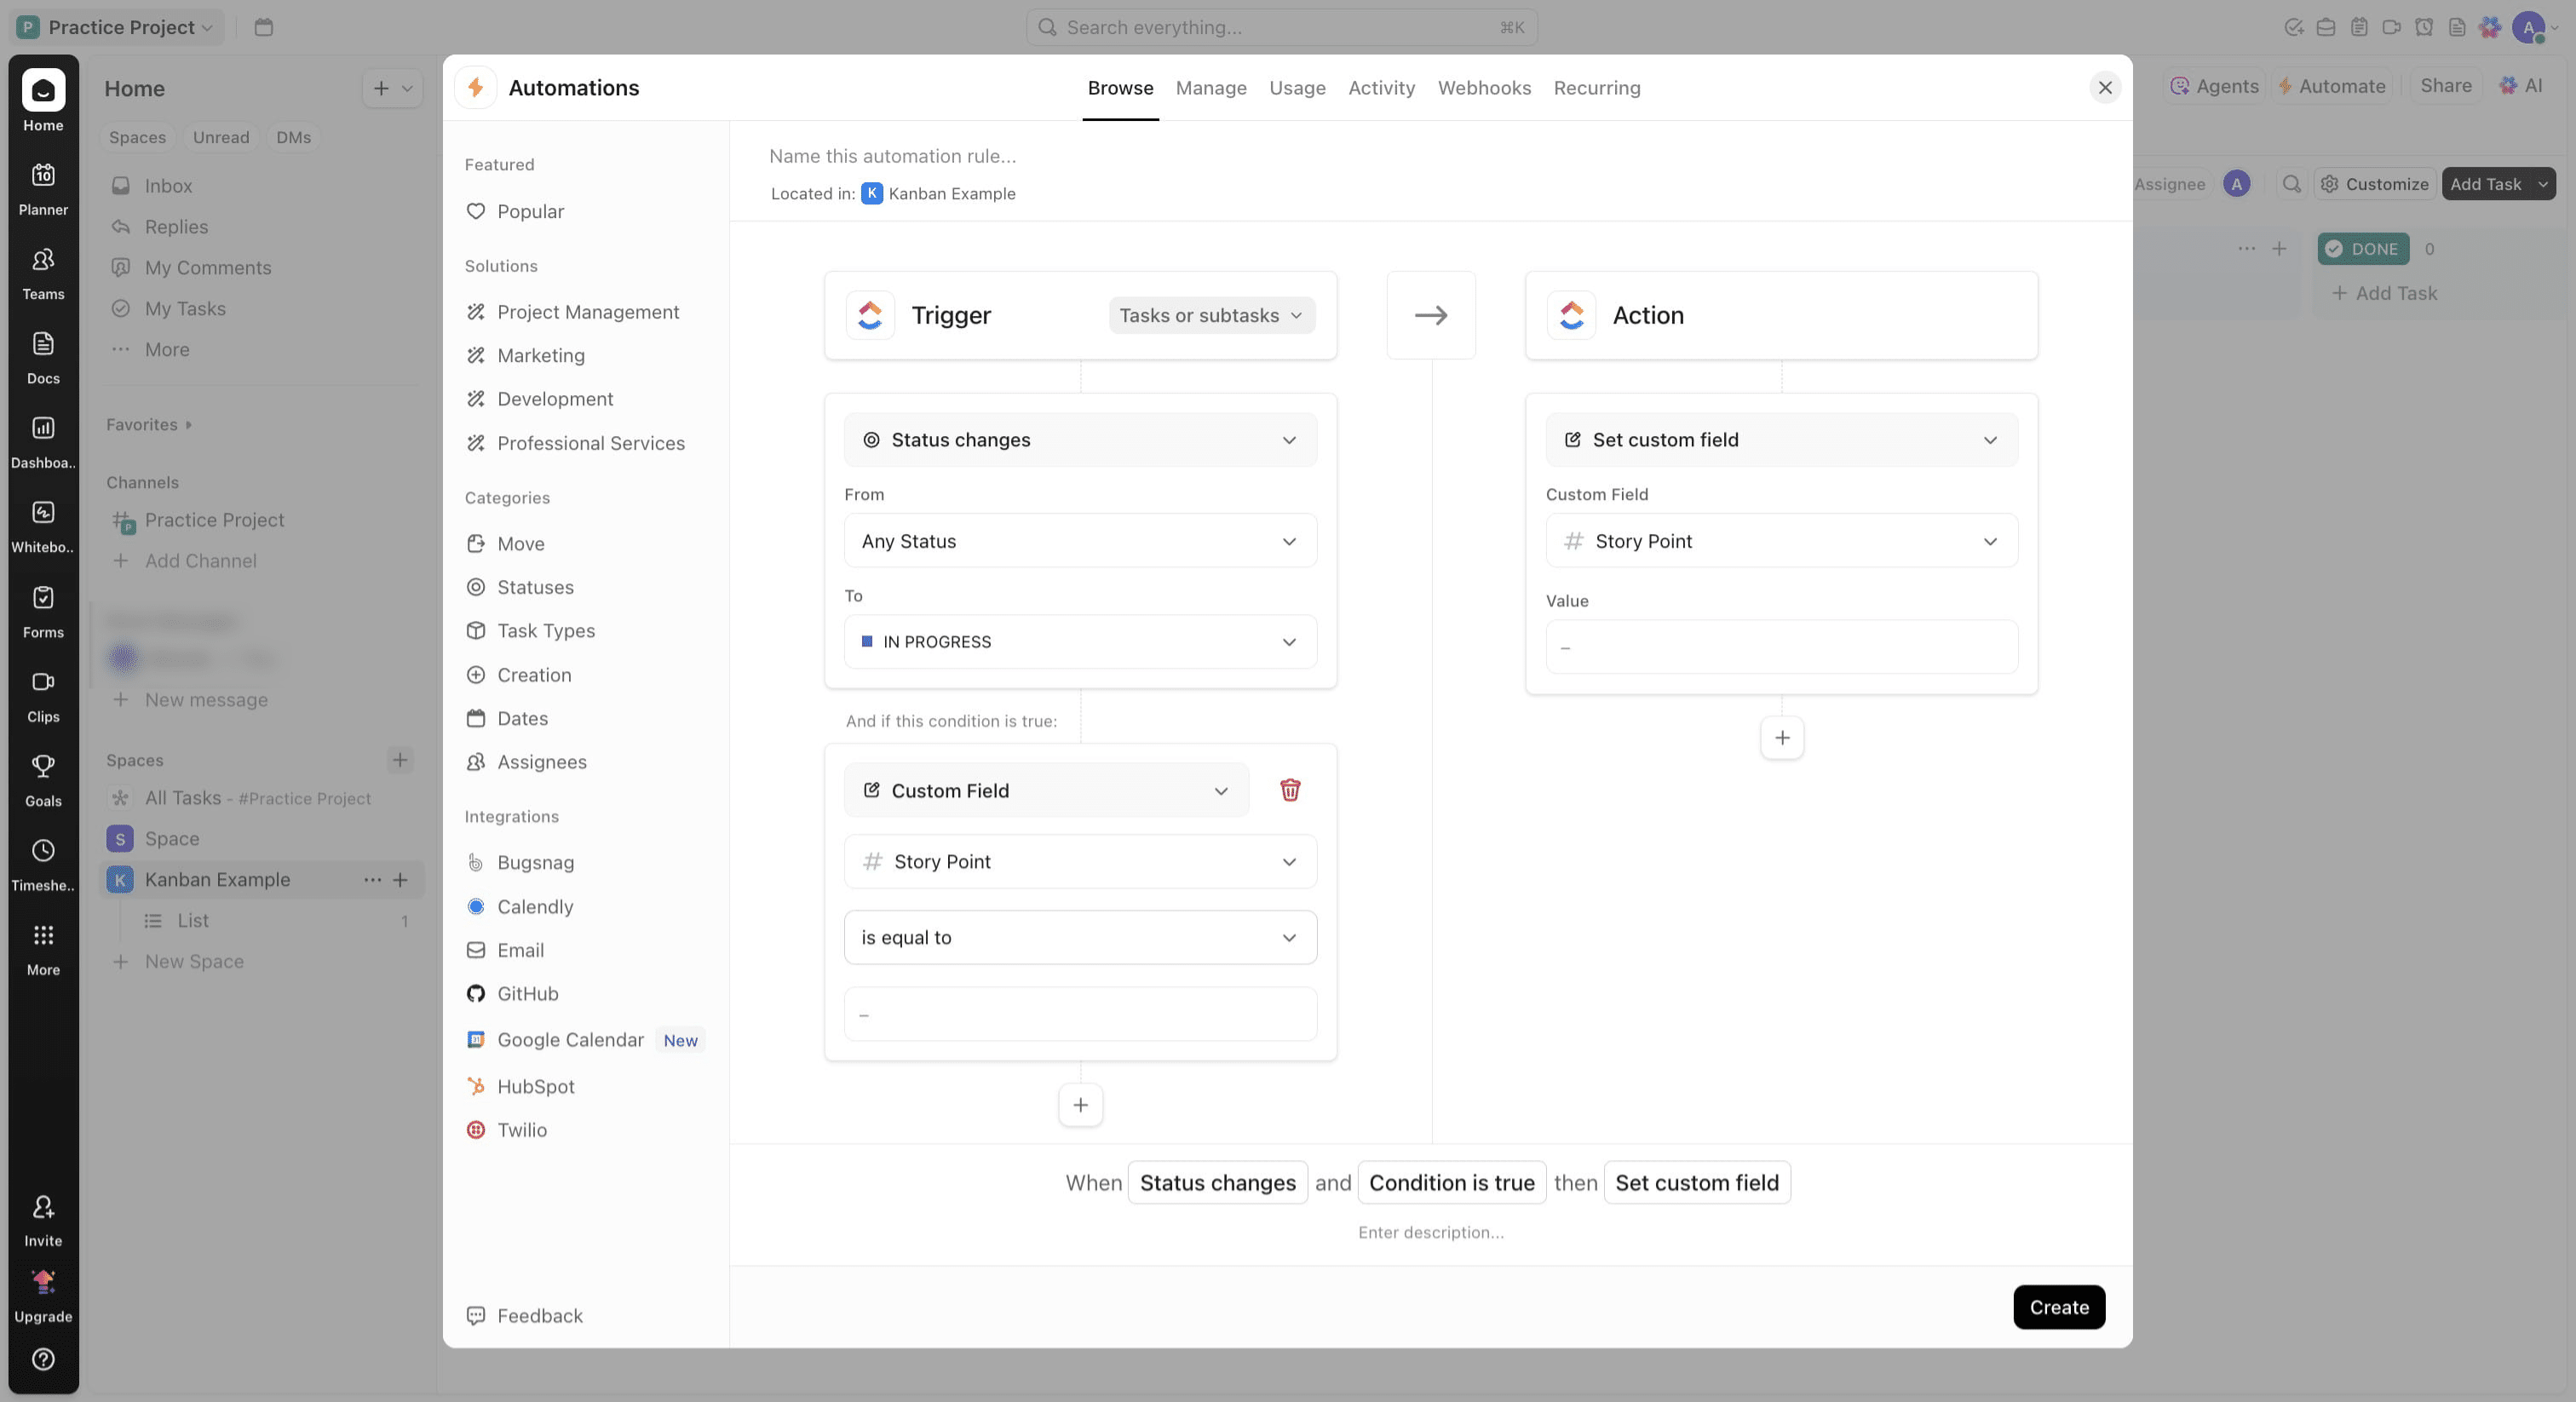
And add 0.5 in the value field
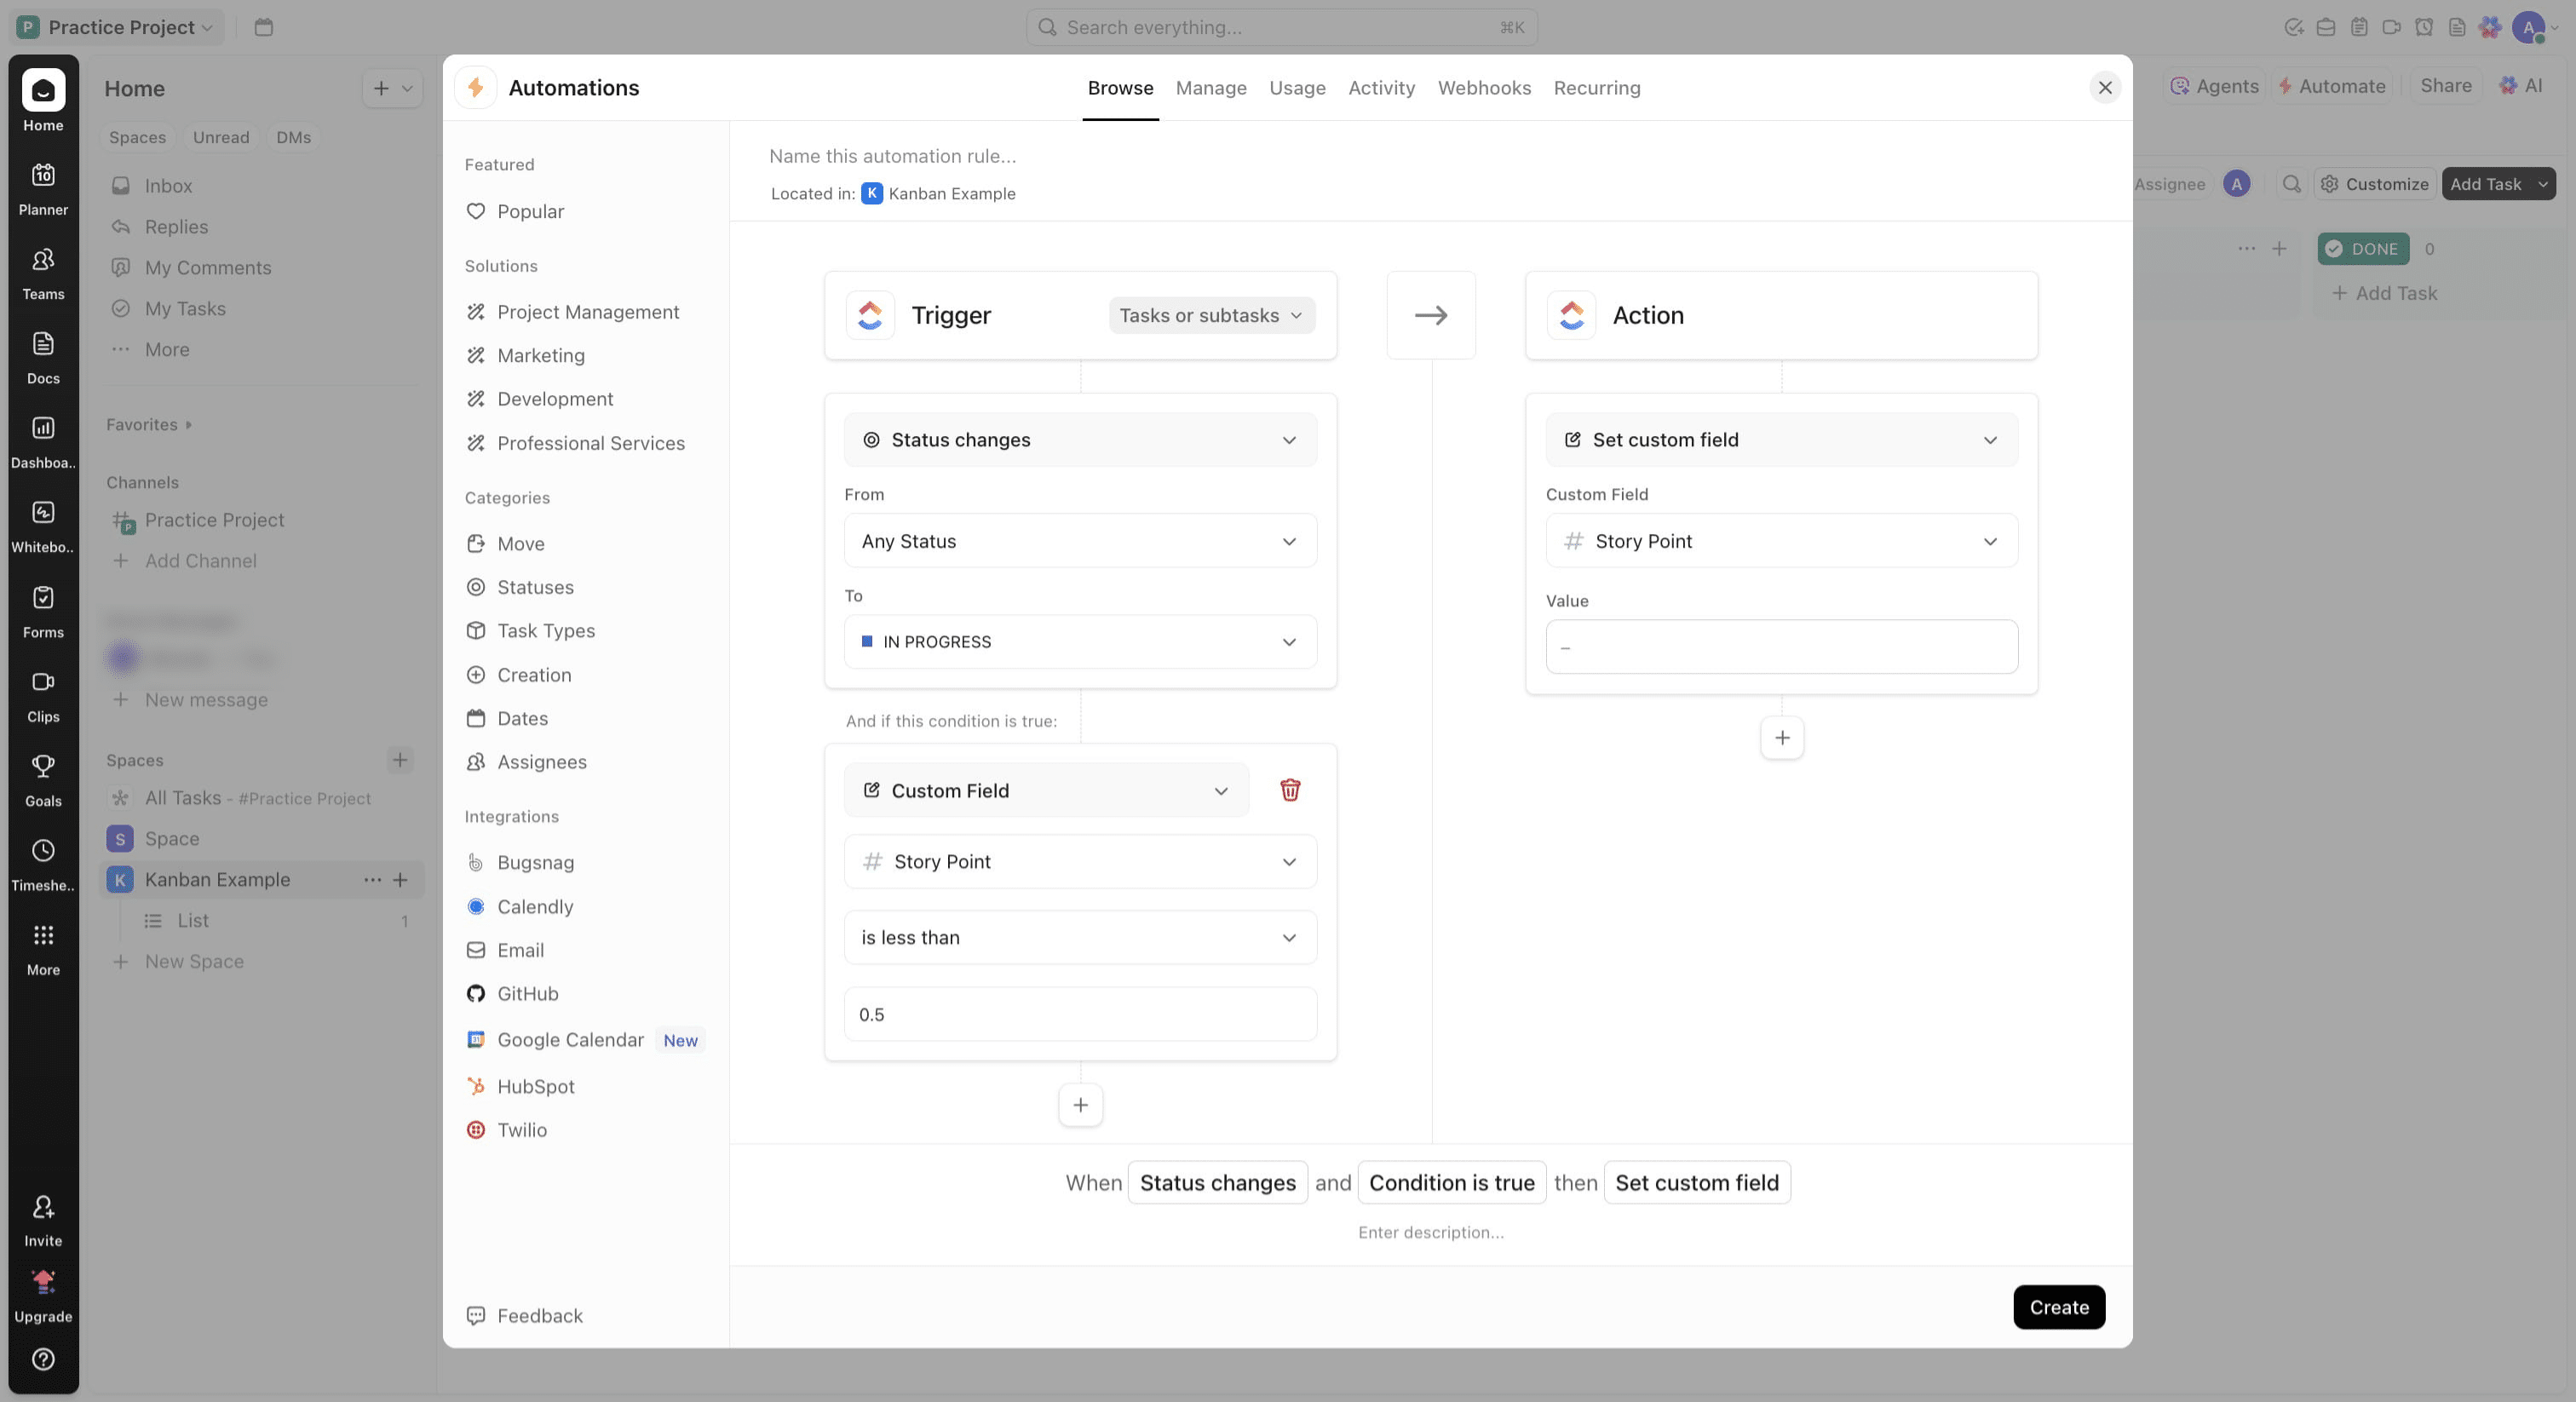
Update the Action section to include and set Custom field, select story point and add 3 to the value field
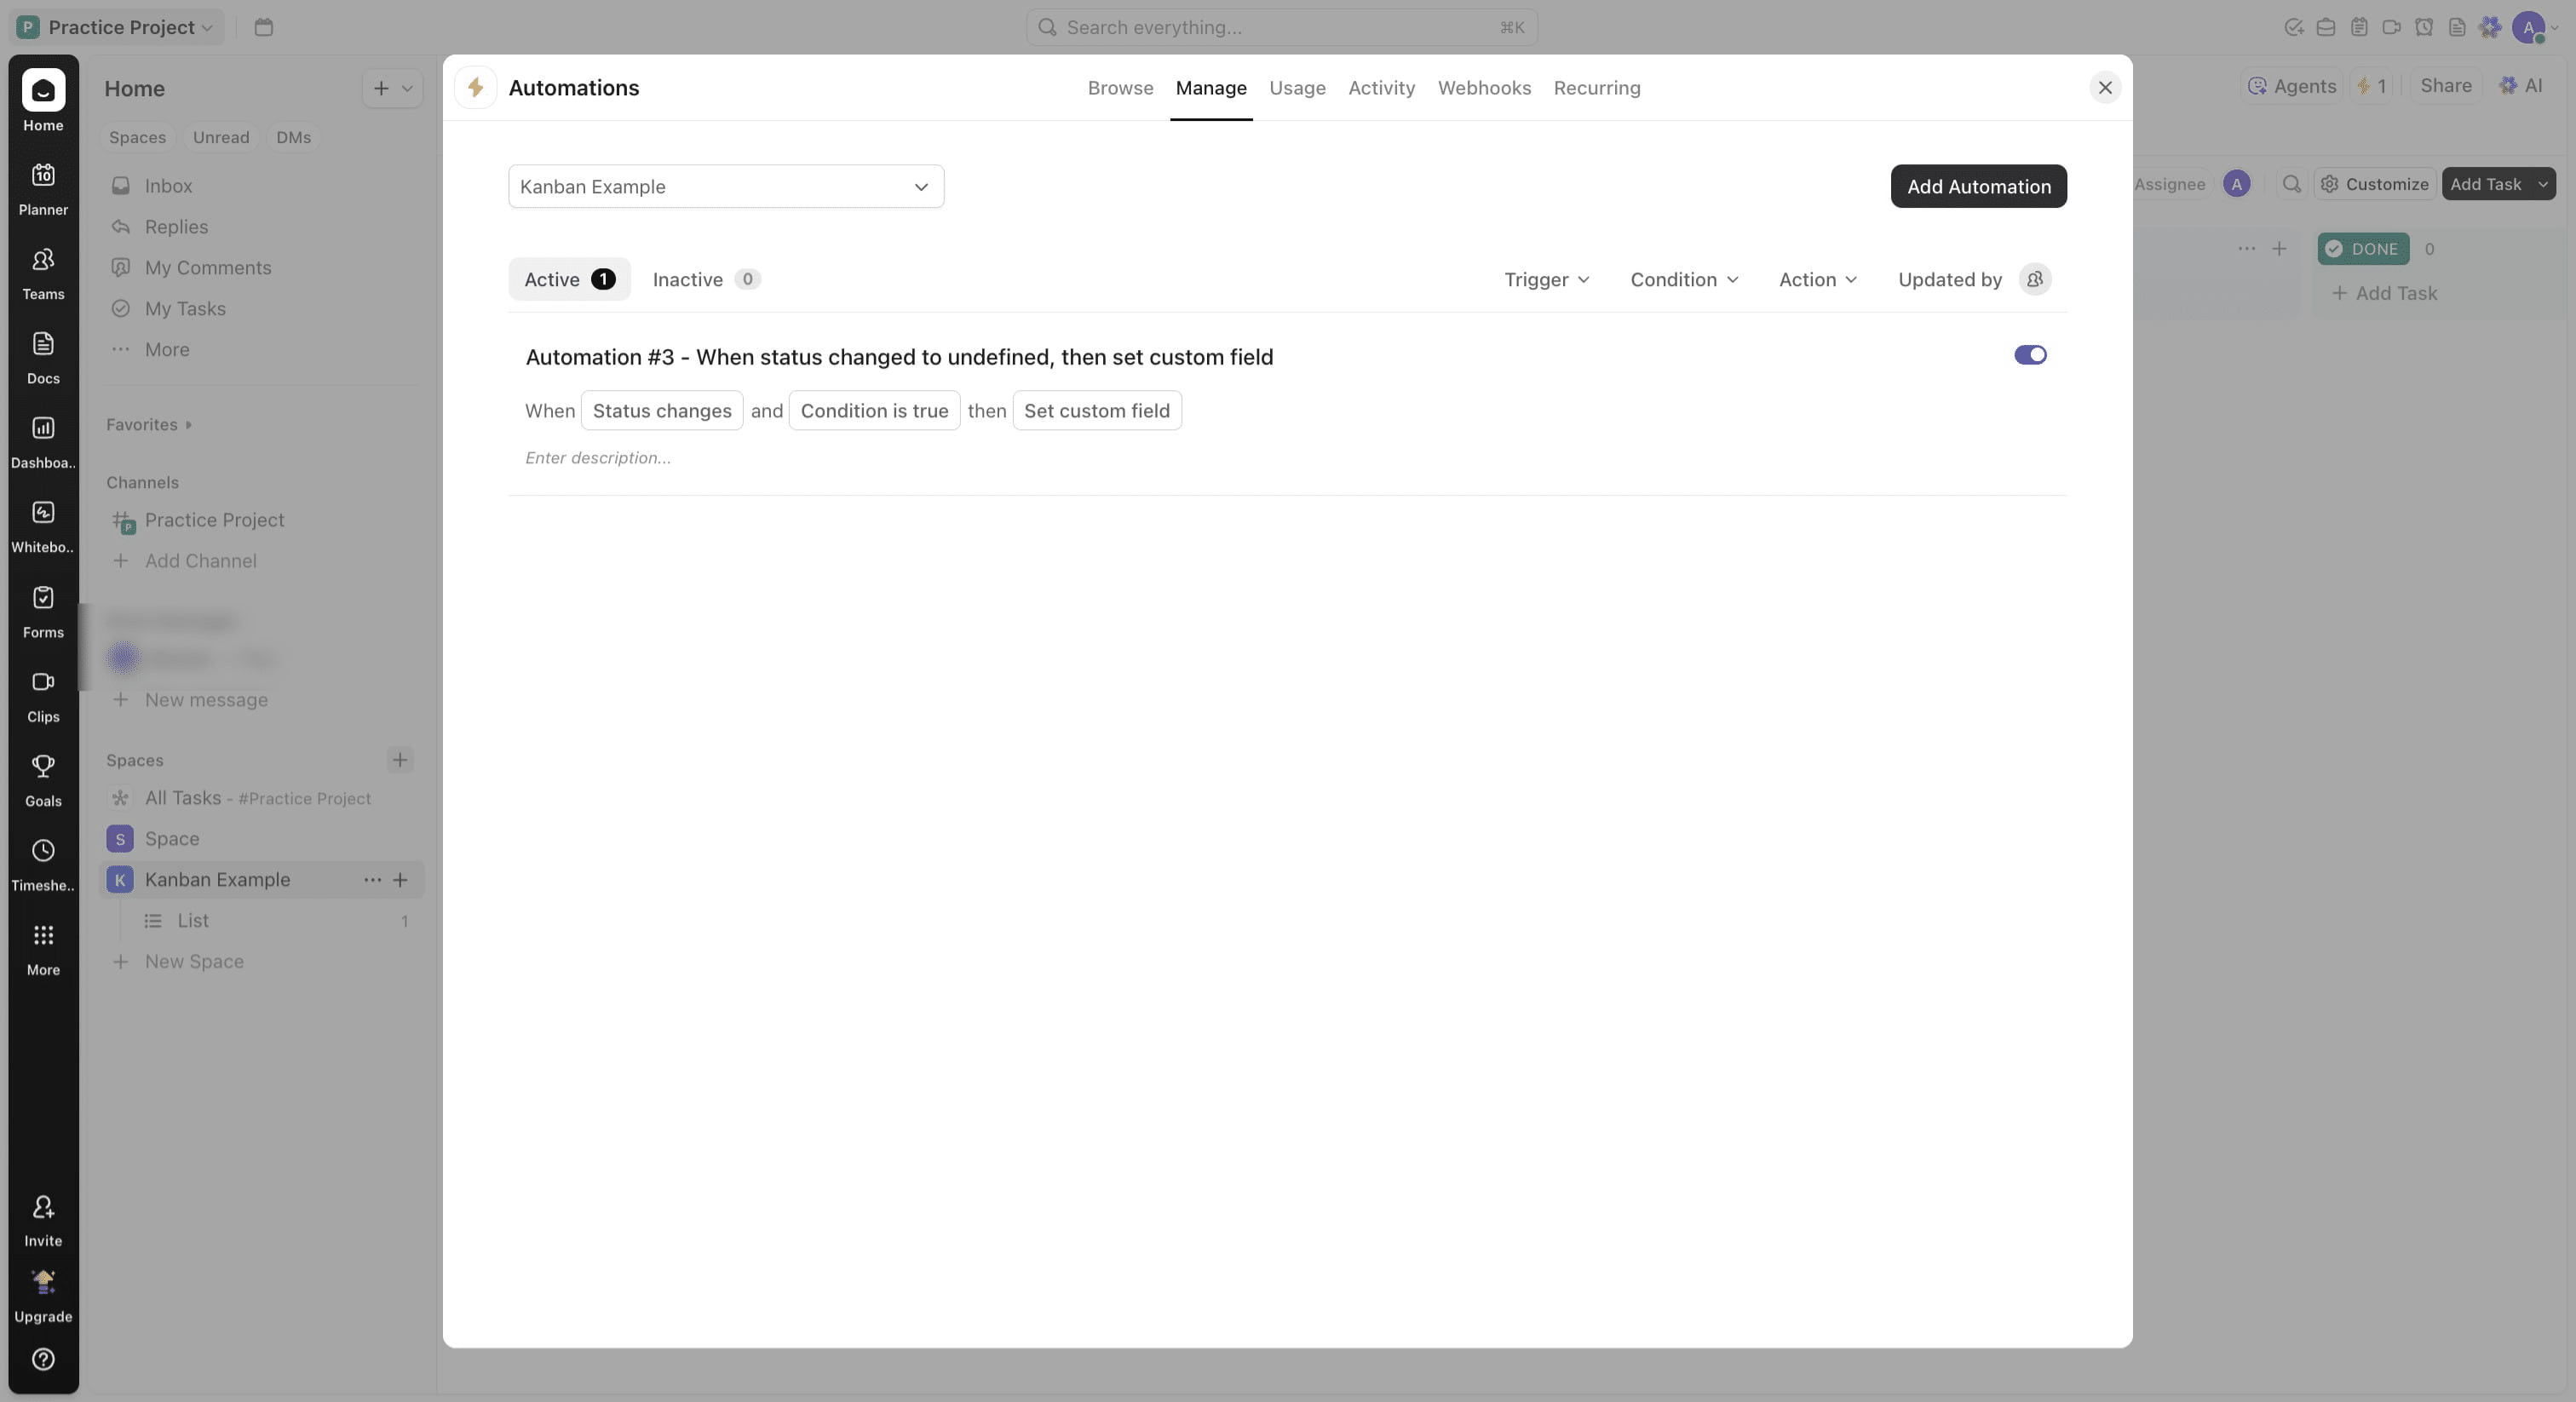
Click on "Create"

To add more automation, Click on "Add Automation"
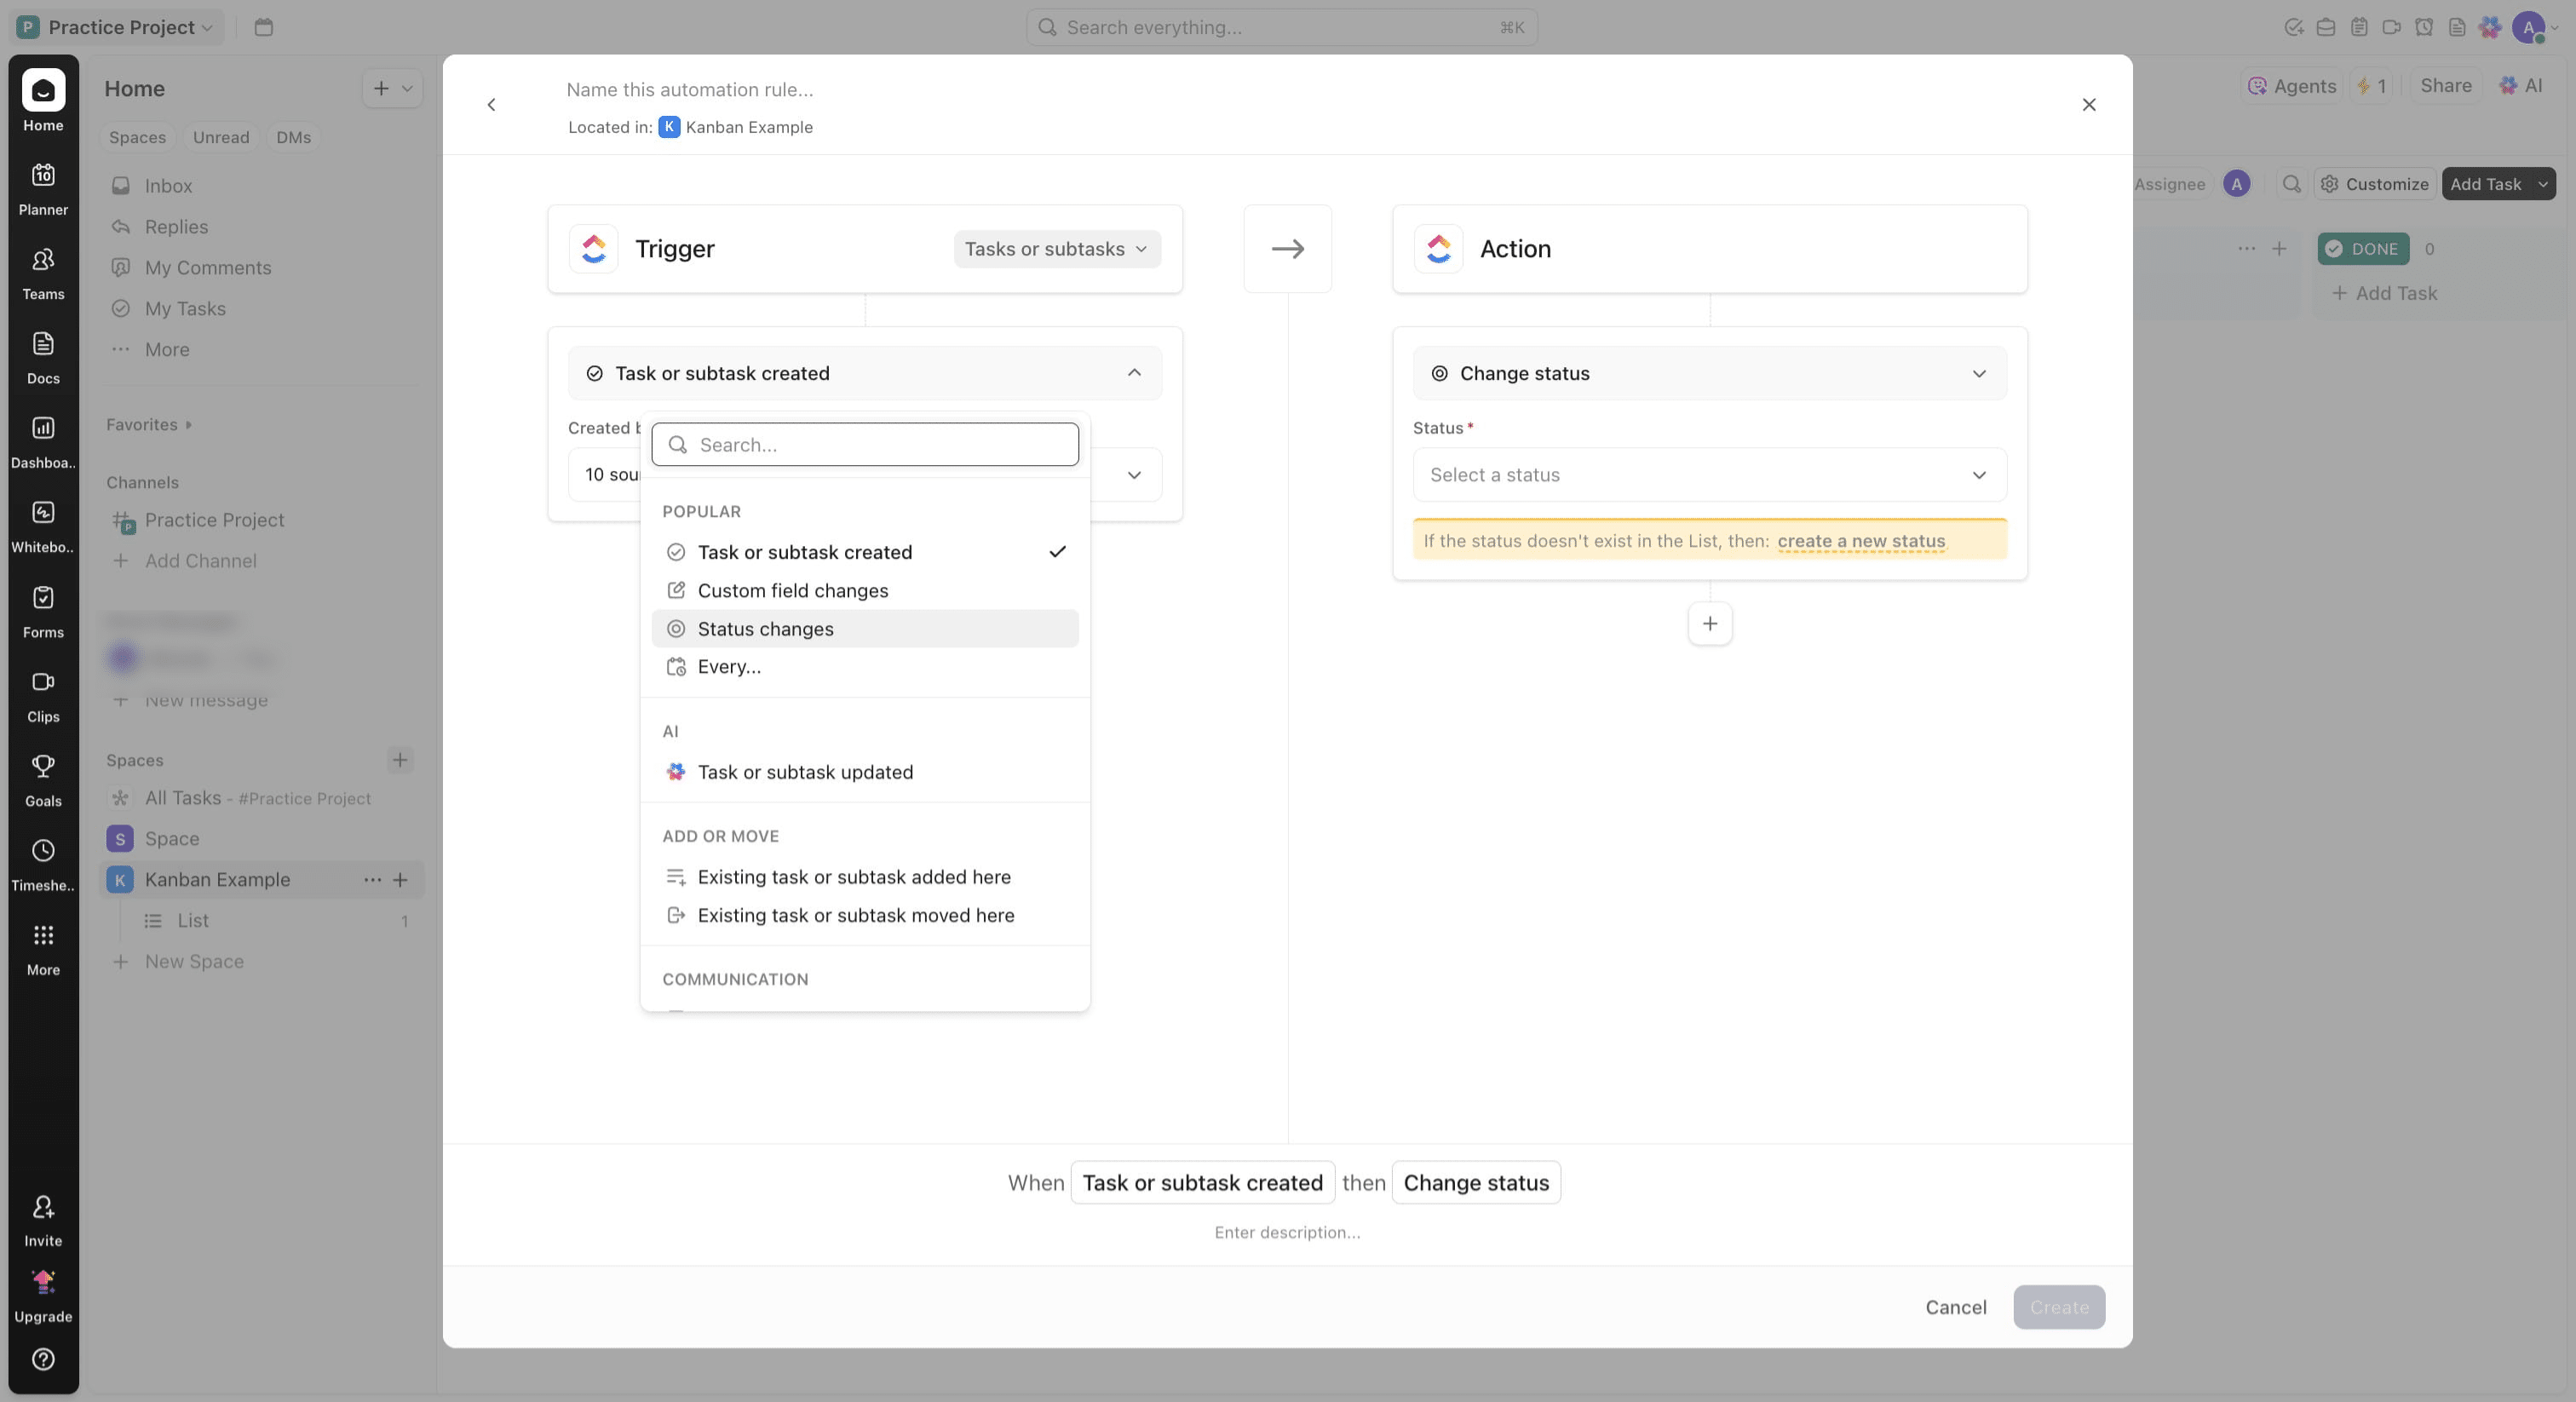
Click on the trigger option you want to use
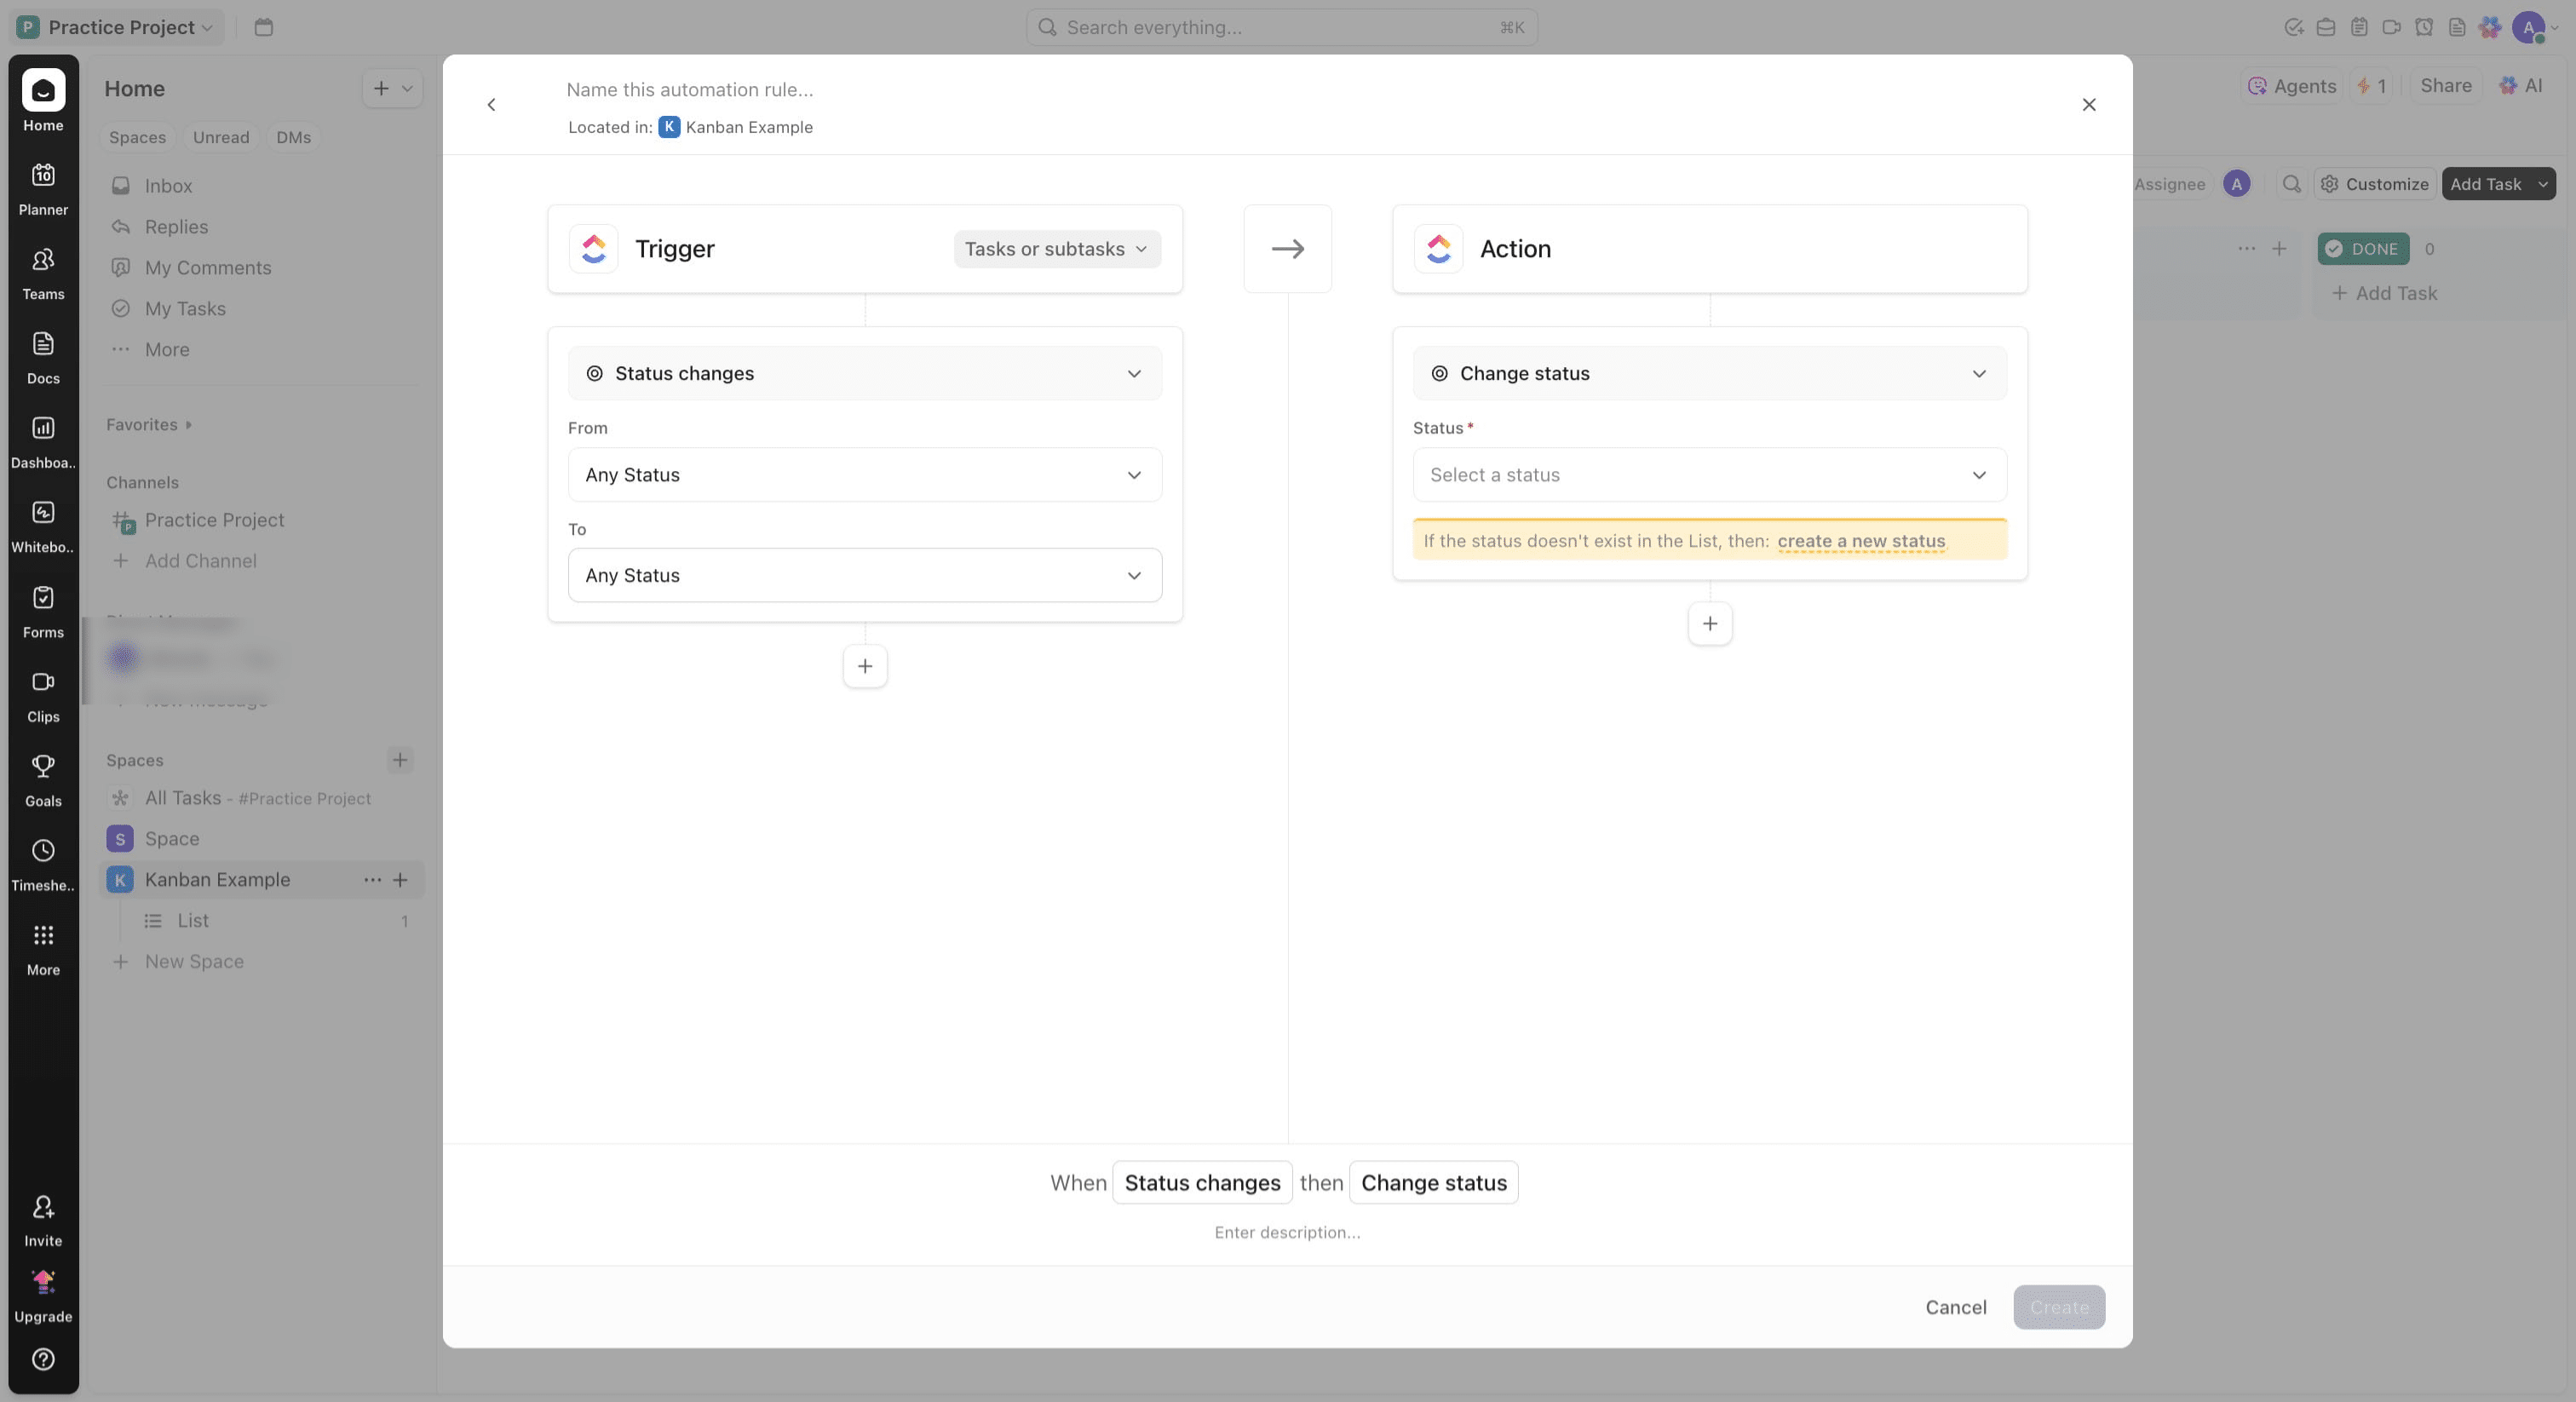
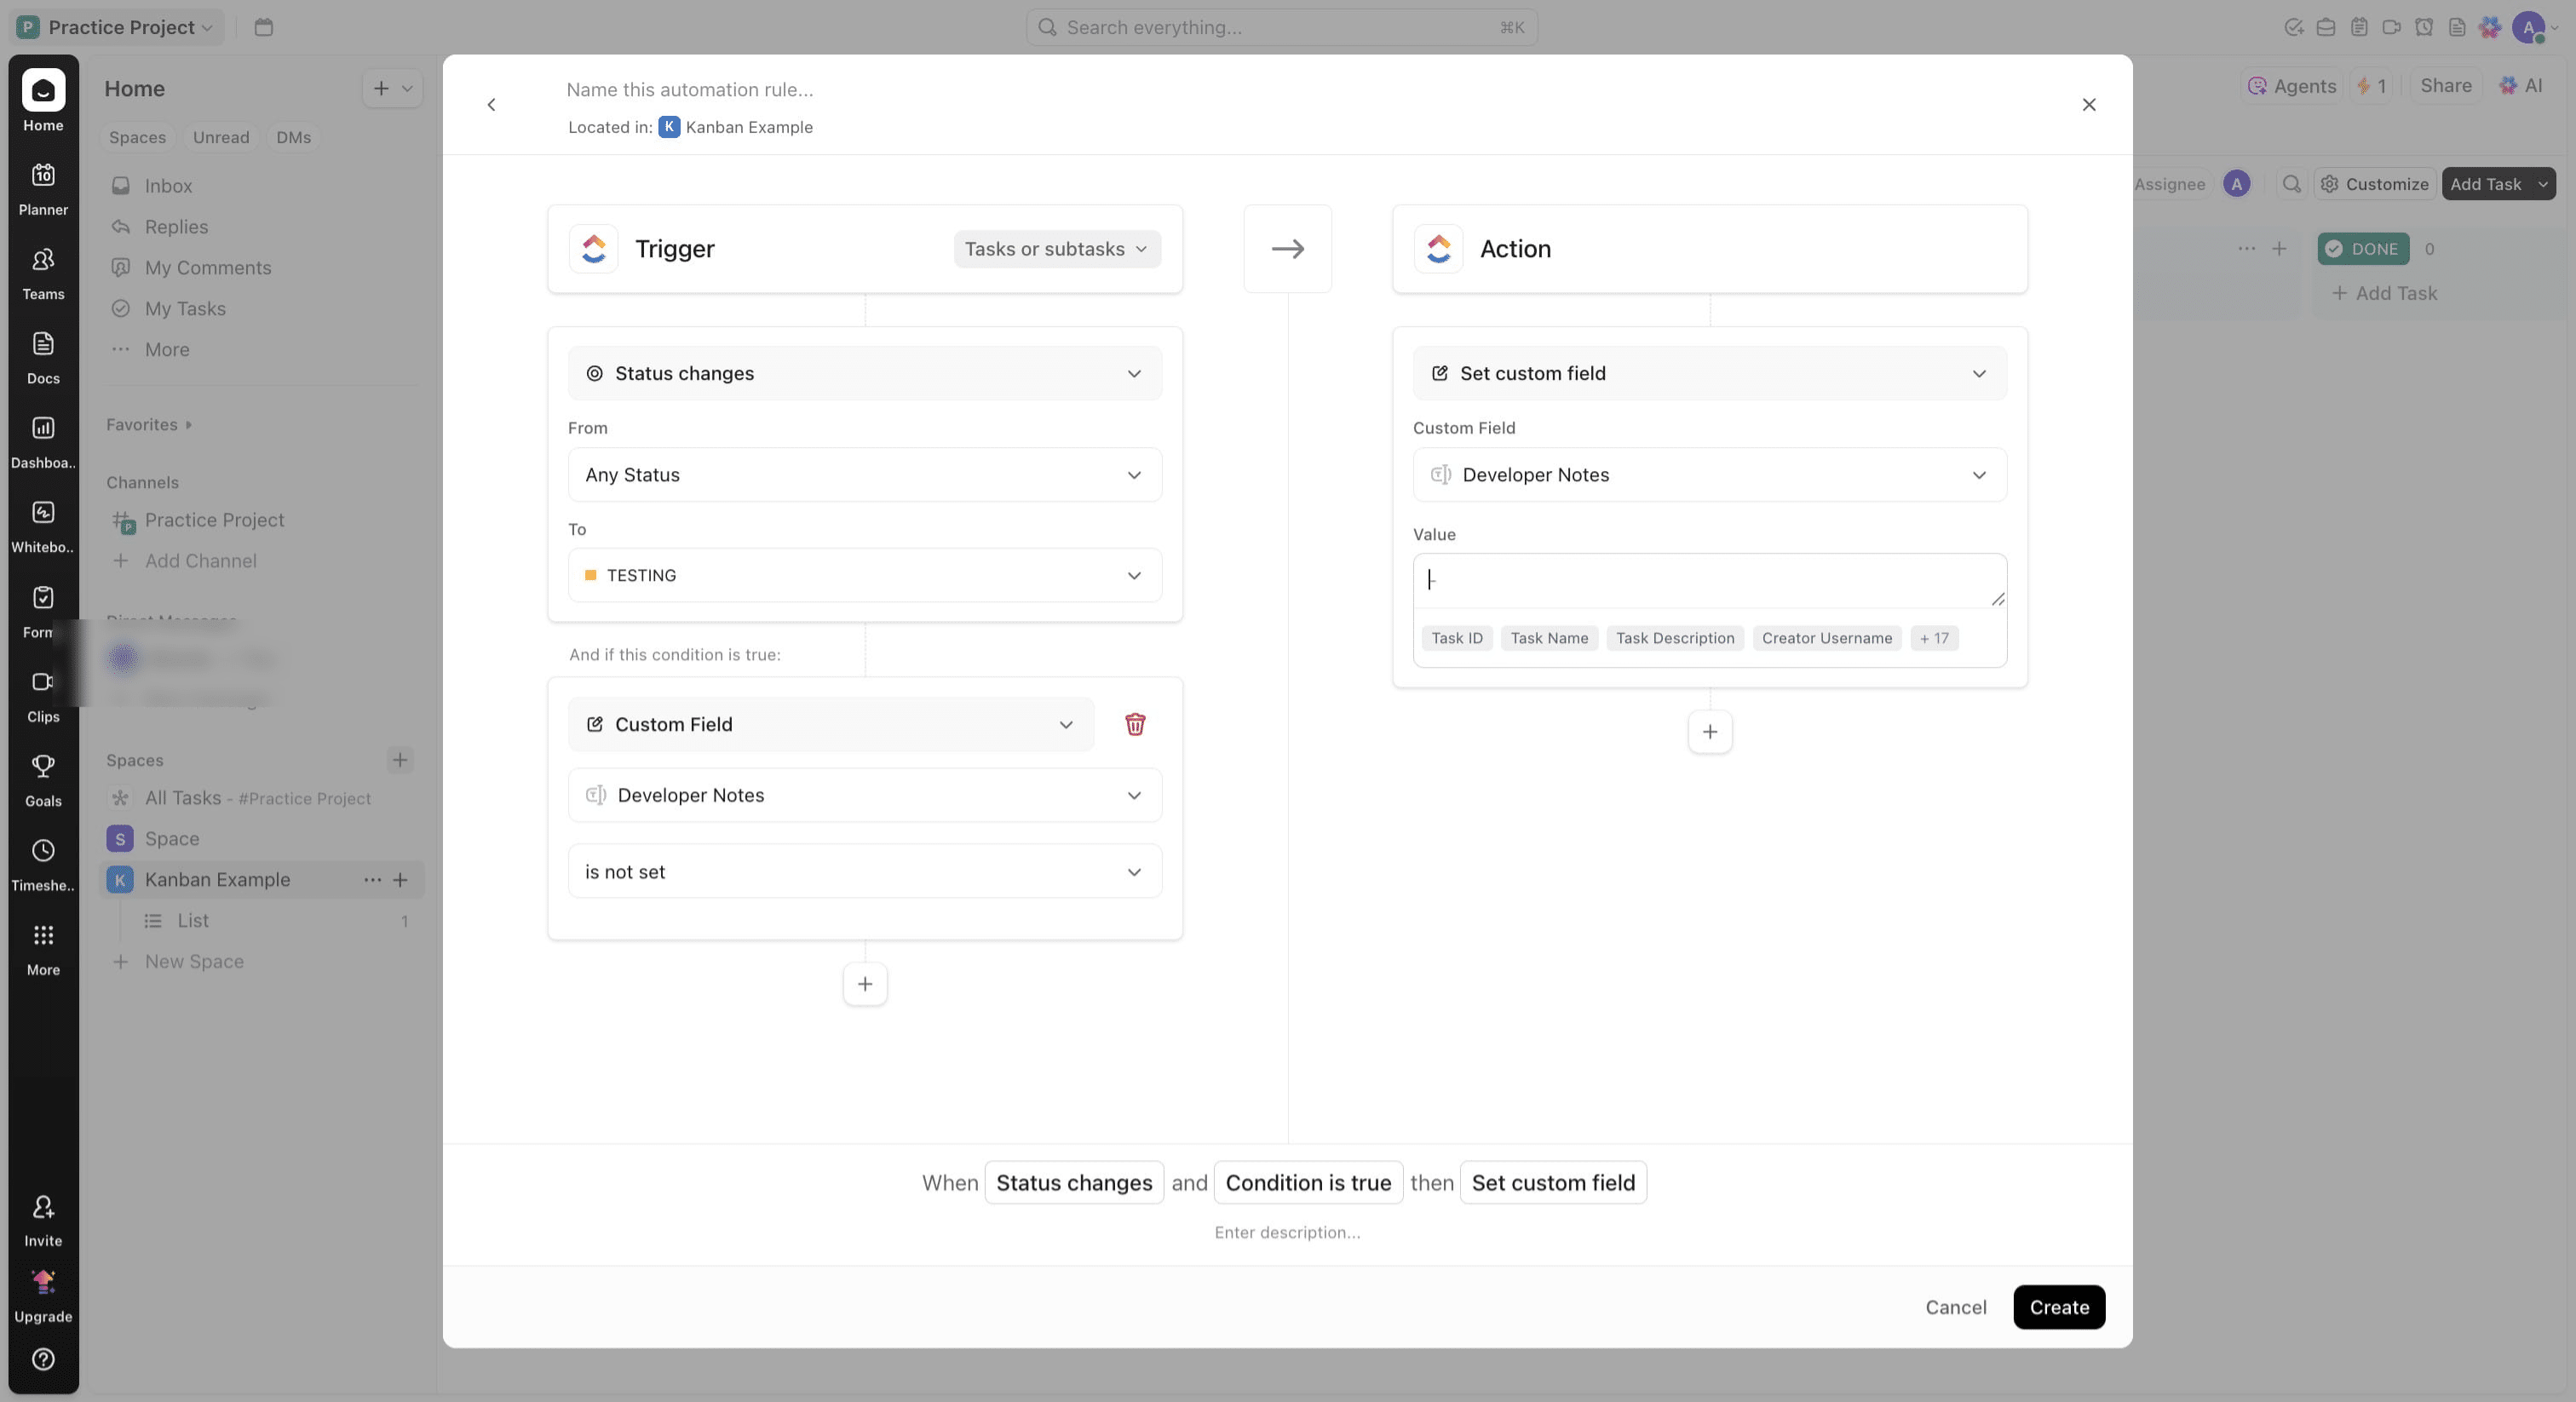
Click on "Status changes"
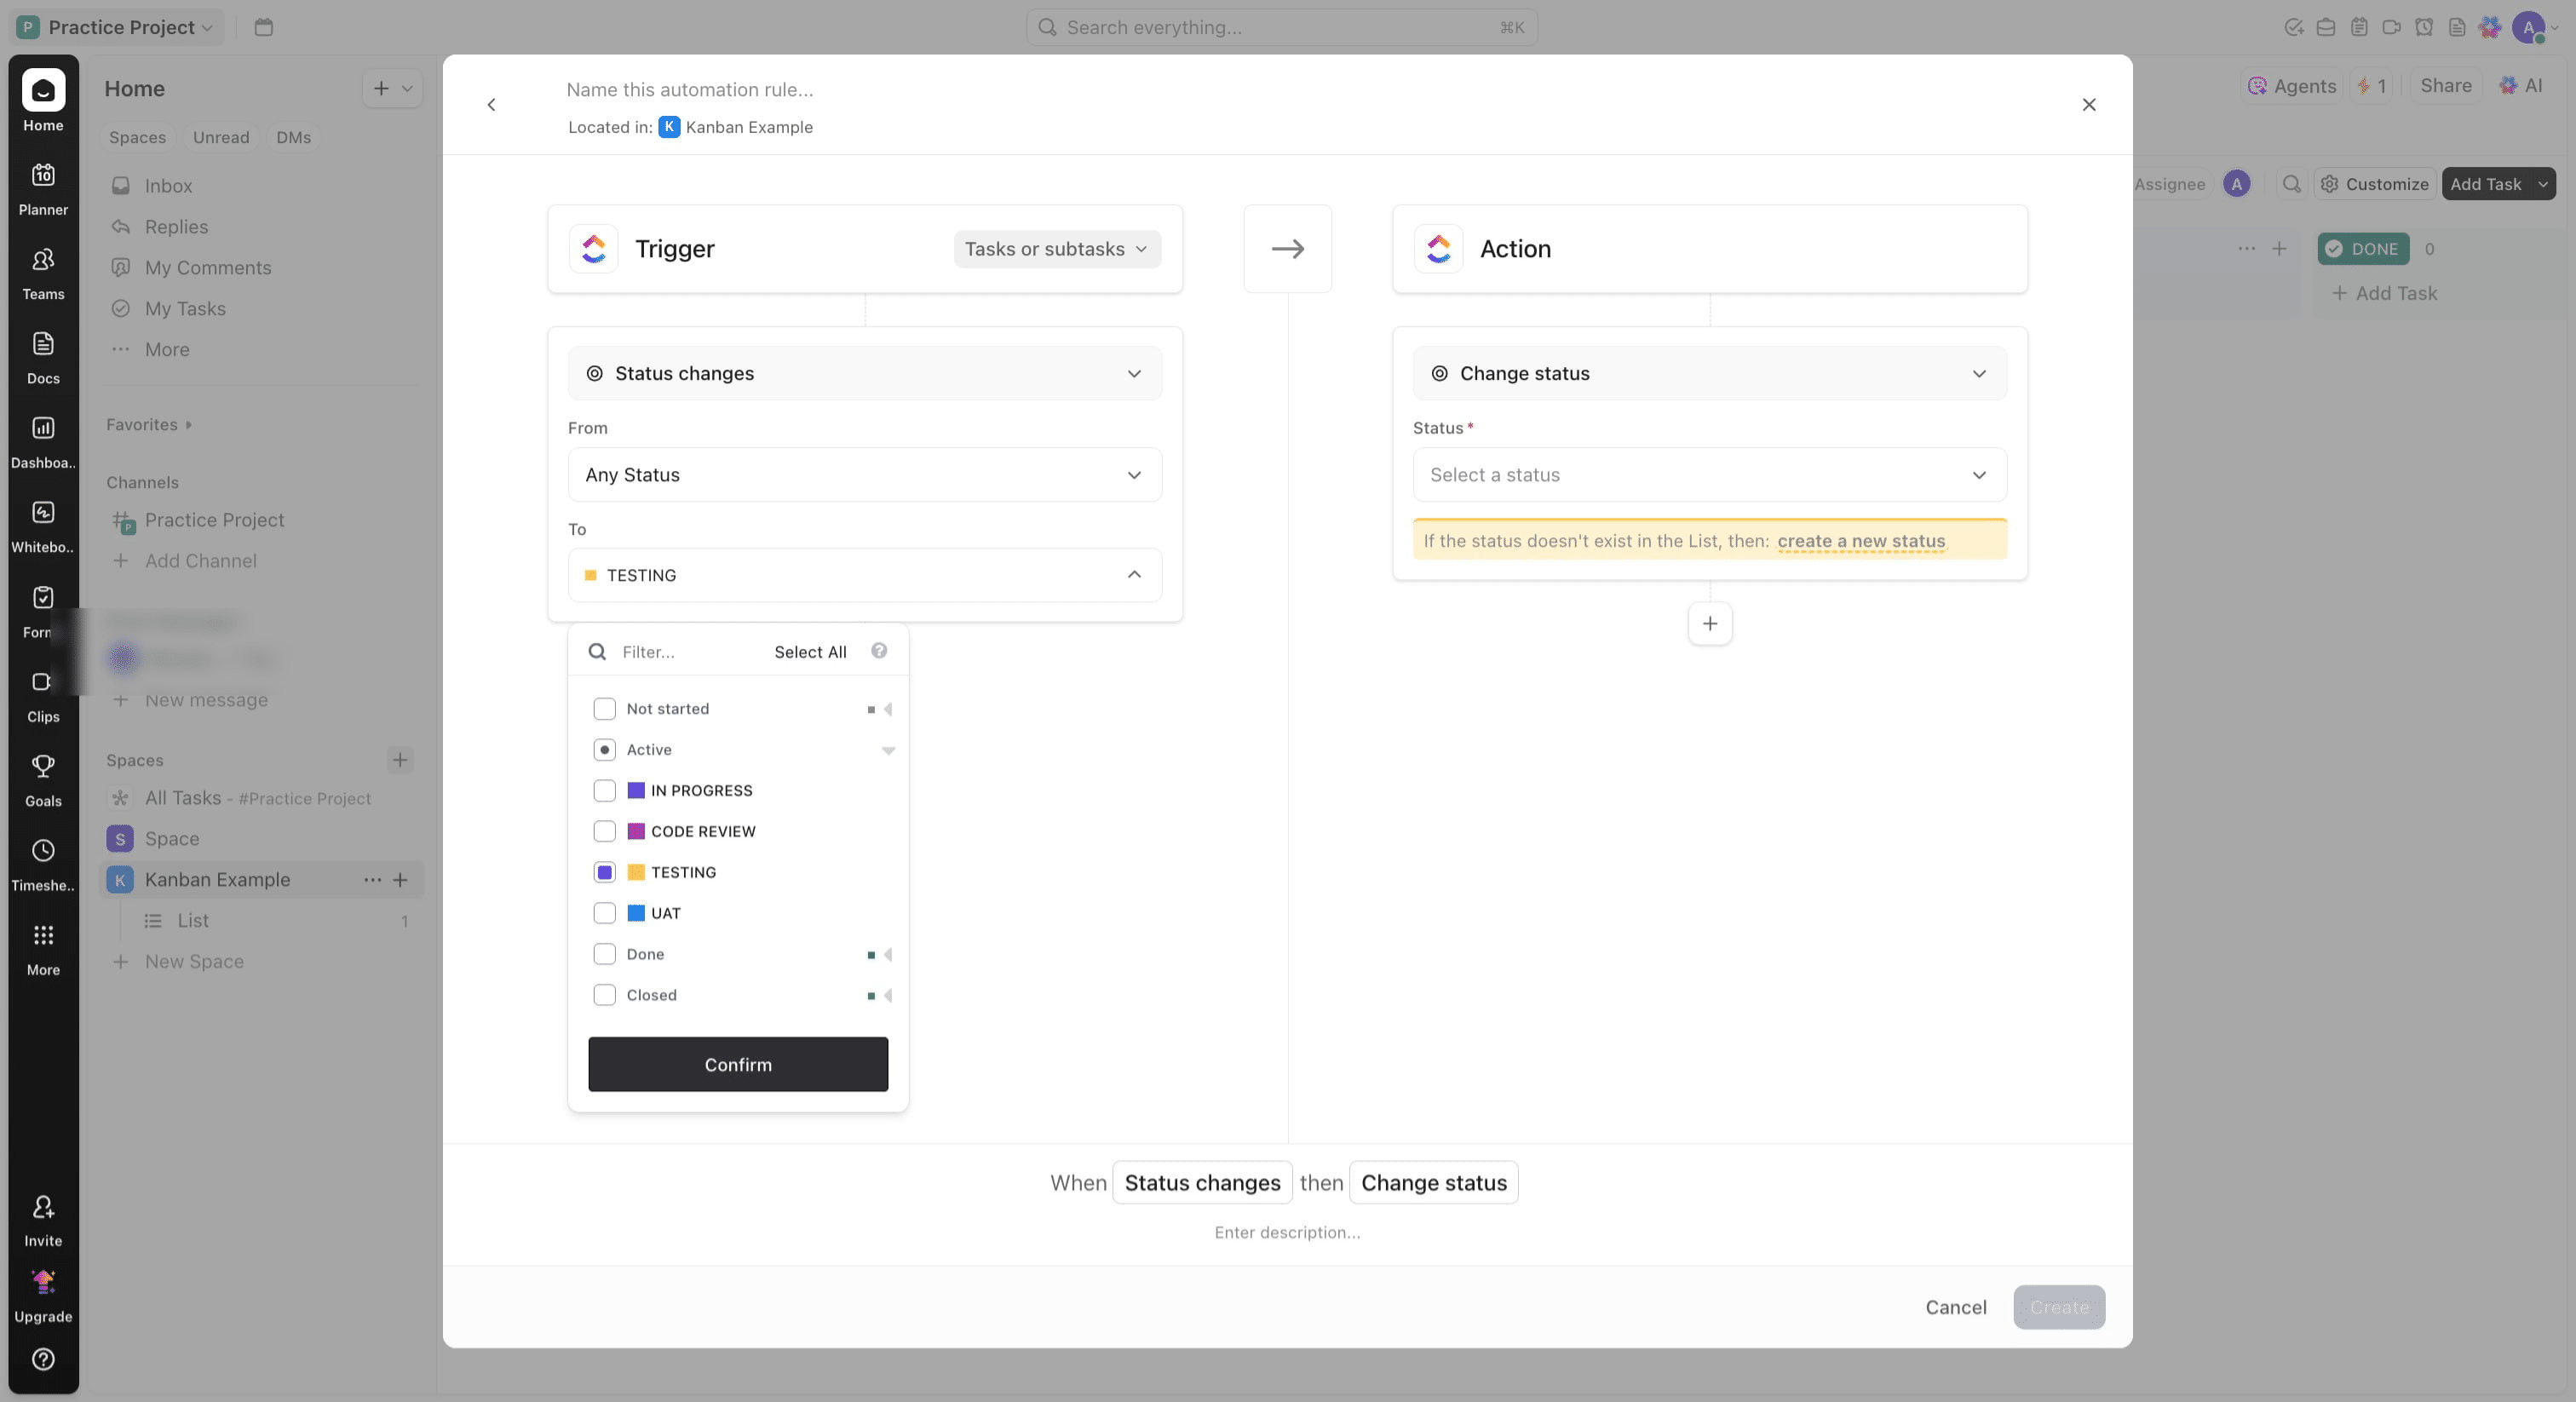
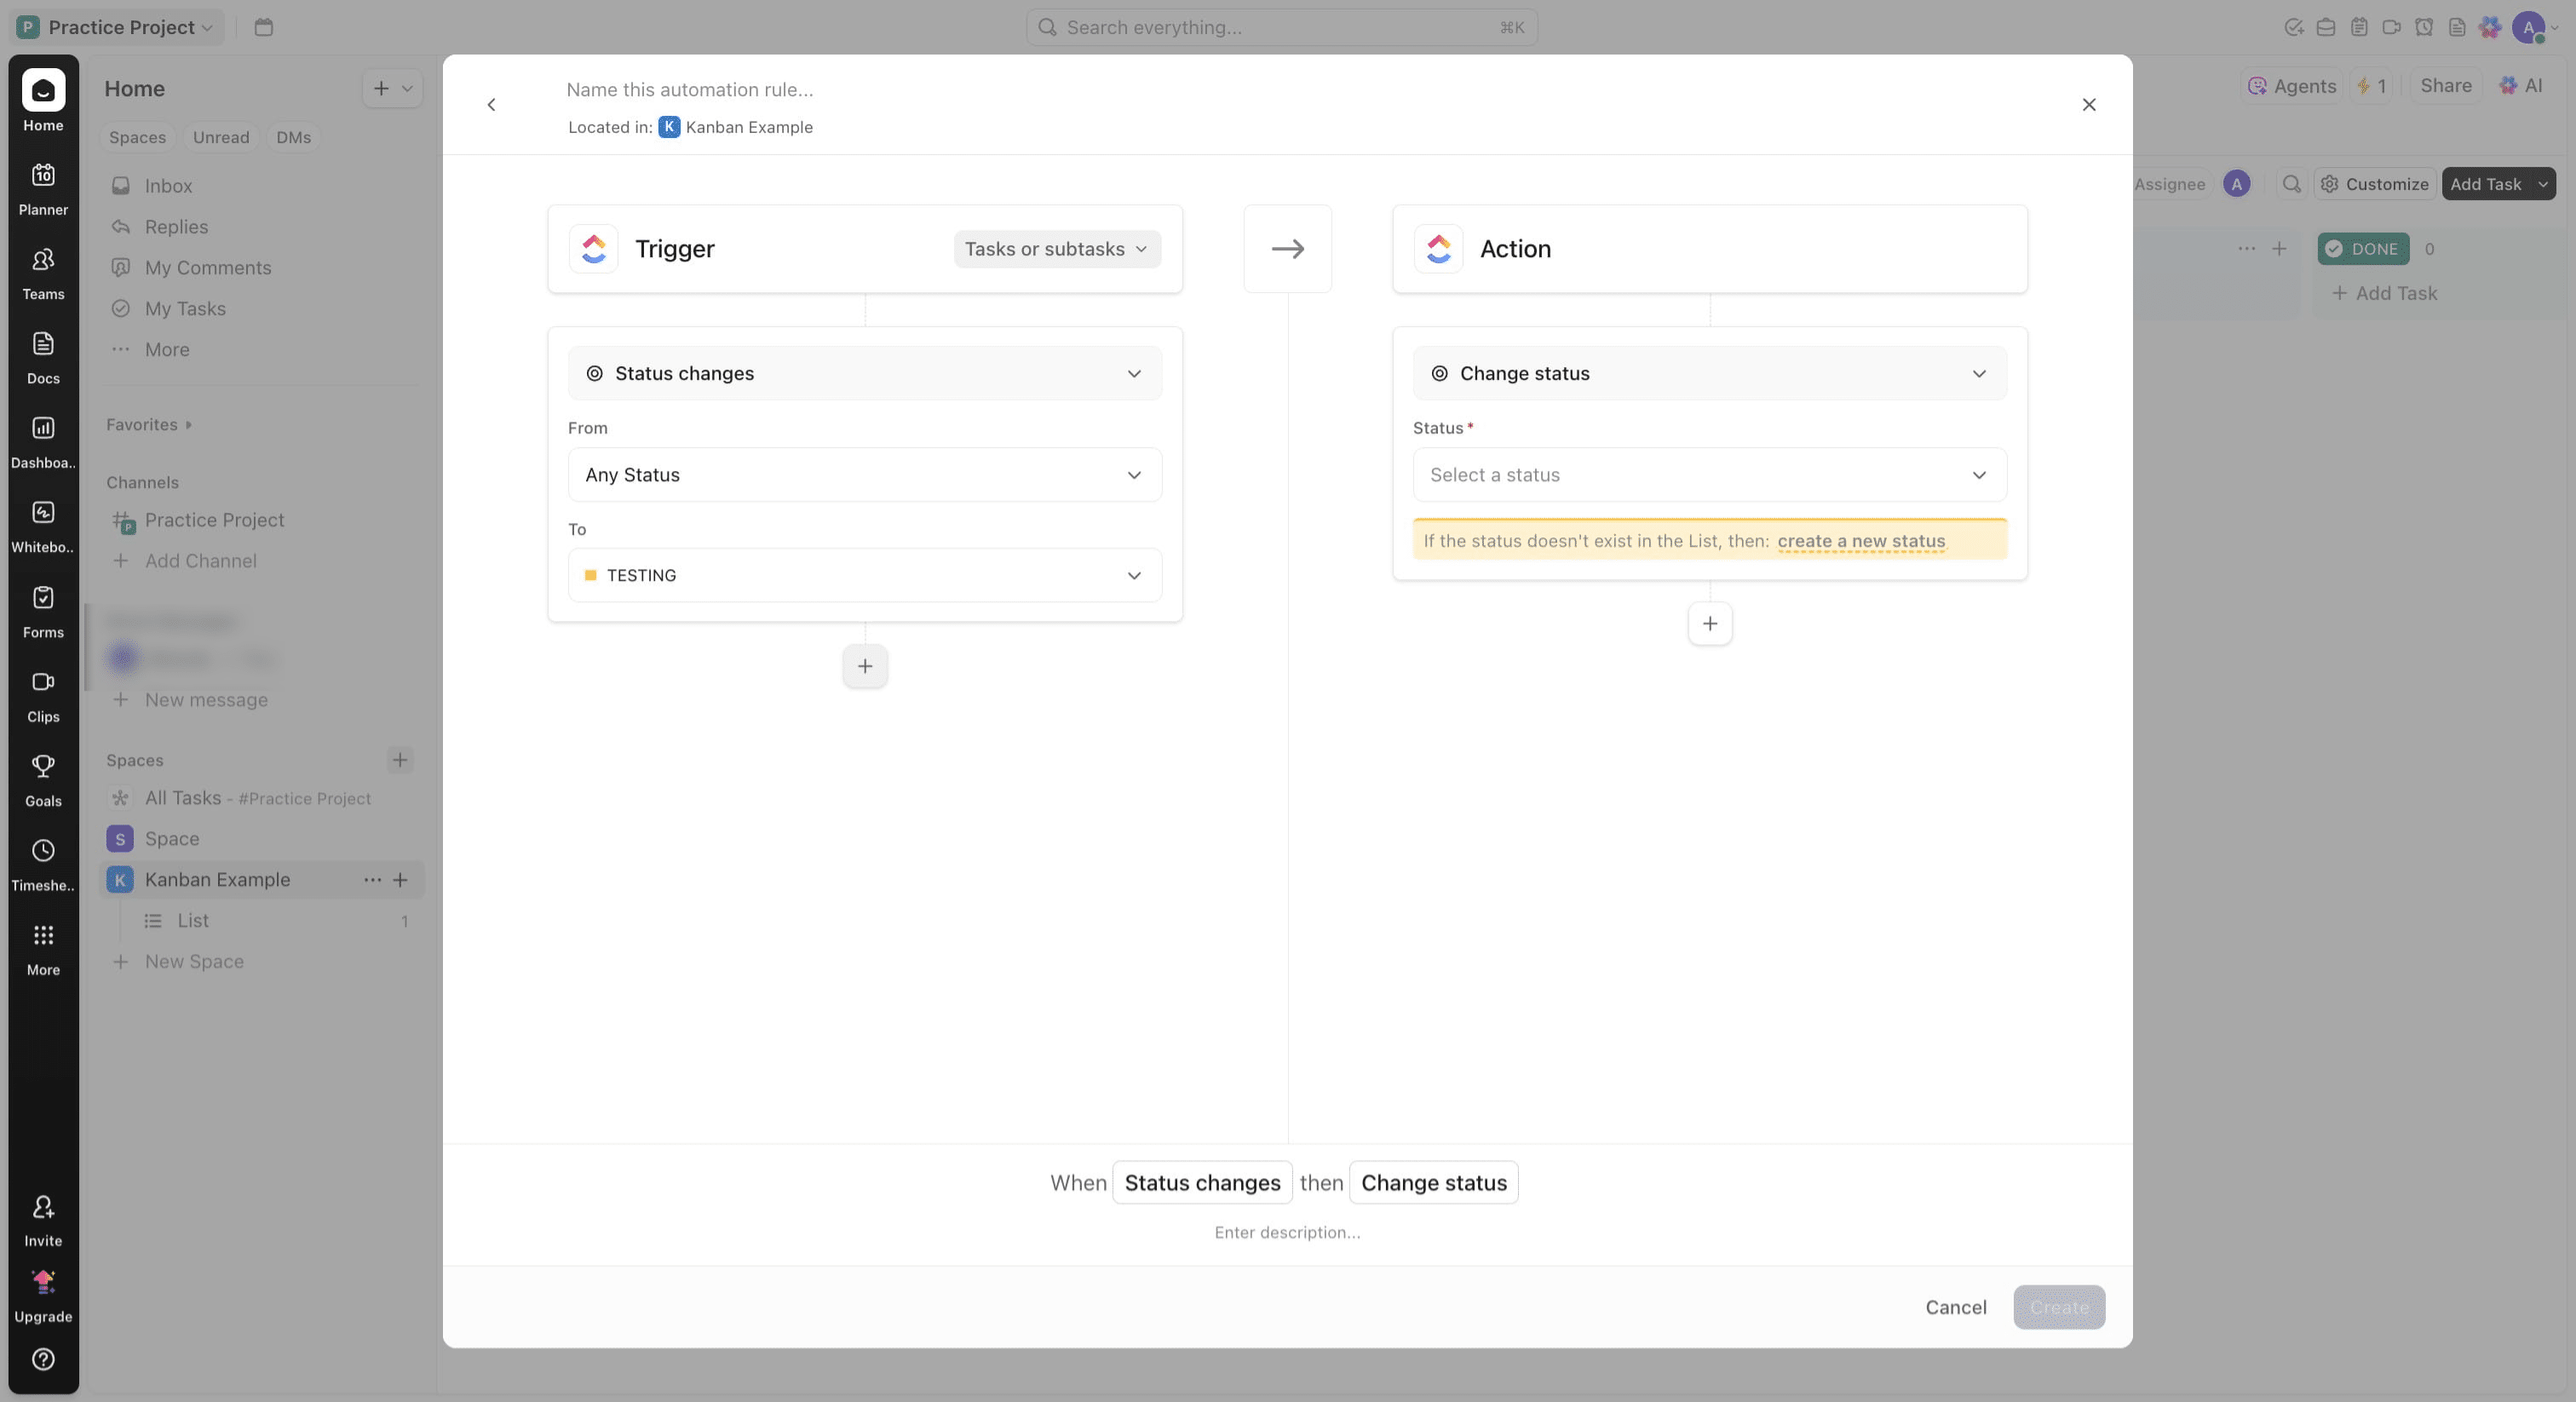
Click on to field and change it to Testing
Under Active category, expand it and click on Testing
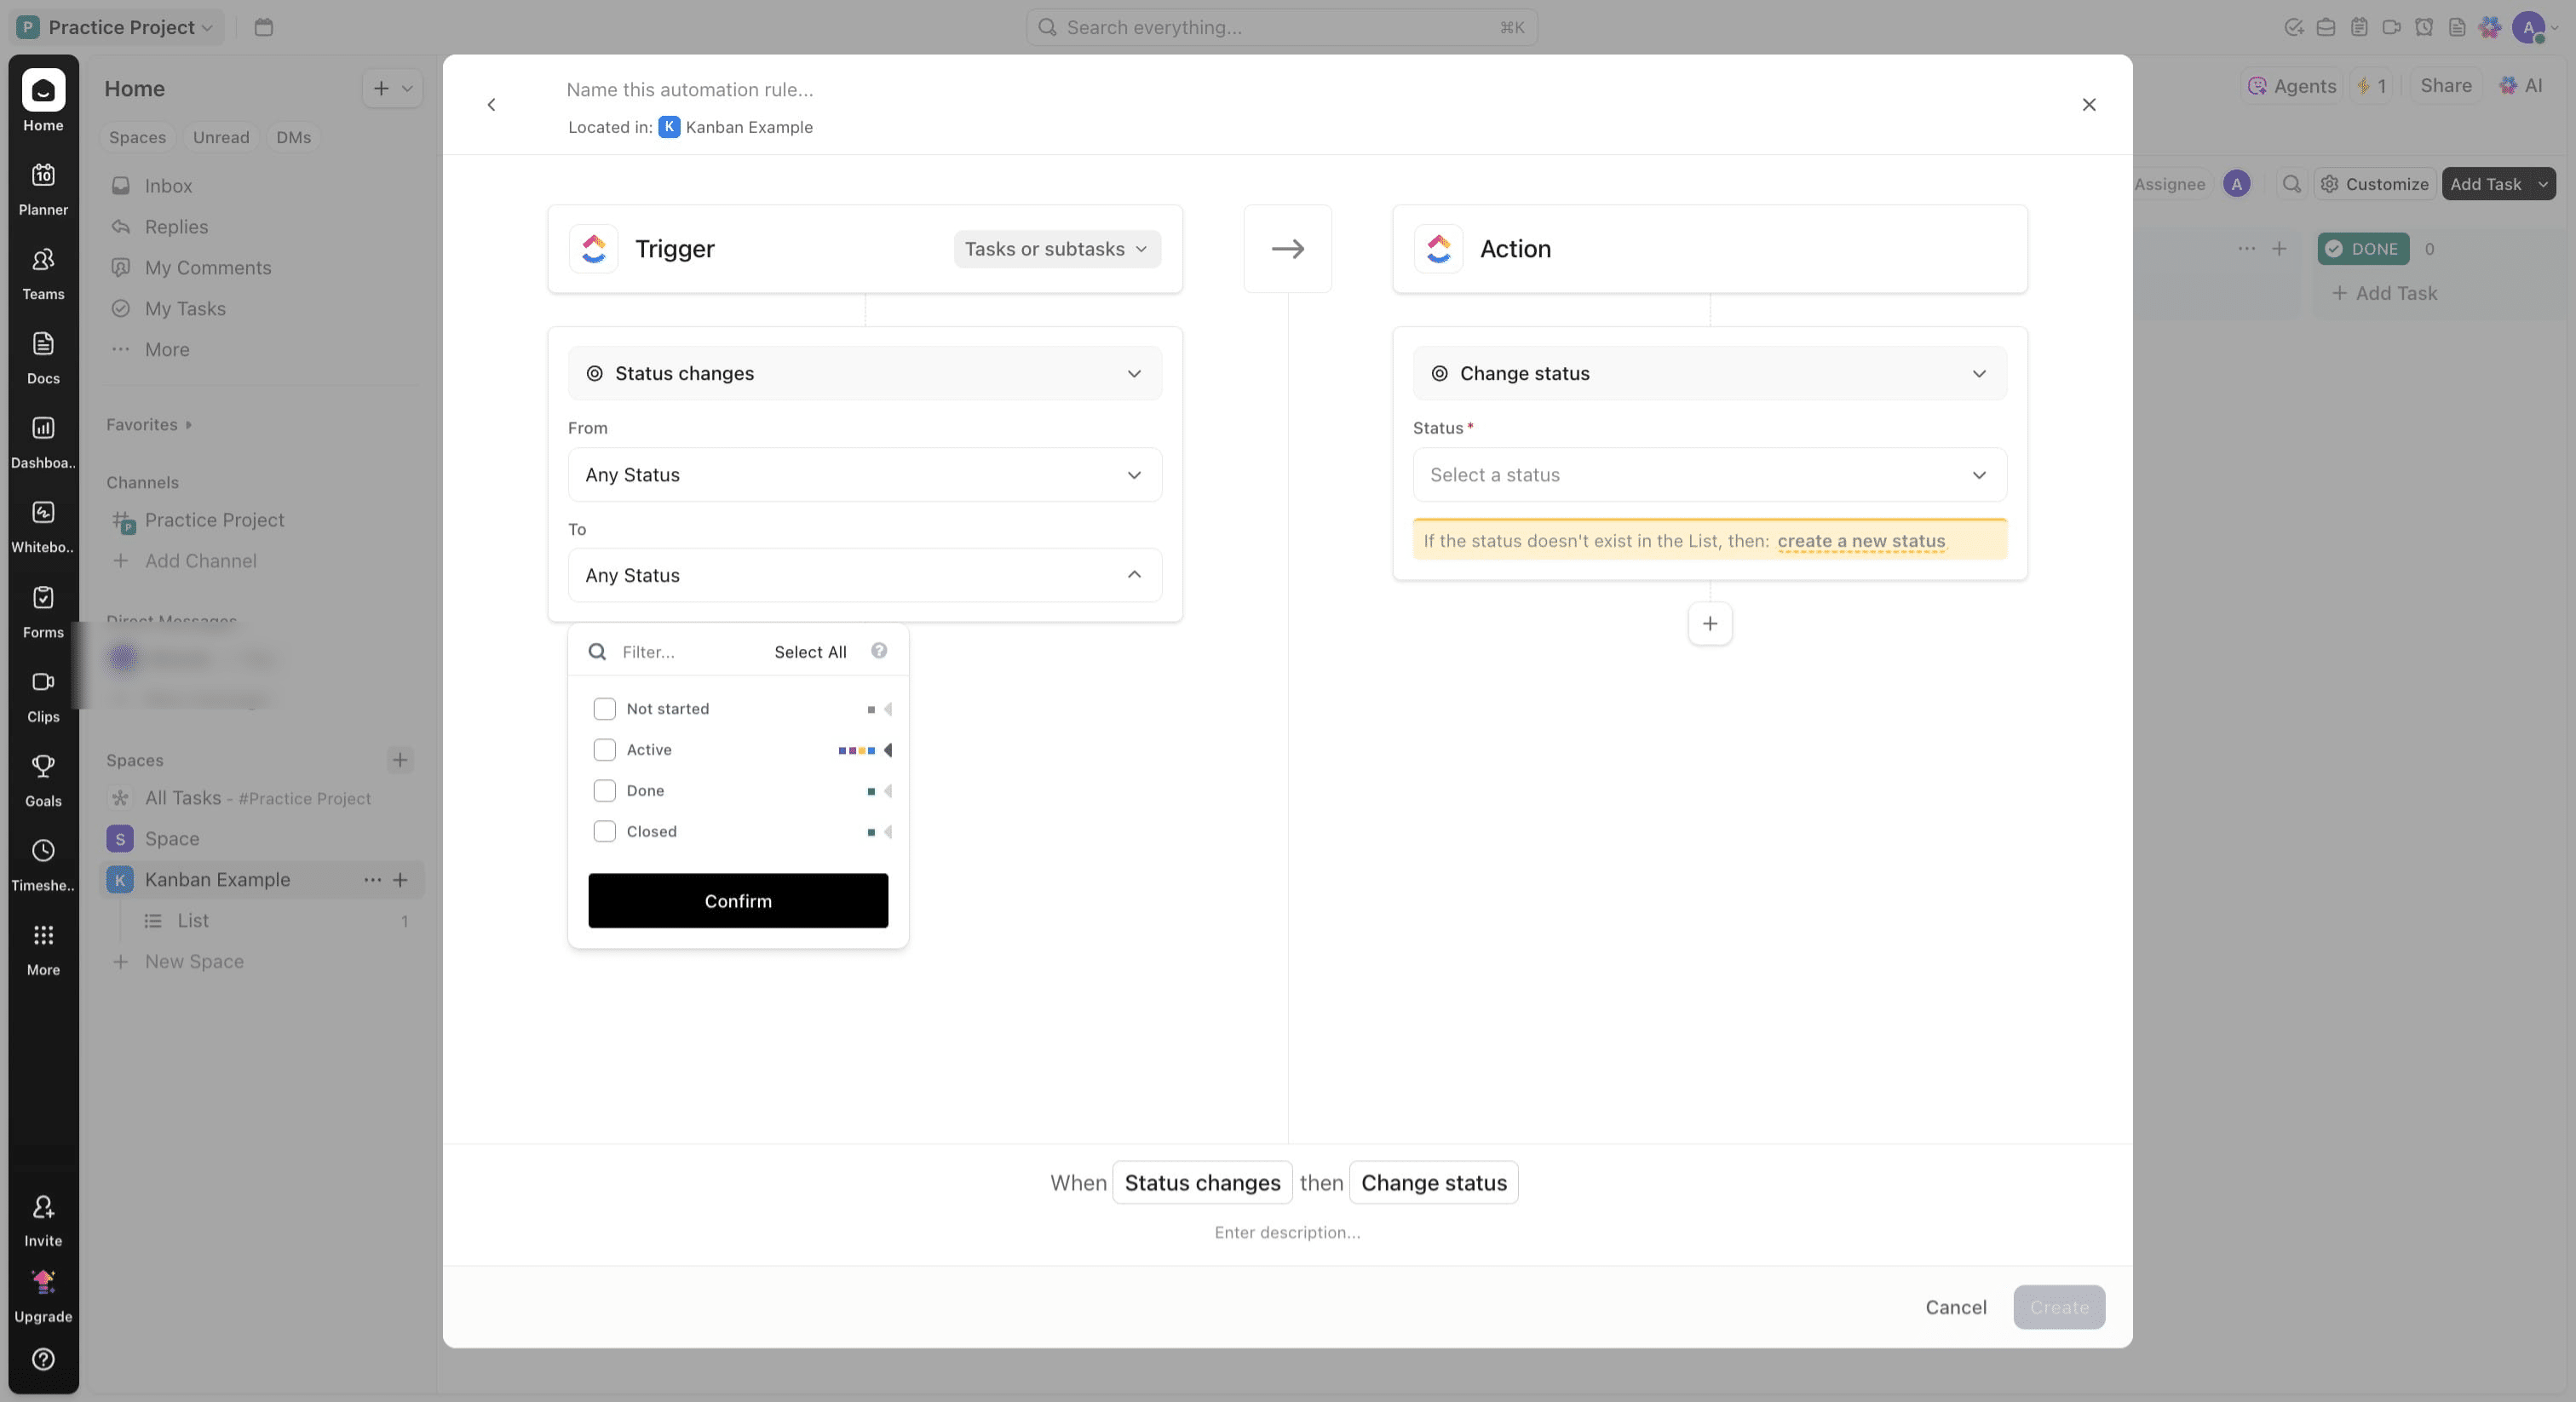
Click on "Testing"
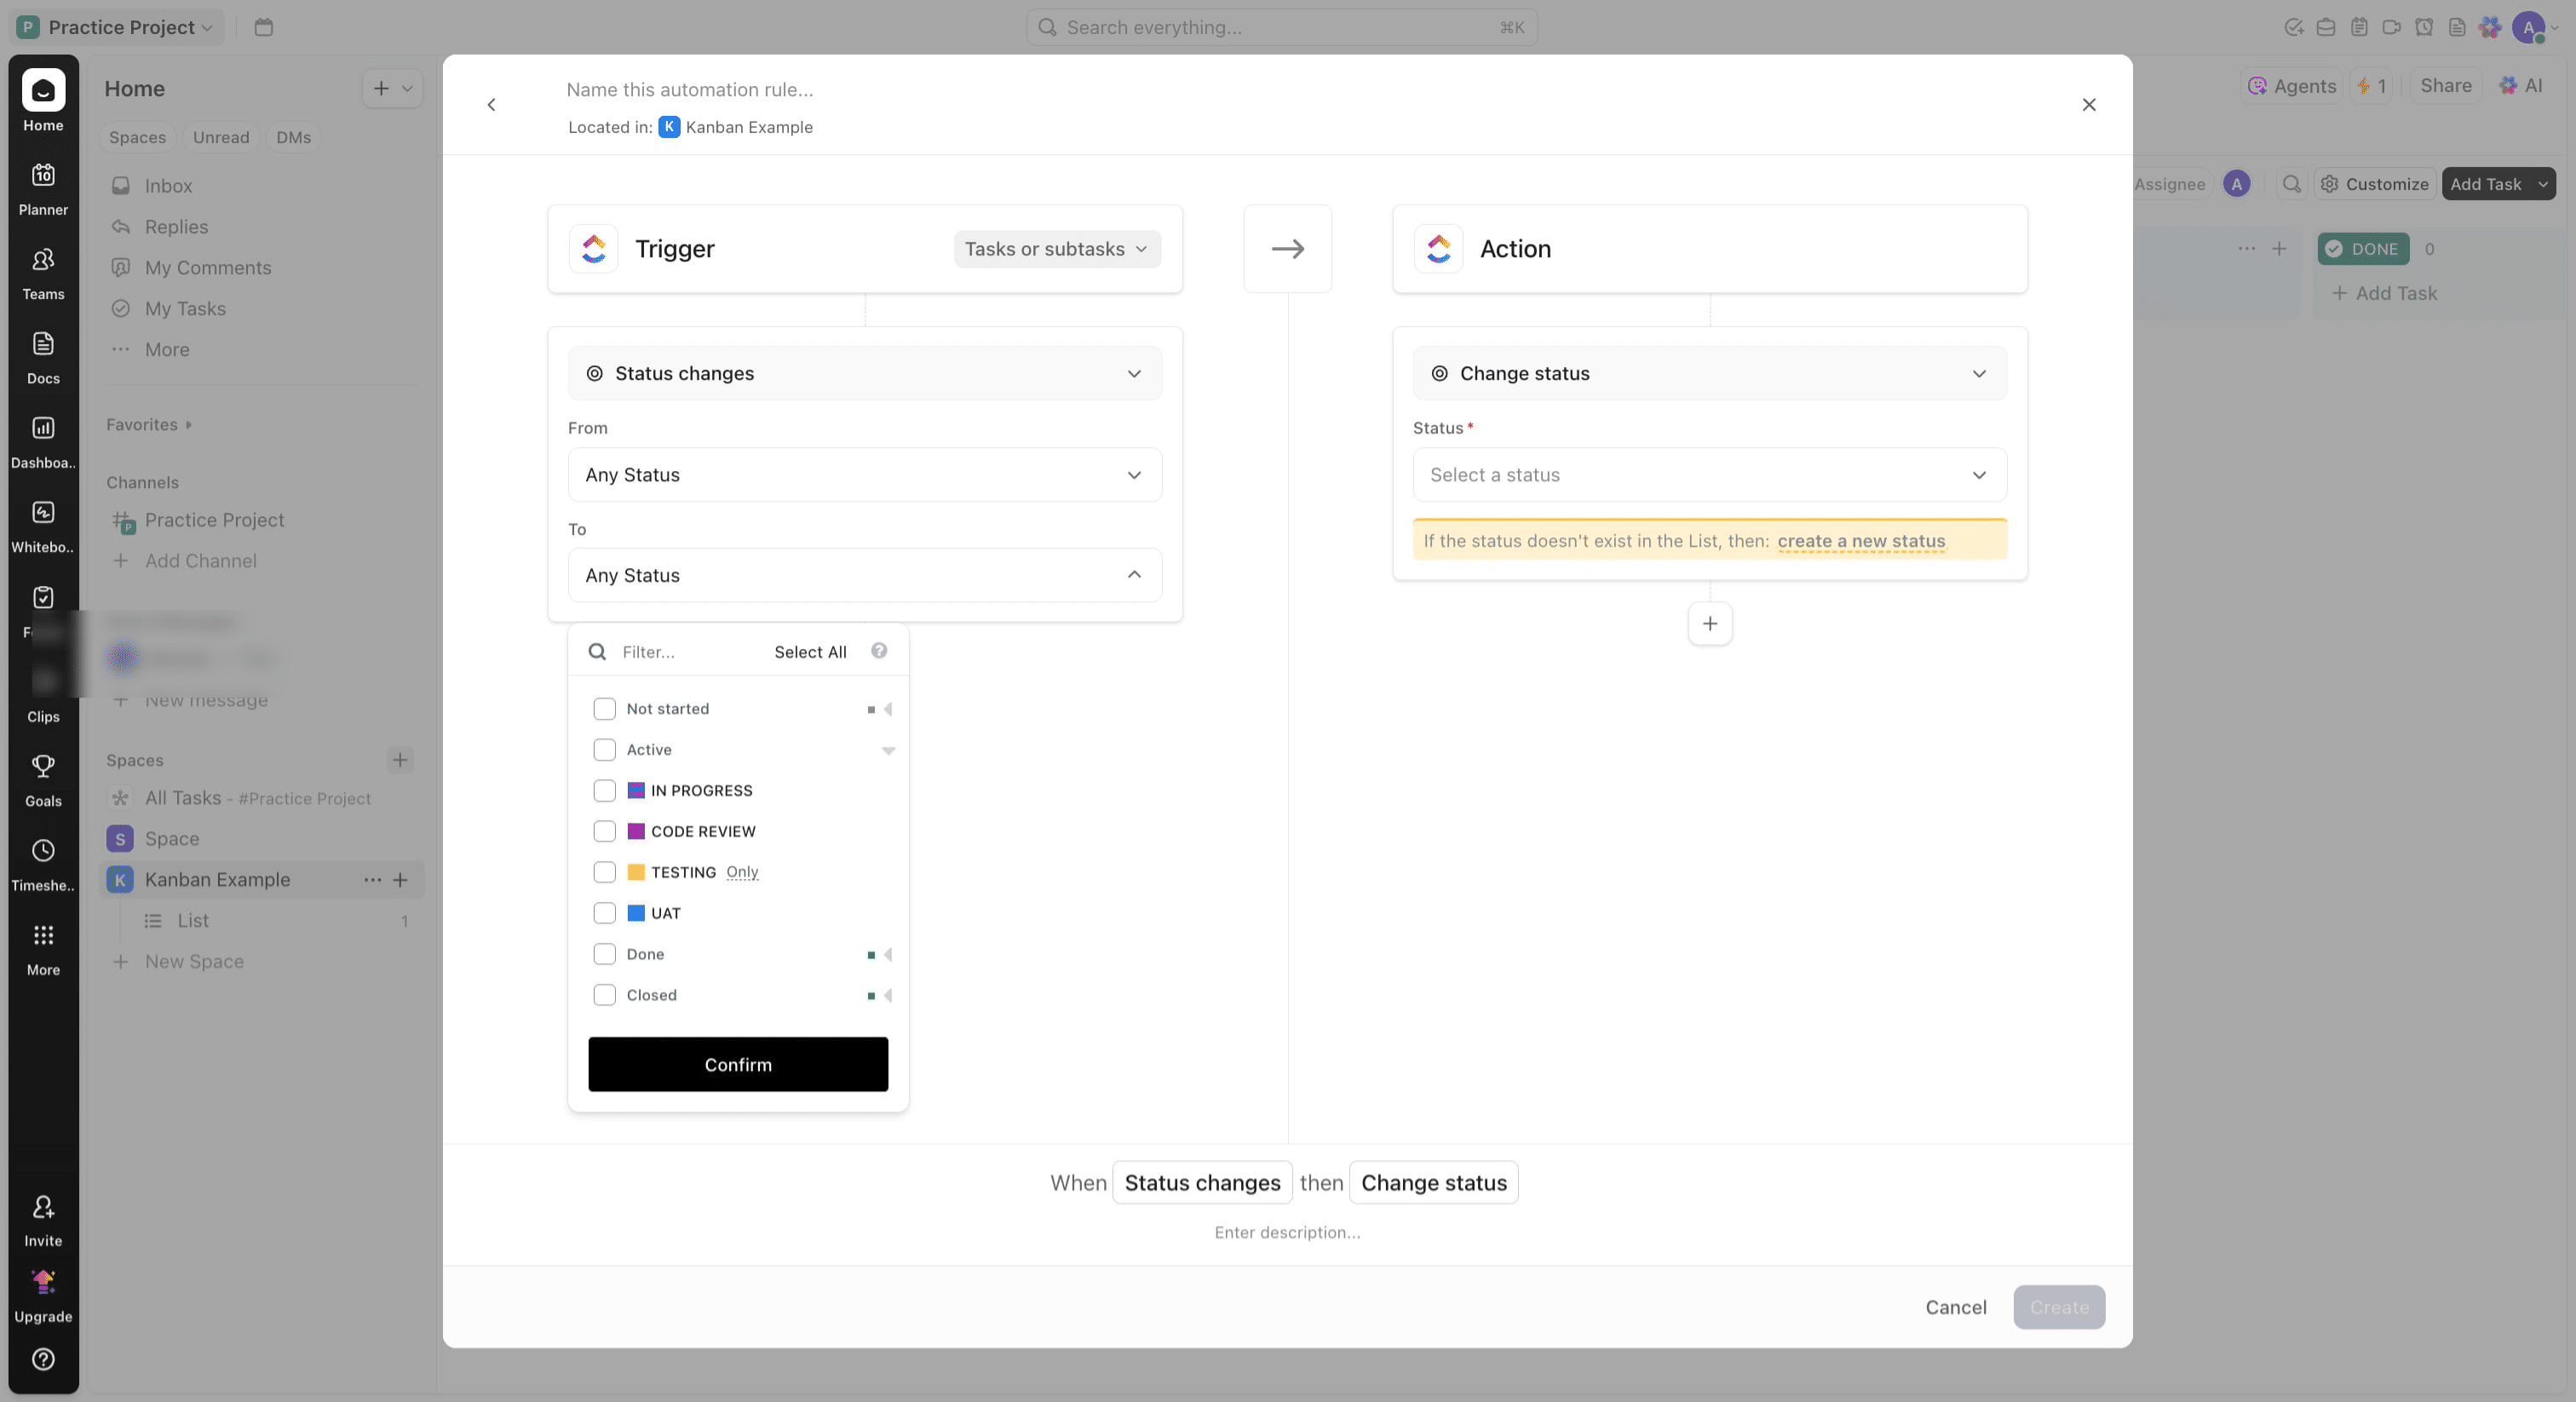
Click on "Confirm"
Click on the plus icon
Change field to work on and make it custom field
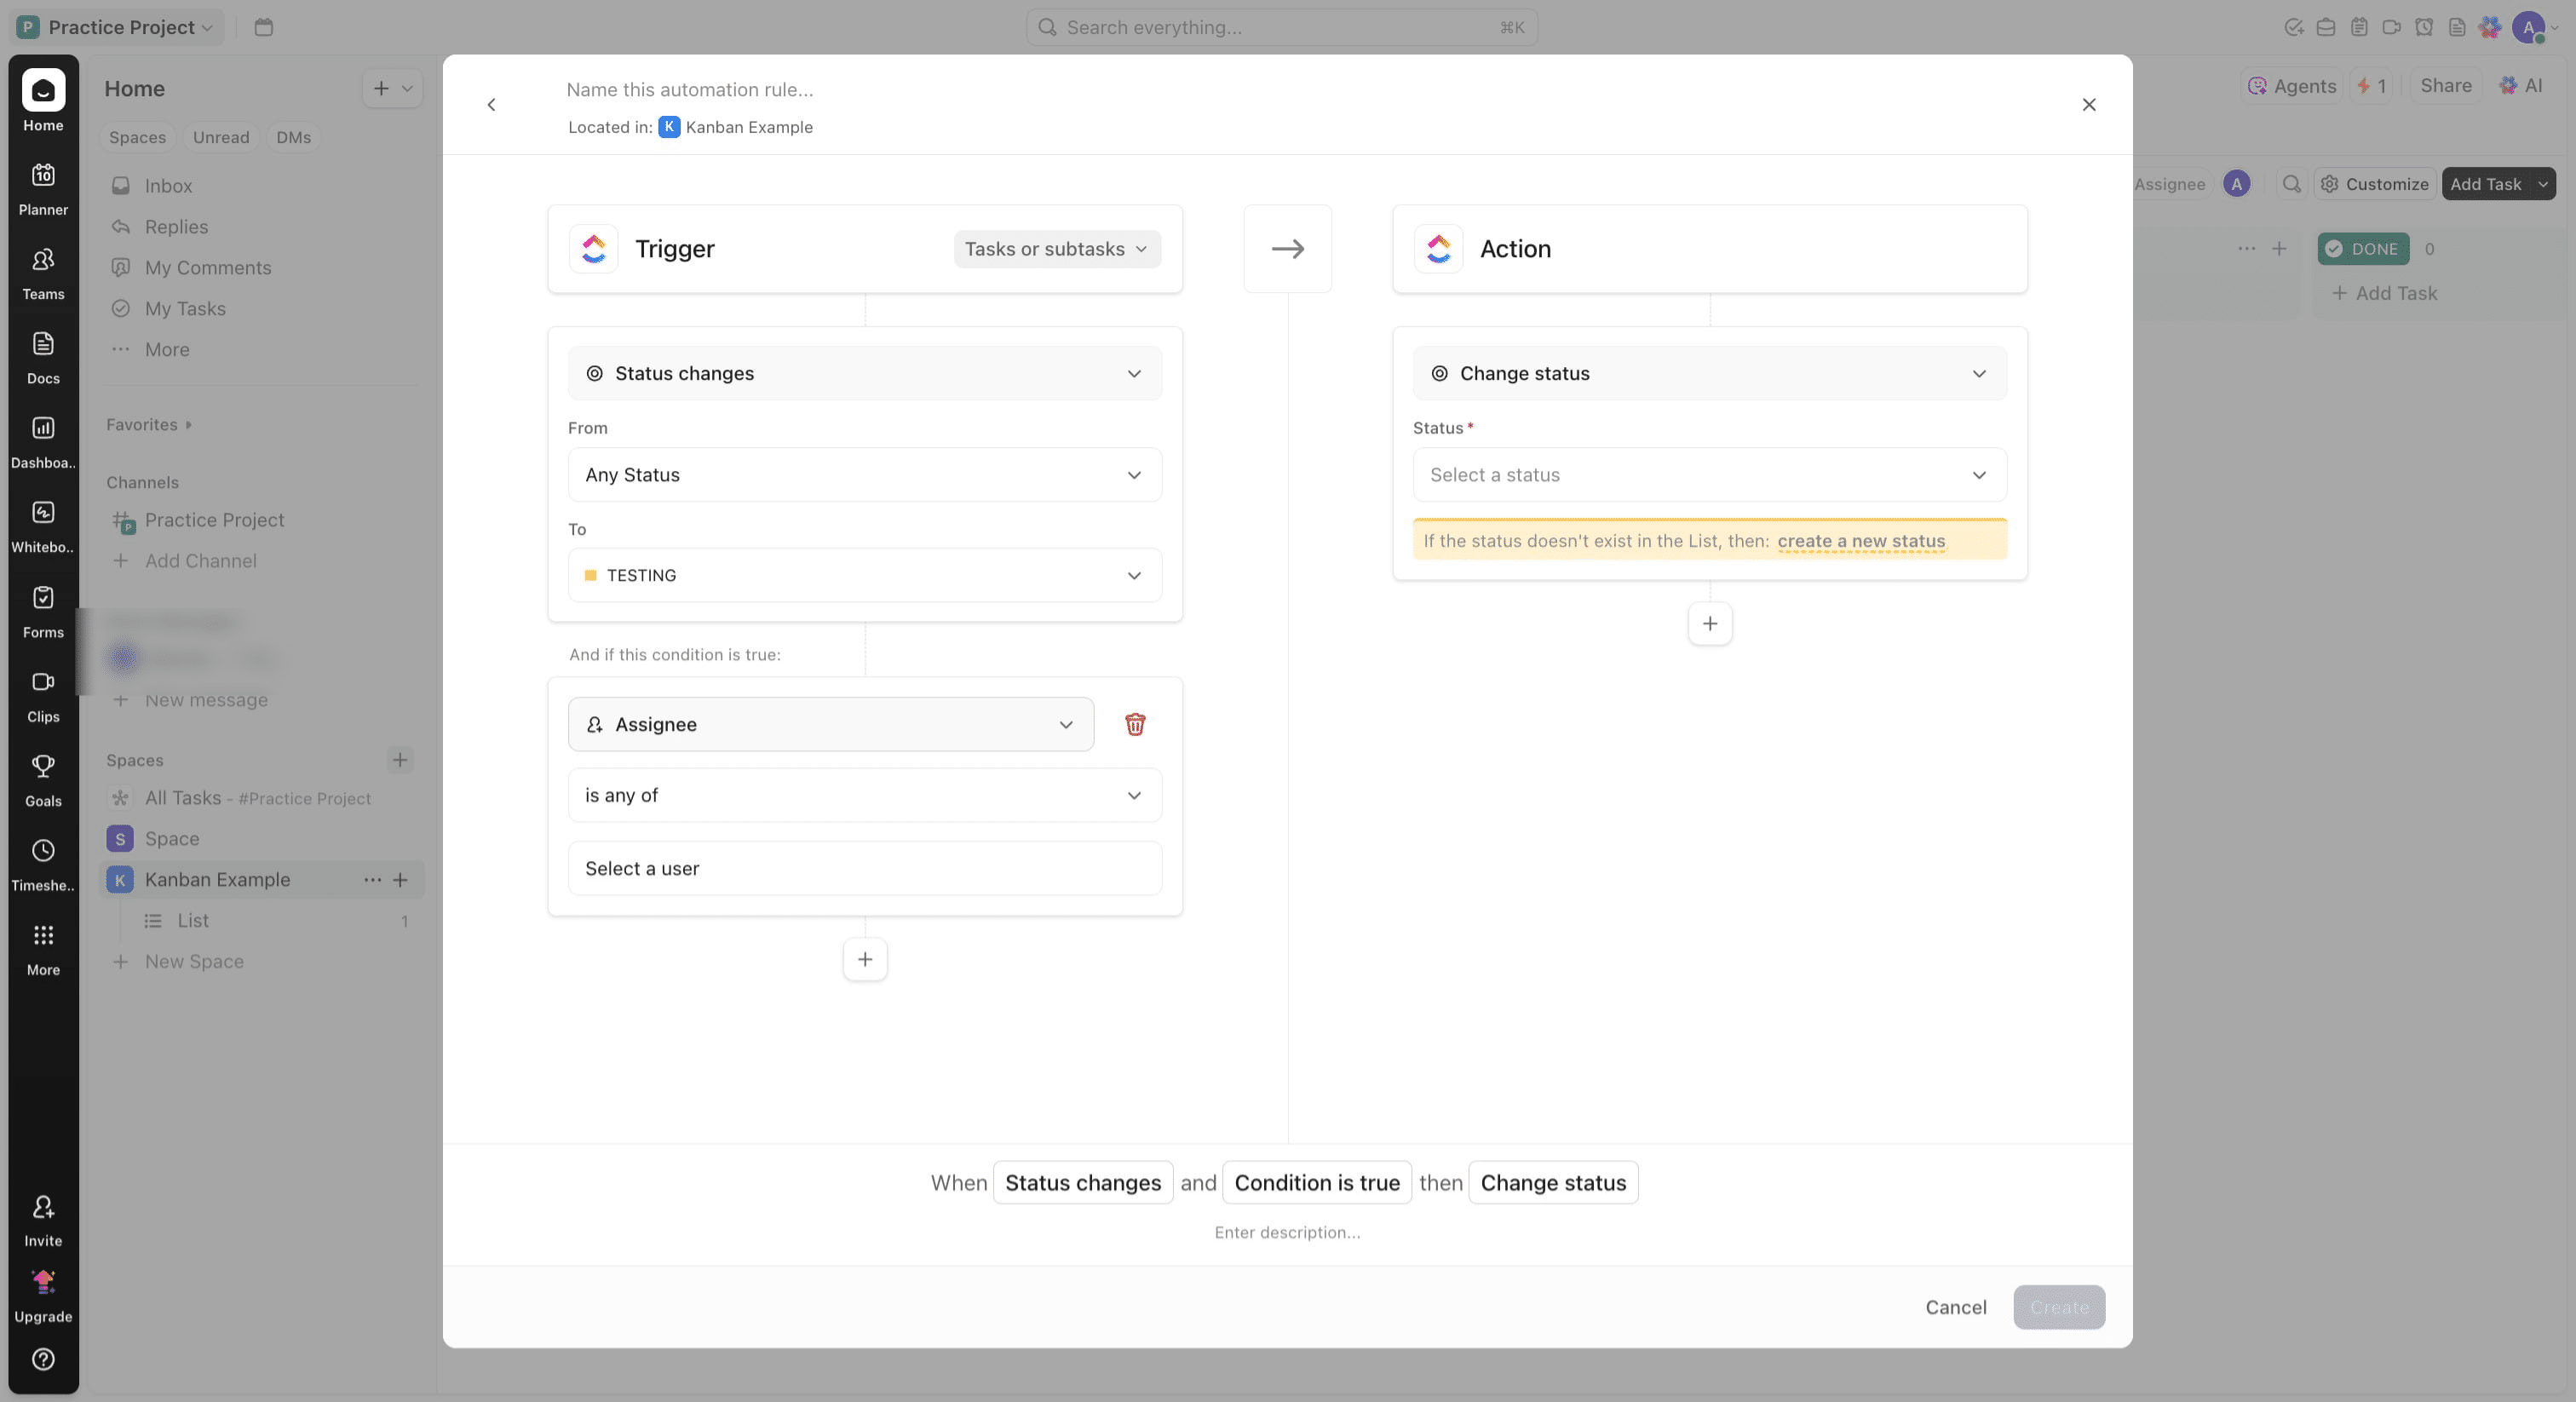
Click on "Custom Field"
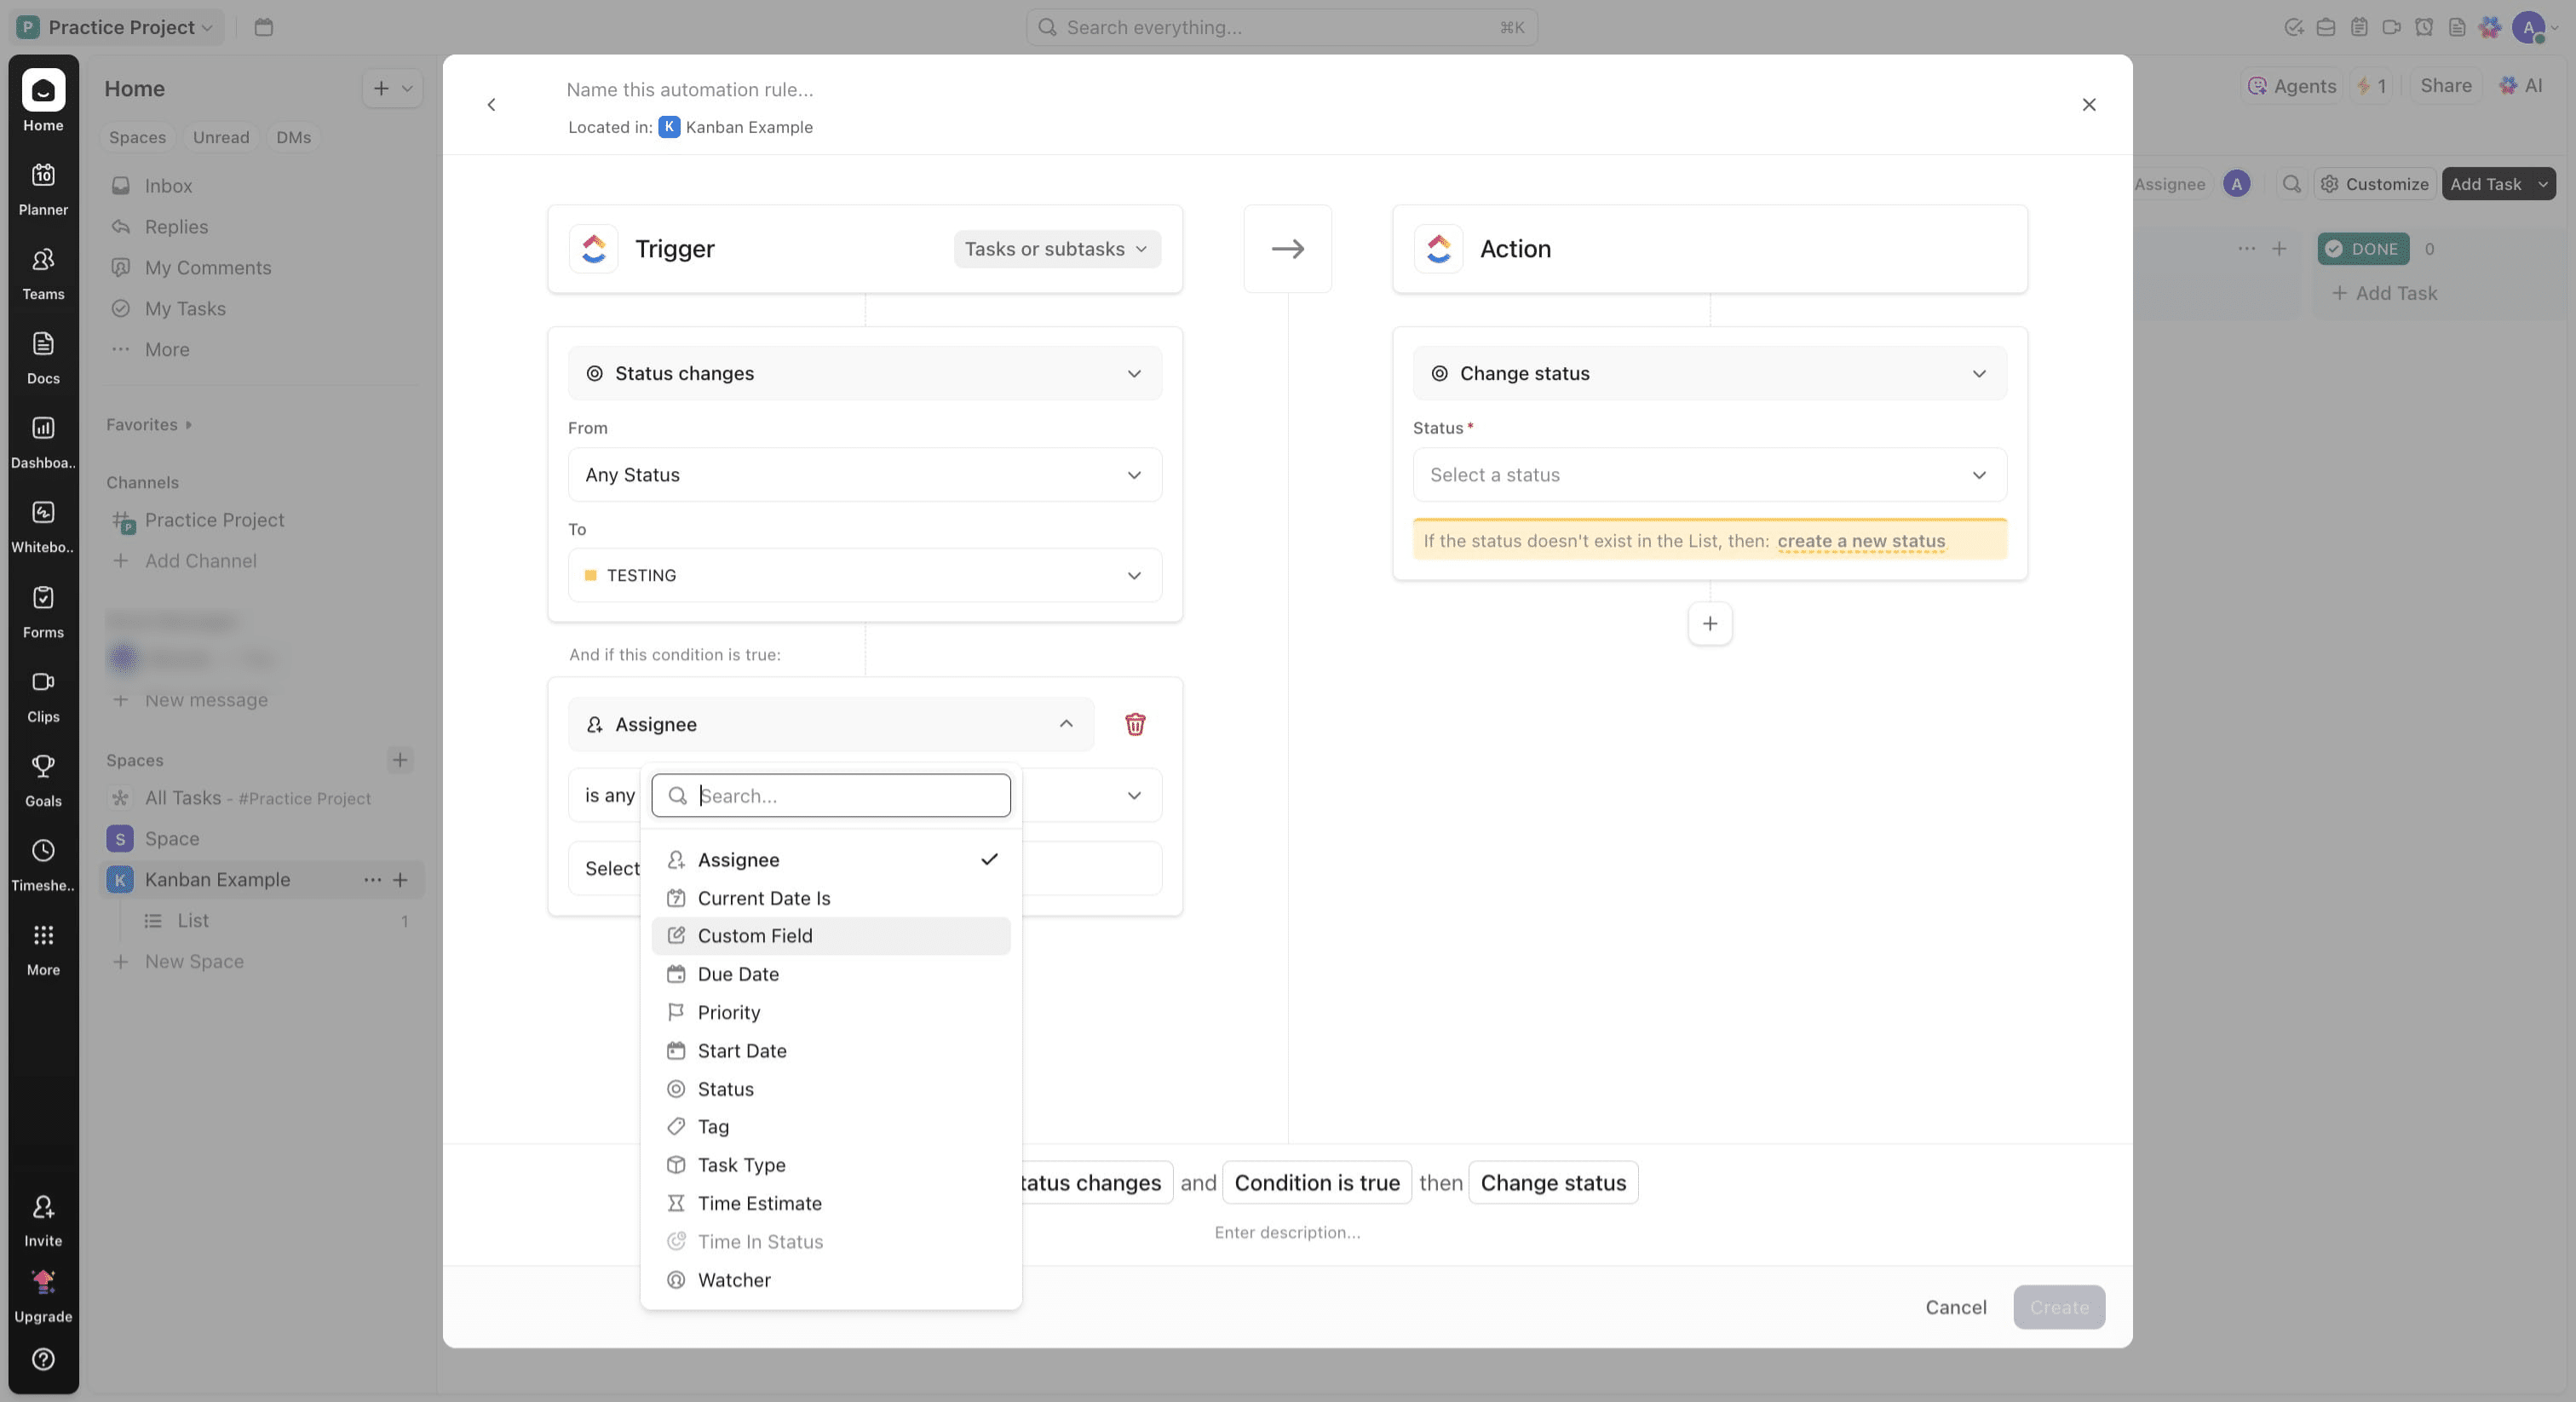
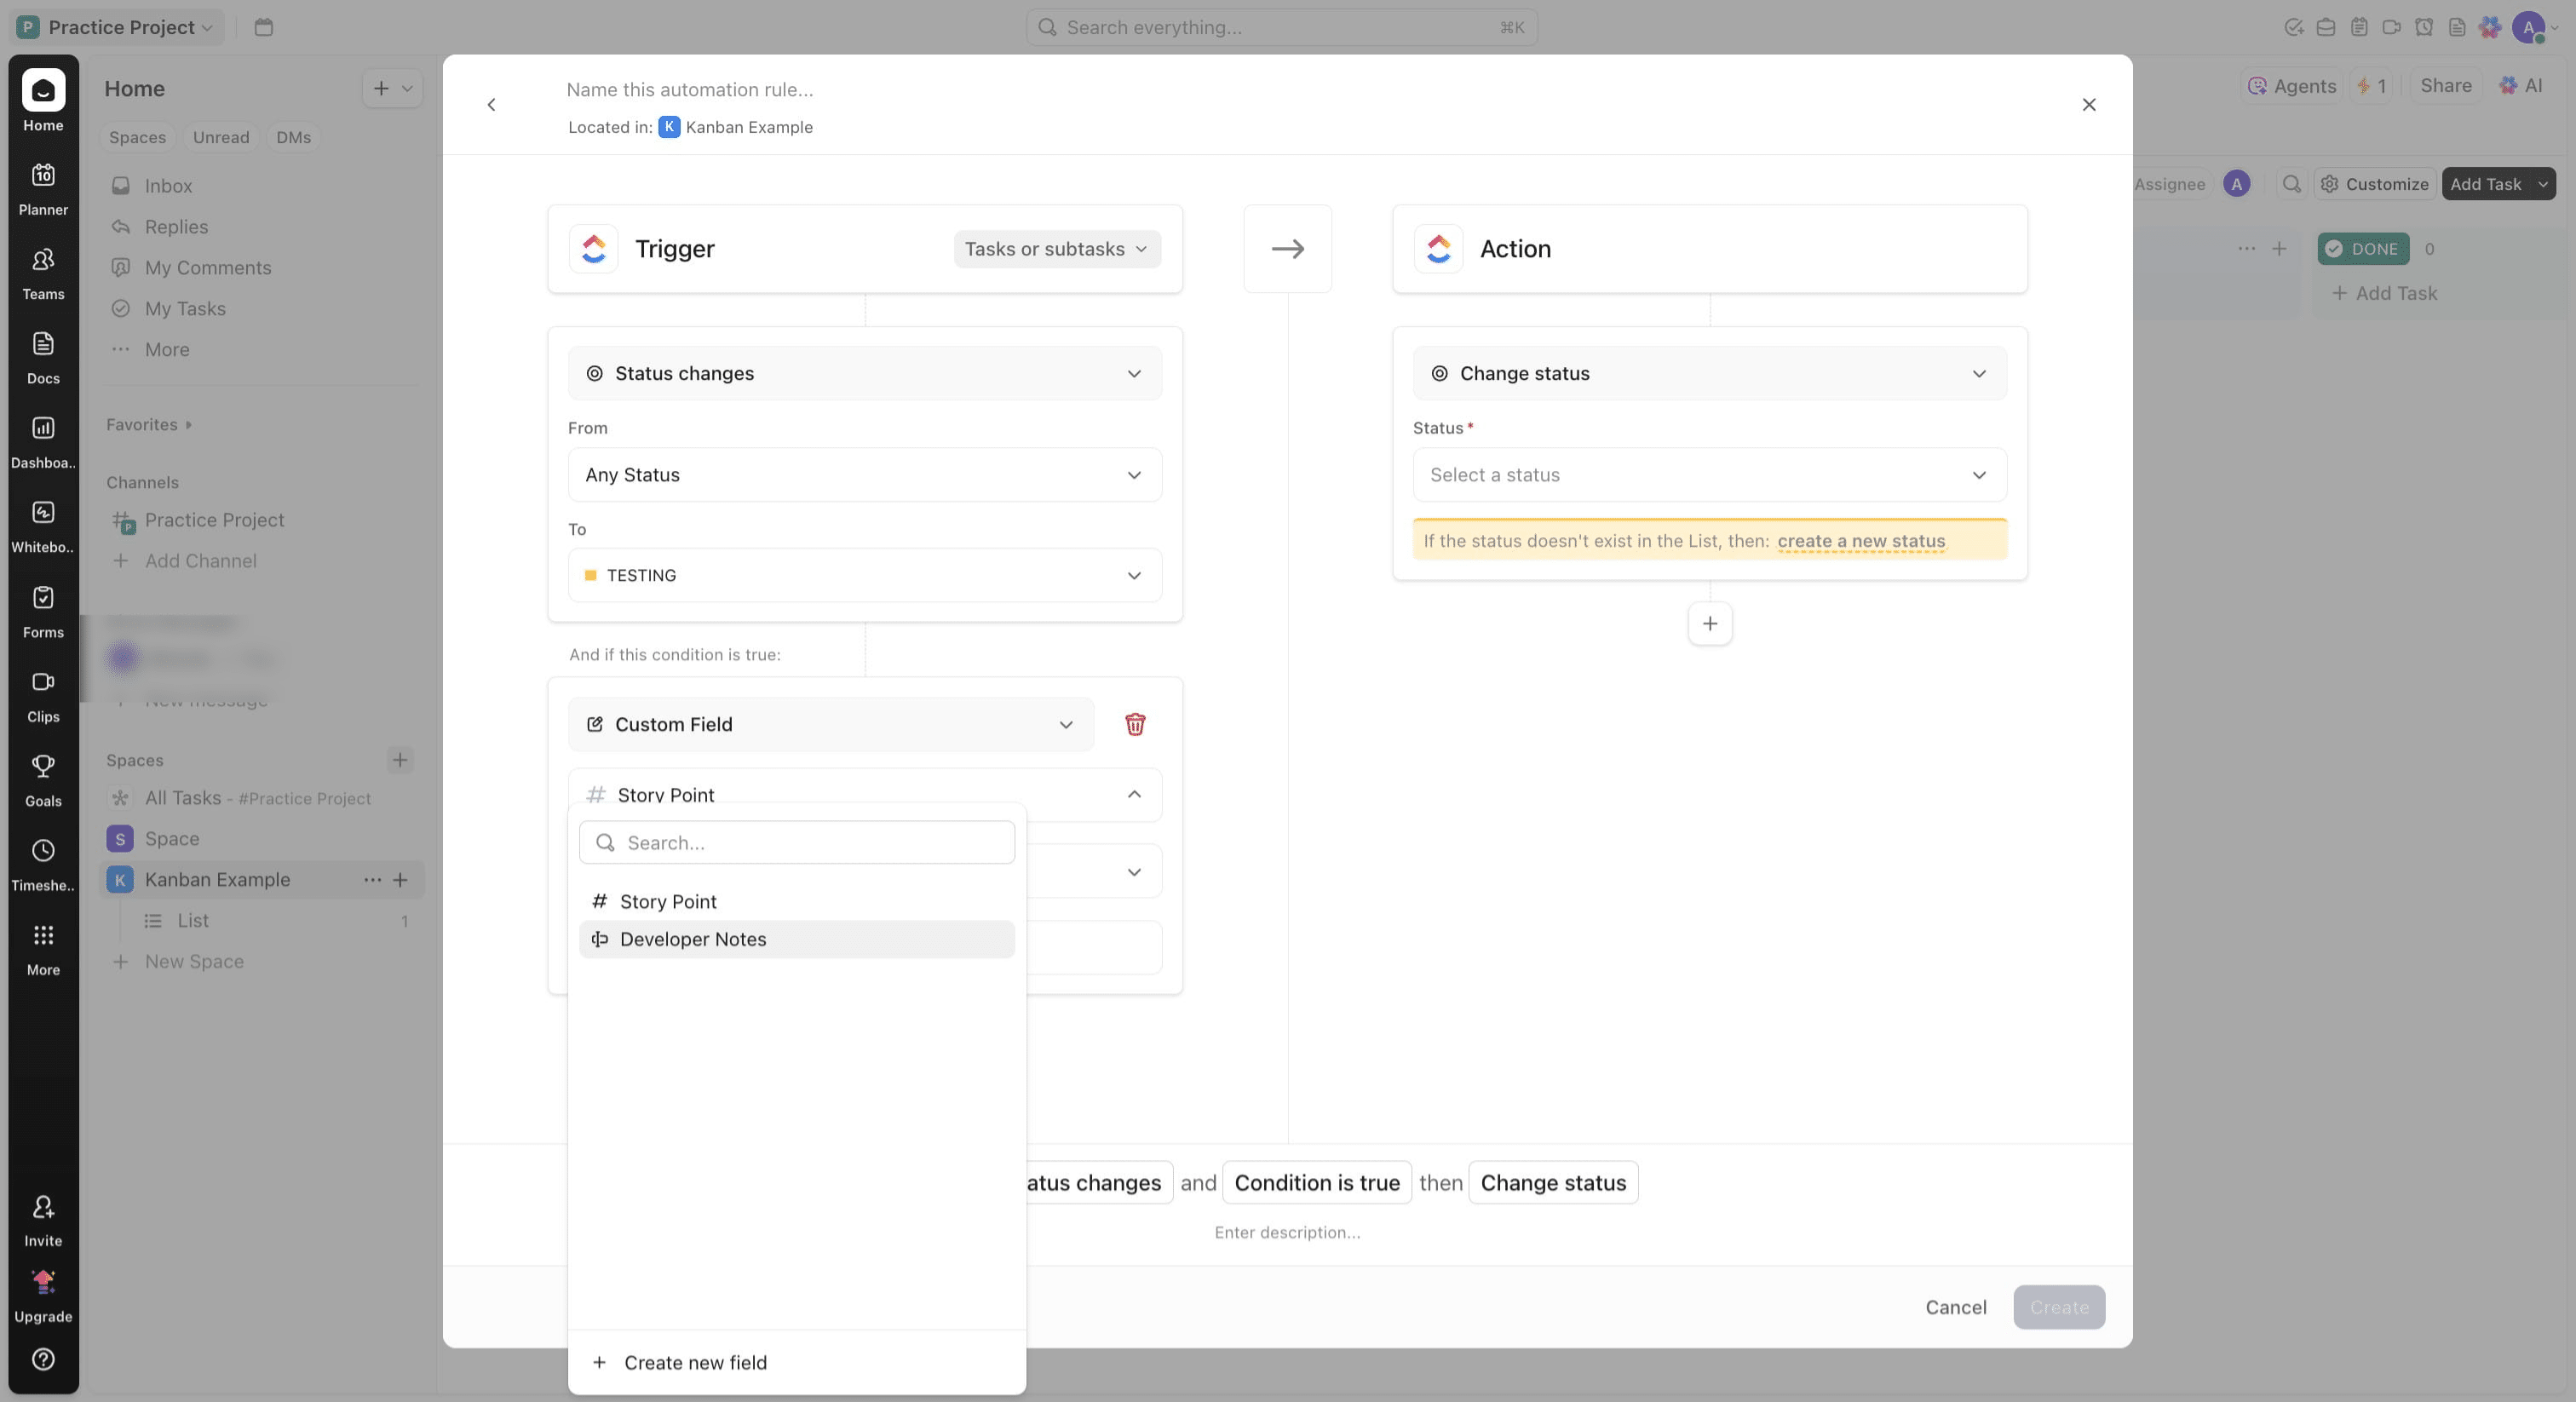
Select the field option and switch to Developer Notes

Click on "Developer Notes"
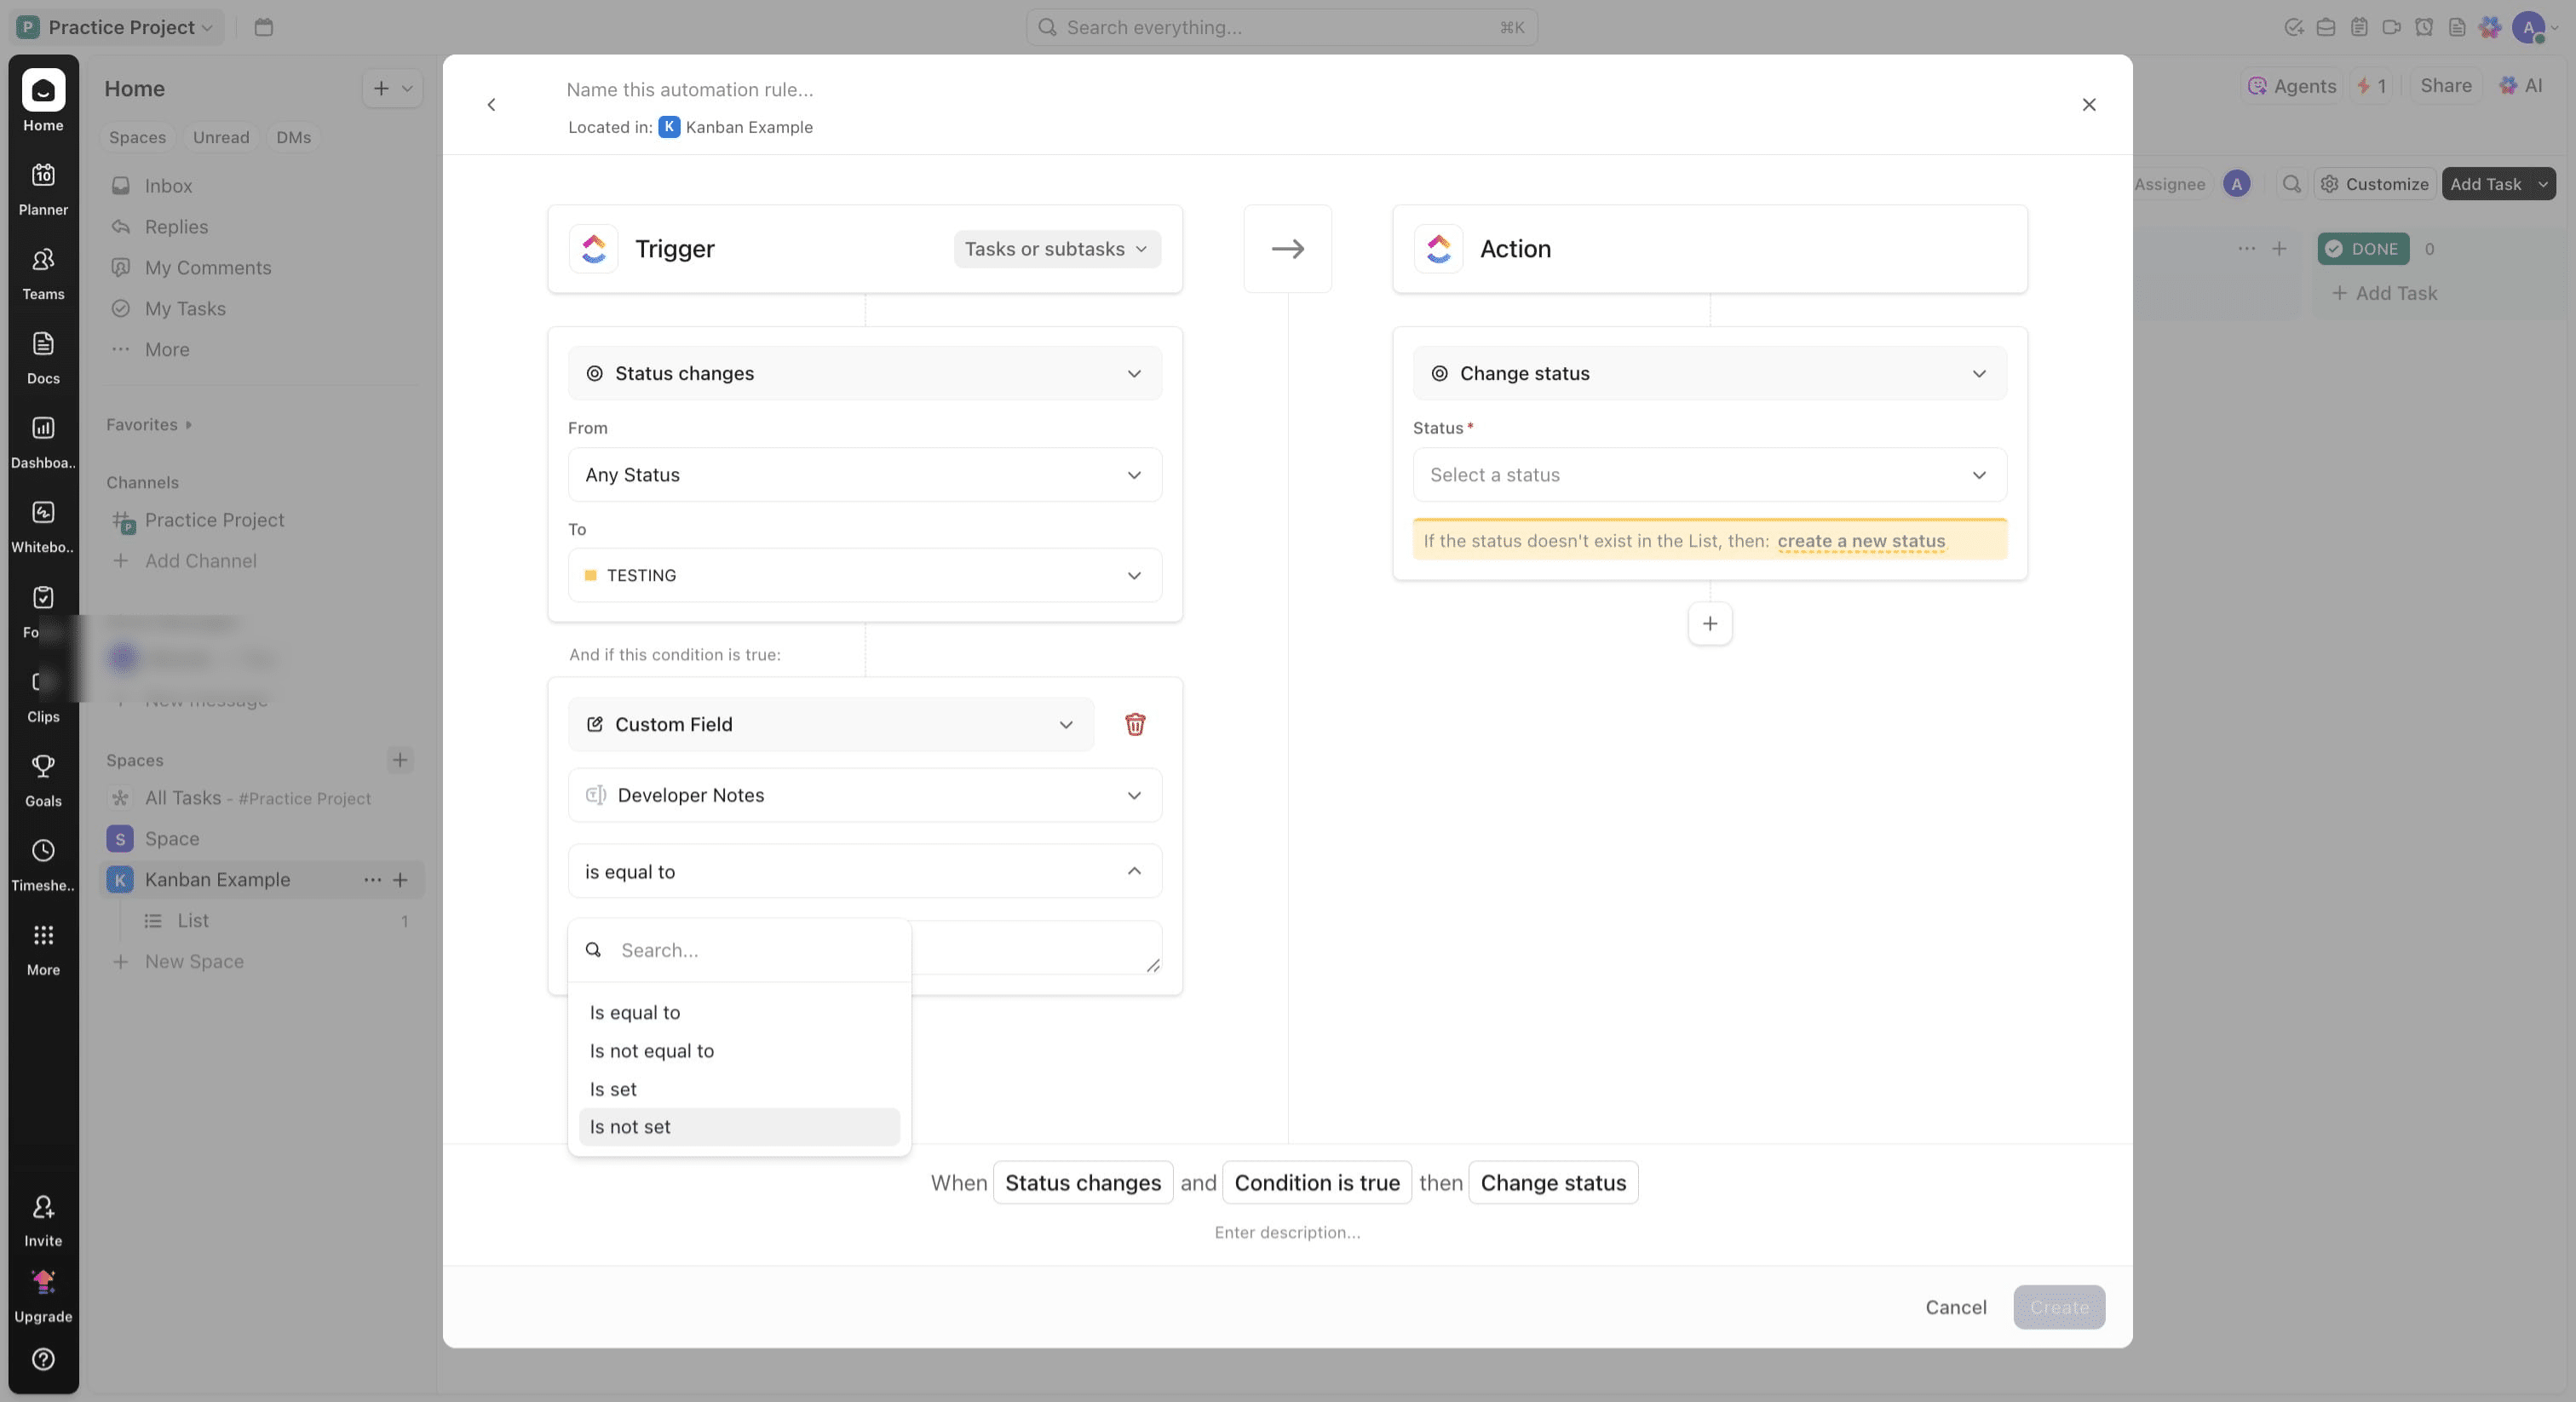
Click on "is equal to" and change to "is not set"
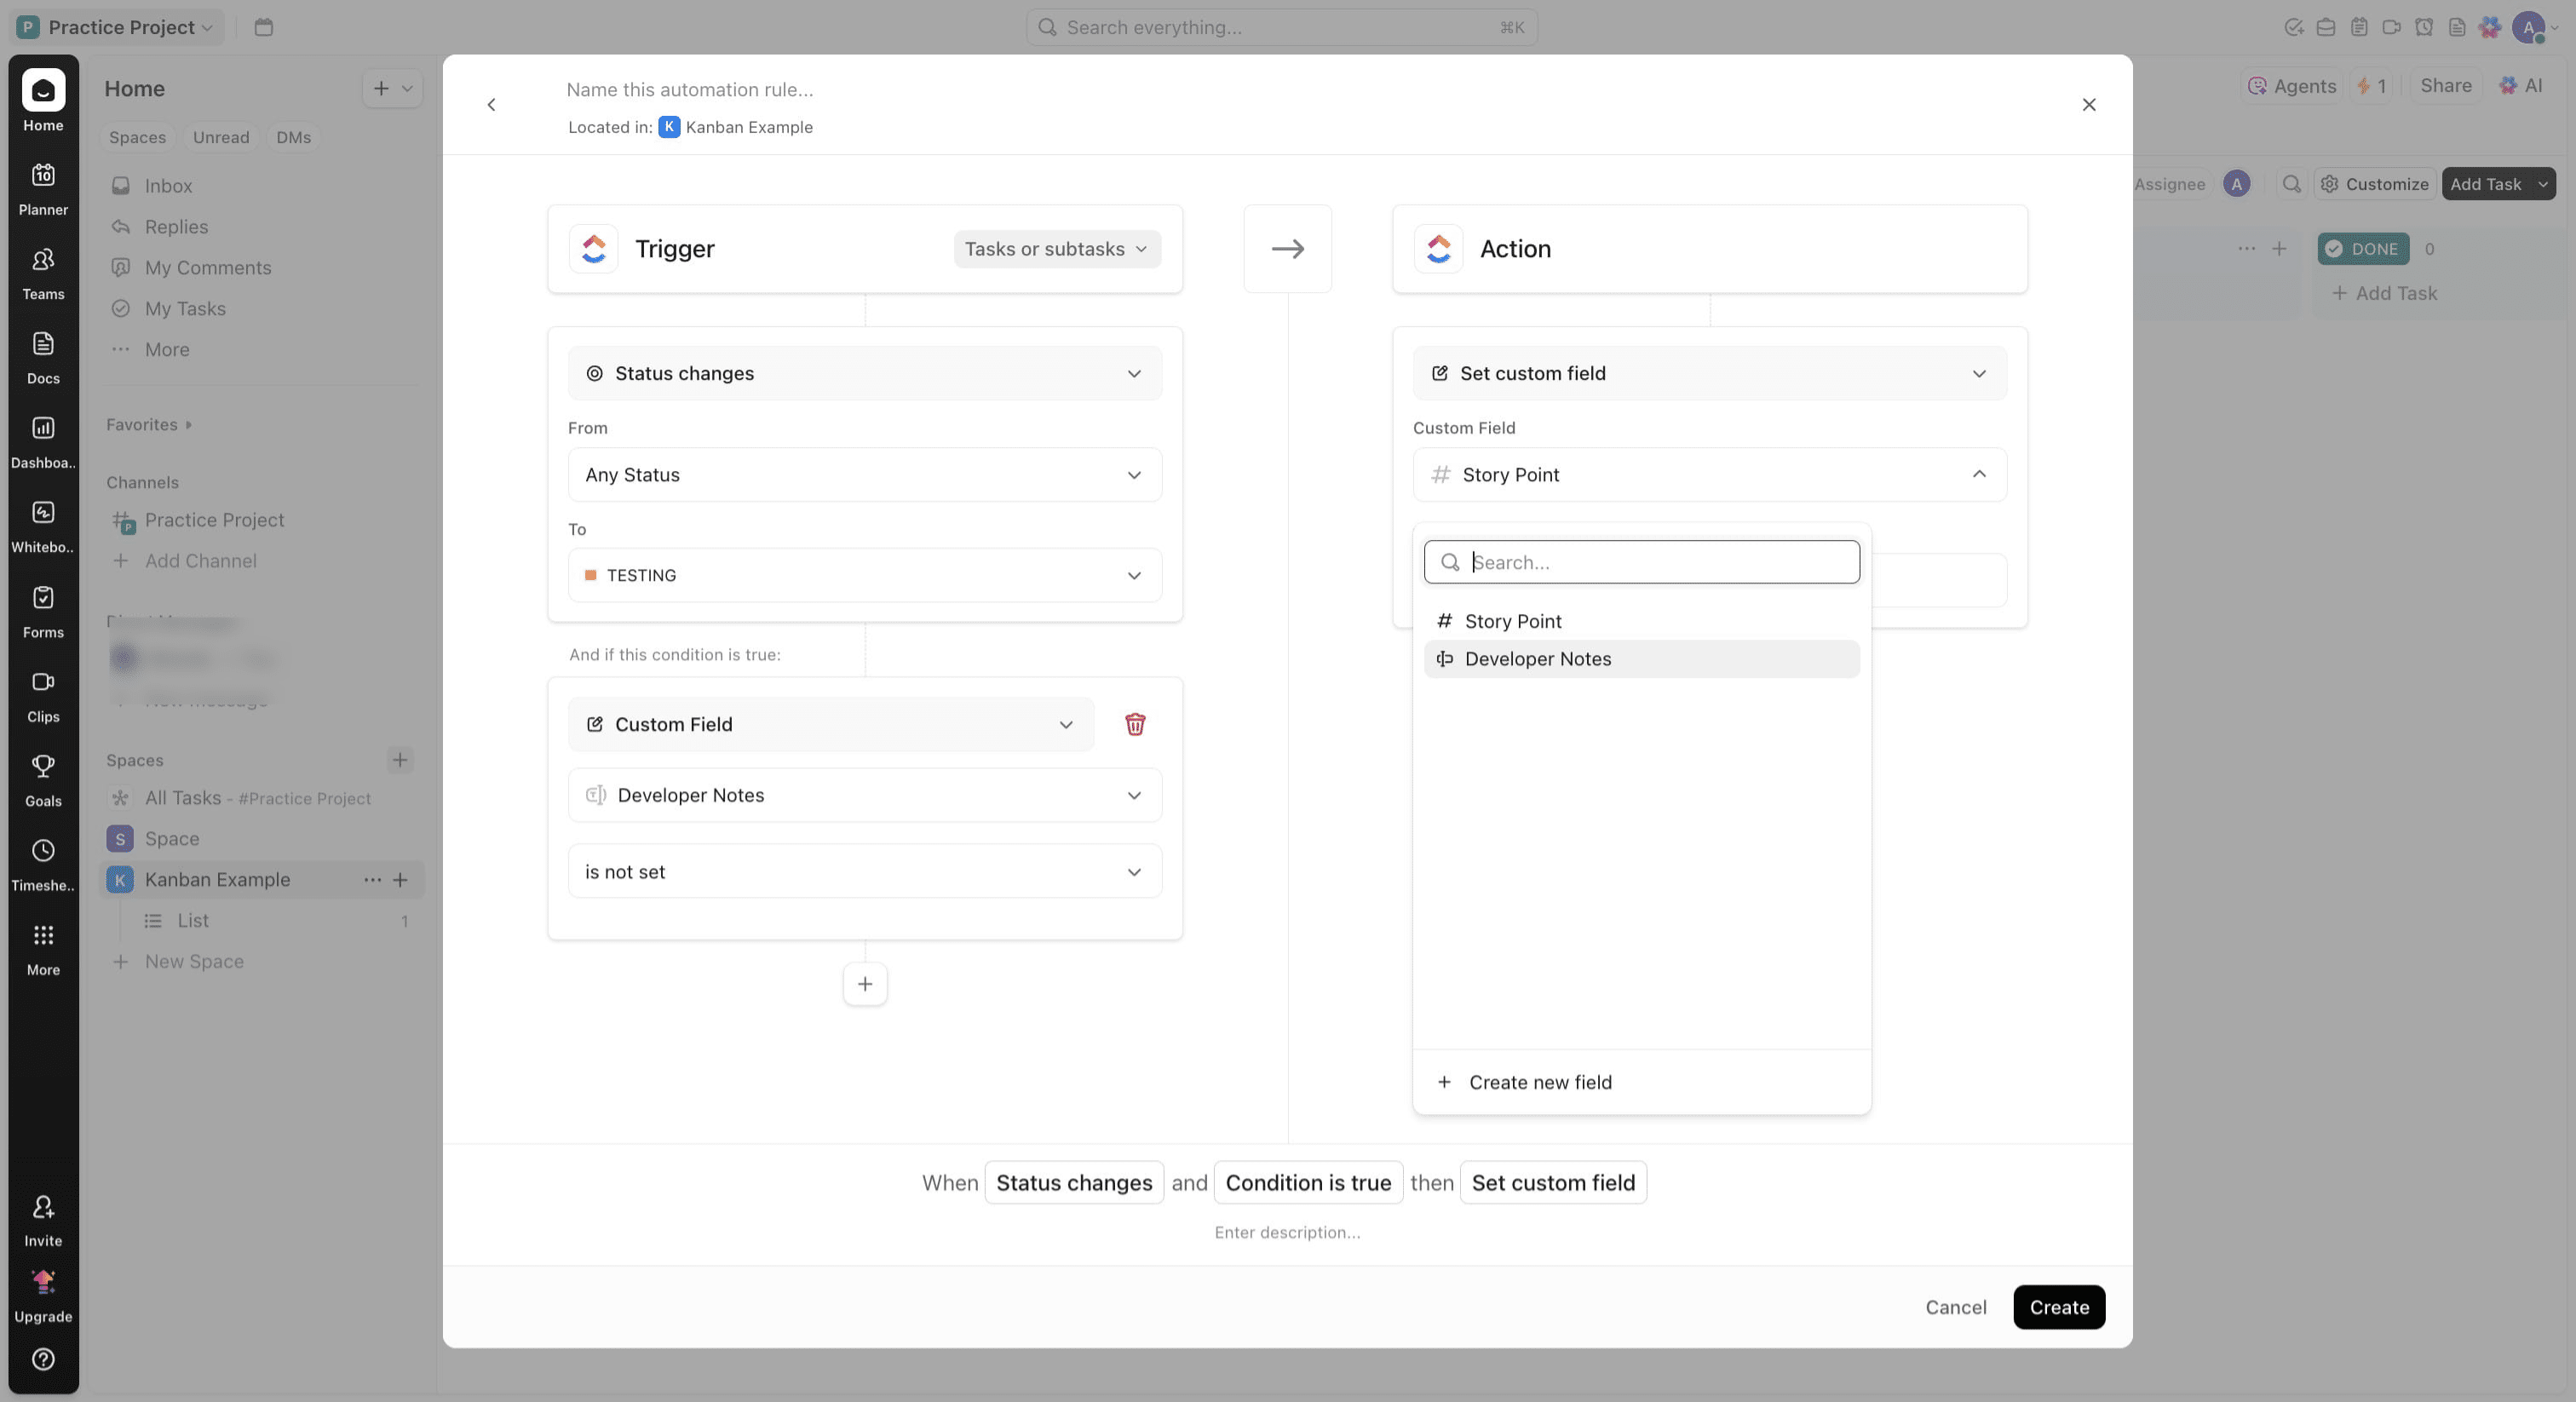
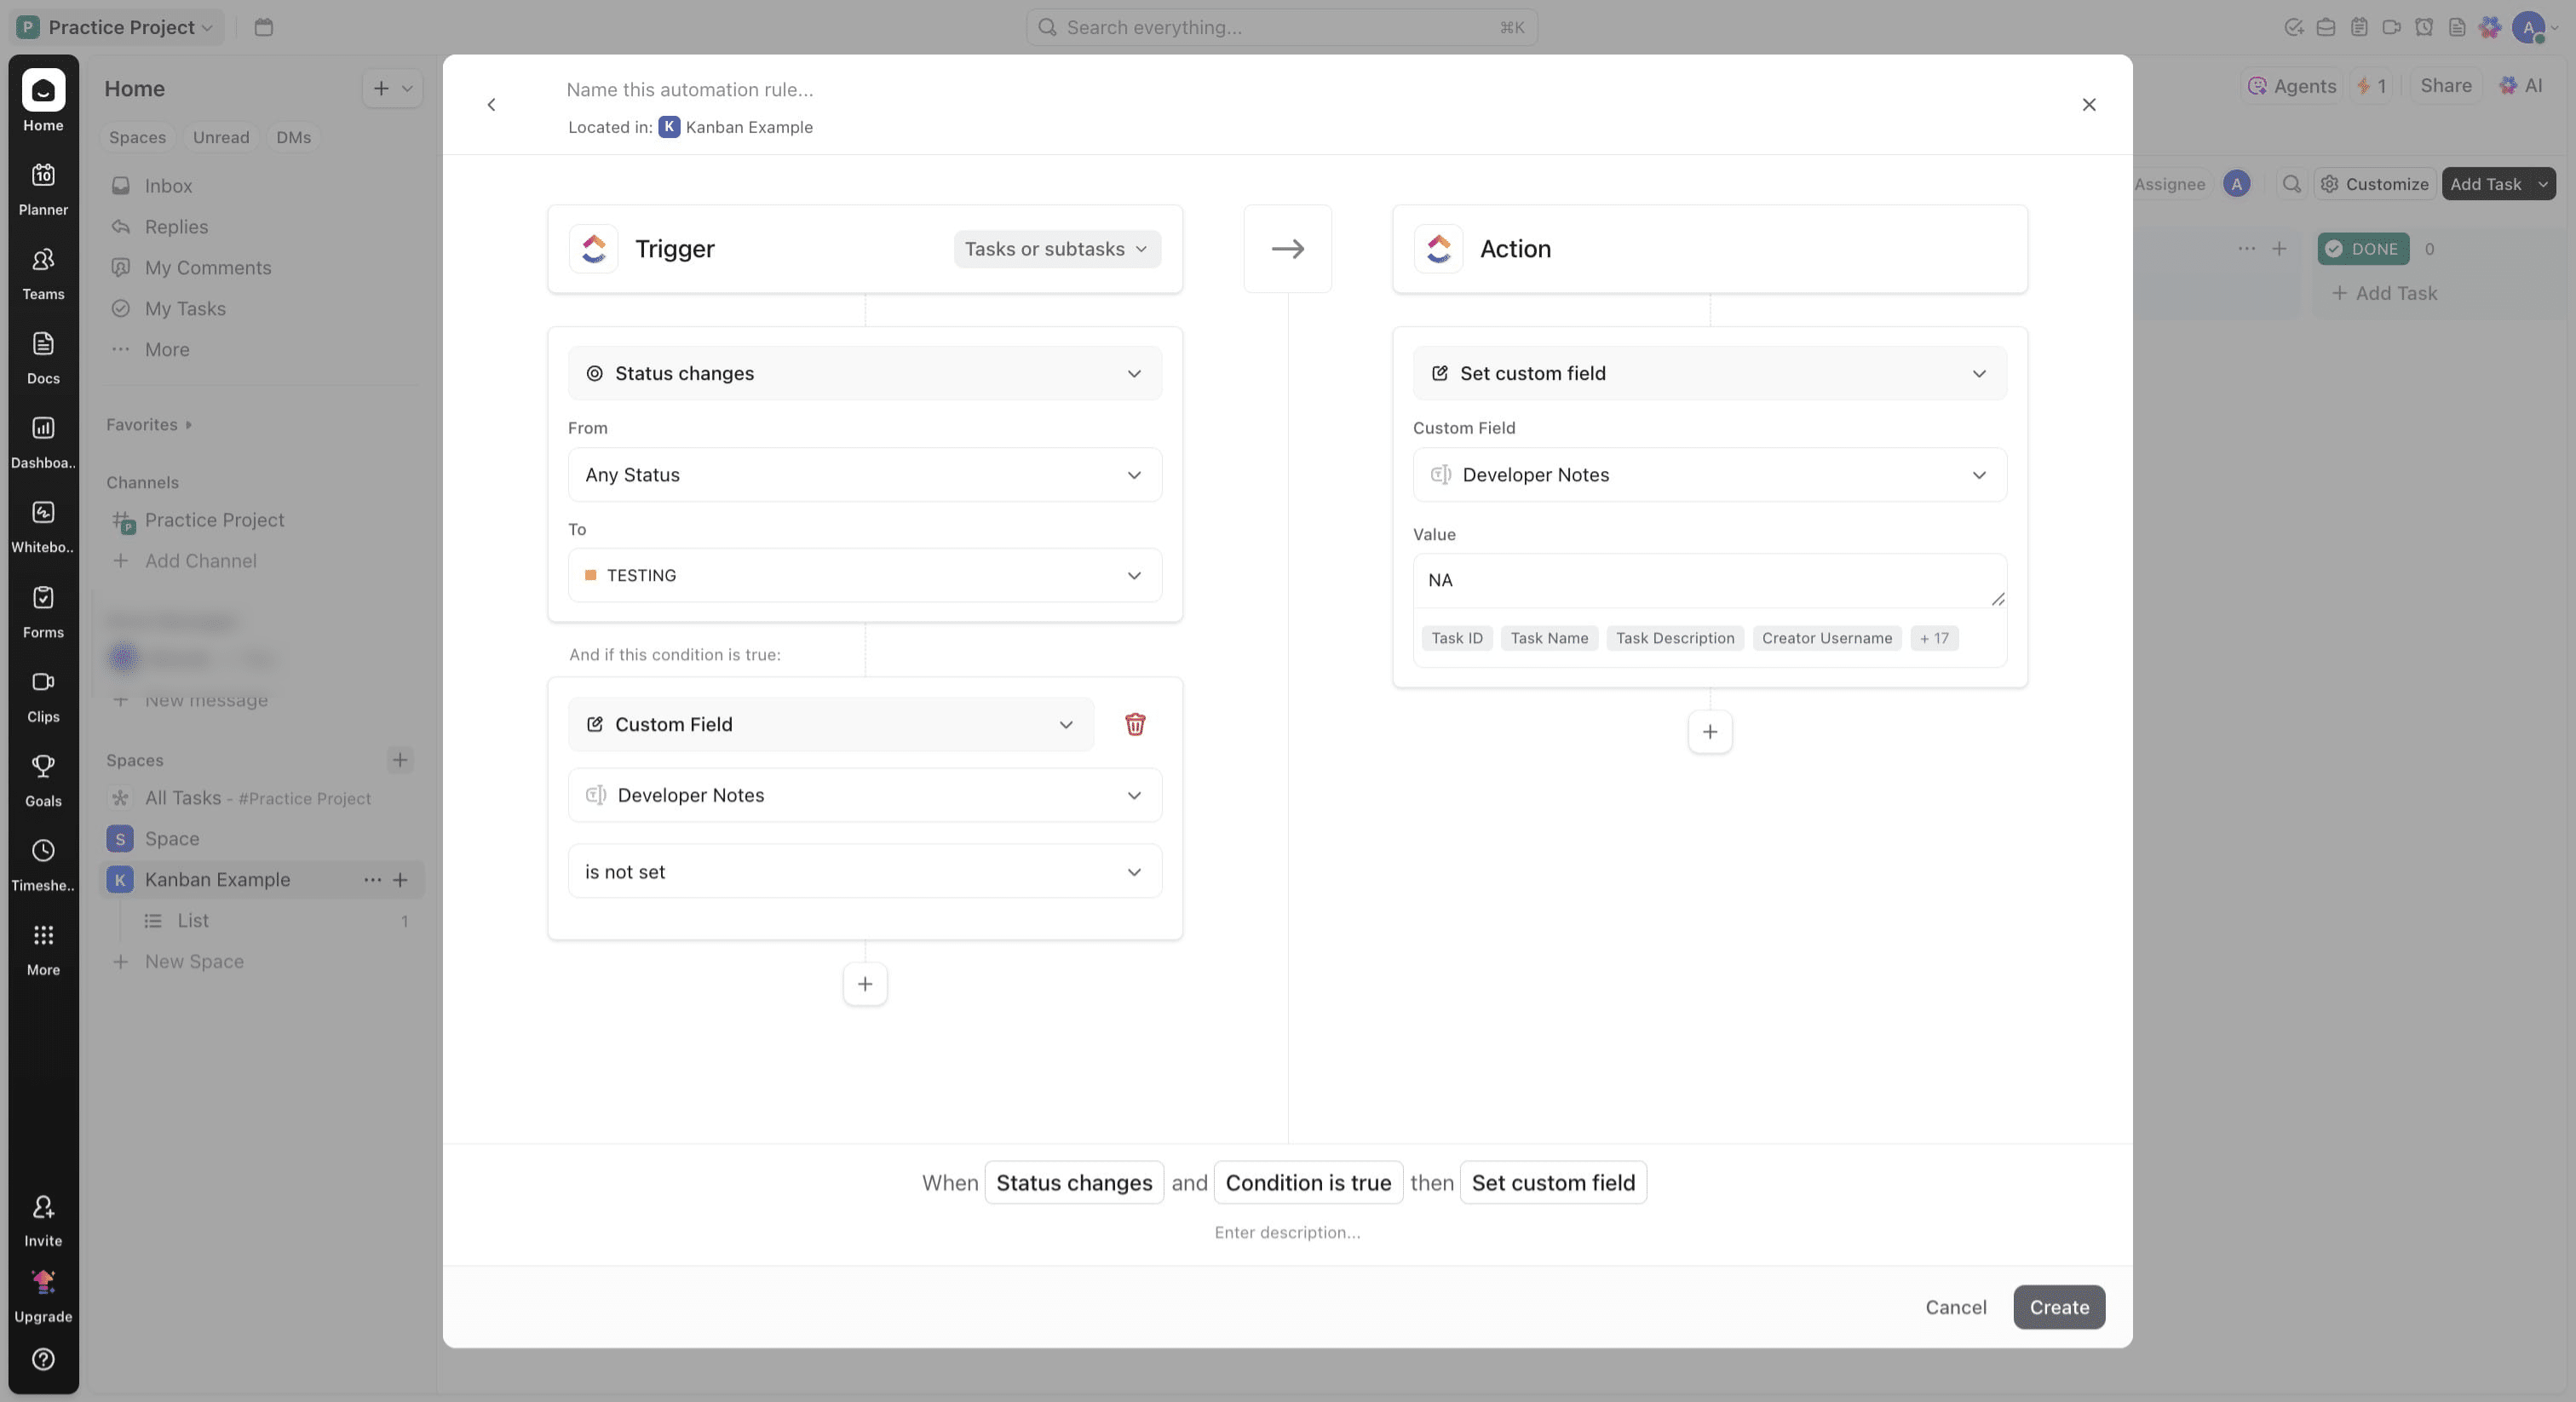
Select the Action section and choose the action you'll like, in this case. Click on "Set custom field"

Click the Custom Field box and Click on "Developer Notes"
Enter NA as a value
Click on "Create"
Awesome, you have now completed workflow creation in Clickup. You can also test the workflow to see how it behaves in your Clickup workspace